1:4000 Battlestar Galactica

scyeige

New Member
Feb 3, 2012
71
0
6
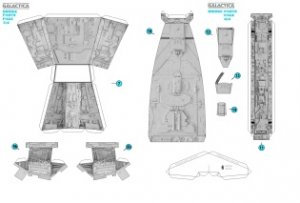
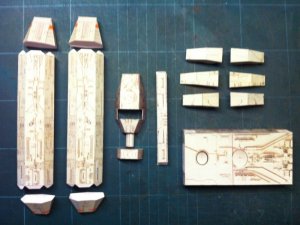
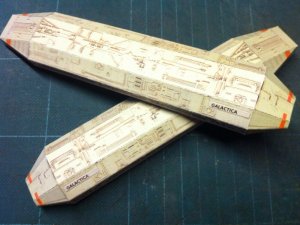
Hi, I've printed out Gearz's Battlestar Galactica template at 66.9% to get 1:4000 scale (he did mention in one of the threads here that his original template is 1:2676 scale).

Anyway, managed to fit 2 pages into 1 page A4 size print out.
When scaling, I noticed the pages were set to US Letter size... in any case, I resized and rescaled it (see pic)...

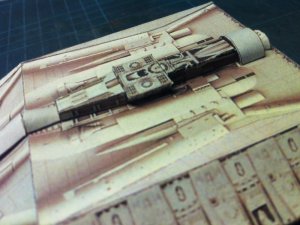
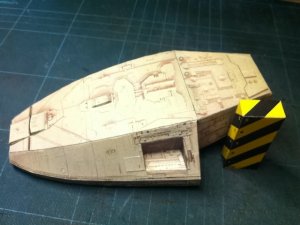
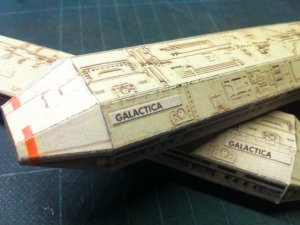
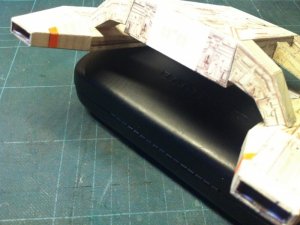
When I have clear coated it, I'll start the build...:twisted:

Watch this space! :)
 

Attachments

  • PartB.jpg
    PartB.jpg
    22 KB · Views: 29
OK, initial thoughts -> seems easy enough... :o
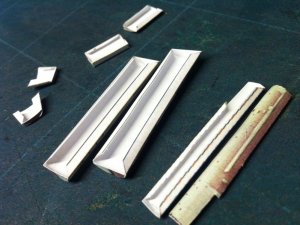
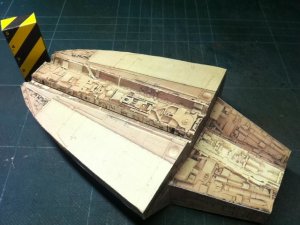
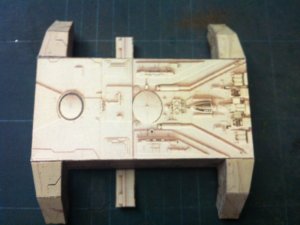
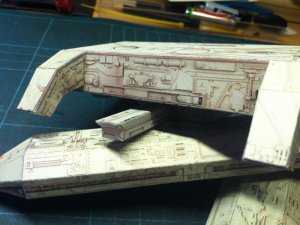
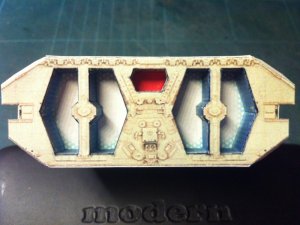
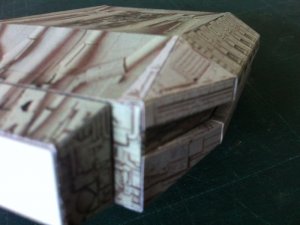
ops:BUT NO, the side walls and top flap are kinda fiddly!!!:curse:

DID NOT like the way it turned out; but since it's my first attempt at this model, I reckon it's not too bad.wall1

If I were to build another Battlestar, I would, however, change the steps (at least for myself) and make the joining of the side walls and top easier.

Anyhoo... as they say, a pic is worth a thousand words :cool:
 

Attachments

  • IMG_0784.JPG
    IMG_0784.JPG
    144.7 KB · Views: 10
  • IMG_0785.jpg
    IMG_0785.jpg
    83.3 KB · Views: 6
  • IMG_0786.JPG
    IMG_0786.JPG
    119 KB · Views: 7
  • IMG_0787.JPG
    IMG_0787.JPG
    125.7 KB · Views: 8
  • IMG_0788.JPG
    IMG_0788.JPG
    143 KB · Views: 8
  • IMG_0789.JPG
    IMG_0789.JPG
    101.4 KB · Views: 15
Looking great, so far... :thumb:

I started (and didn't finish) this model, in its original template size, as a 'warm-up' for my current project.

What stopped me going further was that I ended up with a twisted nose section.... wall1
Yeah, the side walls and top sections are rather frustrating!
As I found out; Everything has to be kept really true and to form and shape, when gluing up........ Otherwise, you end up with a warp, that would not be welcome in a Star Trek episode!! :mrgreen:

Plus, I had a few other bad 'More Thumb than Fingers Syndrome' disasters. :oops:

I will give it a go again one day. Might even it try at your scaling....... :thumb:

Keep it up! I will be watching this closely :cool:

:wave:
 
Rhaven Blaack, fokawe, lehcyfer and myrmedon... thanks for your kind words! :mrgreen:

More building was done and here are the pics...
 

Attachments

  • IMG_0791.jpg
    IMG_0791.jpg
    171.1 KB · Views: 10
  • IMG_0792.jpg
    IMG_0792.jpg
    175.4 KB · Views: 14
  • IMG_0793.jpg
    IMG_0793.jpg
    164.7 KB · Views: 11
  • IMG_0794.jpg
    IMG_0794.jpg
    70.1 KB · Views: 9
Some more pics... this time, the main body.

I have attached the Landing Bays to the main body, will post more pics when the rig is dry :wave:
 

Attachments

  • IMG_0795.jpg
    IMG_0795.jpg
    132.3 KB · Views: 14
  • IMG_0796.jpg
    IMG_0796.jpg
    185.7 KB · Views: 9
  • IMG_0797.jpg
    IMG_0797.jpg
    179 KB · Views: 8
I need a link to that one so I can try it. yours looks incredible.
Micah
 
Landing bays attached, and the mid-section is done! :mrgreen:
 

Attachments

  • IMG_0798.jpg
    IMG_0798.jpg
    174.5 KB · Views: 7
  • IMG_0799.jpg
    IMG_0799.jpg
    176.1 KB · Views: 10
  • IMG_0800.jpg
    IMG_0800.jpg
    139.9 KB · Views: 9
  • IMG_0801.jpg
    IMG_0801.jpg
    165.2 KB · Views: 10
Looking great!!! :thumb:

When I rebuild this model, I am gonna definatly build it at this scale!
It will fit in my glass display case, which the original template won't!

Nice work!
 
Thanks F131 and fokawe... as for crazy glue, we don't have that here... will try to see if I can get it to work with the PVA glue I'm using... :thumb:

Rear section done, ready for greebling... :wave:
 

Attachments

  • IMG_0802.jpg
    IMG_0802.jpg
    195.9 KB · Views: 14
  • IMG_0803.jpg
    IMG_0803.jpg
    176.2 KB · Views: 11
  • IMG_0804.jpg
    IMG_0804.jpg
    183 KB · Views: 12
  • IMG_0805.jpg
    IMG_0805.jpg
    172.5 KB · Views: 7
  • IMG_0806.jpg
    IMG_0806.jpg
    136.3 KB · Views: 9
You are doing a FANTASTIC job on this.
I have noticed one thing though, is your printer running out of ink? Reason why I ask, is because I noticed that there is quite a bit of red in some of the parts.
 
Thanks RB... nah, it's just the lighting and the phone camera. The actual model is not reddish at all, in fact it's abit greenish due to the clear coat!:curse:

I had some old clear coat leftover (a few years old) and I thot I'd finish it... :cry: bad mistake!!! wall1 It came out a little greenish... but it's not that bad (I keep trying to convince myself)...:rolleyes::twisted:
 
Some greebling done... the PVA glue works fine! :mrgreen:

I form the parts fist then paste it on... see pics

1st pic - top centre greebling done

2nd pic - some of the parts formed, and edge-glued, once dry, will paste on
 

Attachments

  • IMG_0807.jpg
    IMG_0807.jpg
    170.5 KB · Views: 8
  • IMG_0808.jpg
    IMG_0808.jpg
    195.8 KB · Views: 10