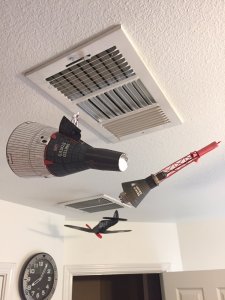
1/24 Gemini IV

My second paper model in 35 years. I have been a regular hobbyist all my life, having mostly been involved with plastic models, stick and tissue, models and RC airplanes.

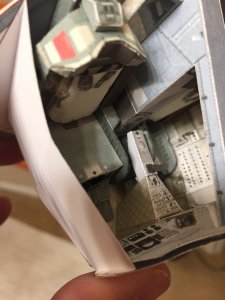
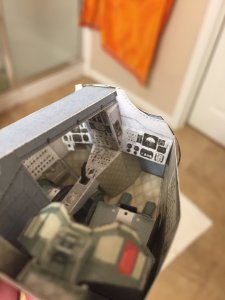
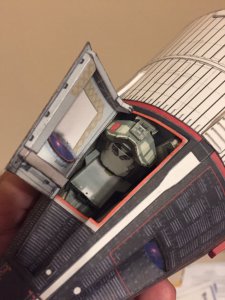
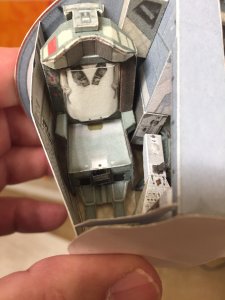
This is the Delta 7 studios Gemini IV in 1/24 scale. This kit has been a little more of a challenge than the much simpler Mercury I built a few days ago. This kit includes a reasonably busy interior and is meant to be displayed with the right door open.

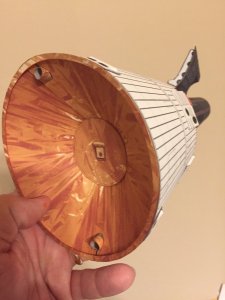
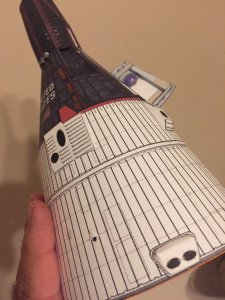
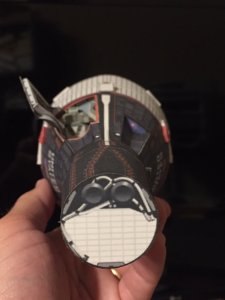
The bulkheads walls and floor were printed on 110# card stock, and the various details and seat parts were printed on 67# card stock. The cockpit is done, and I am working on the external body pieces now. Thank goodness for reprinting! The body is fighting me a little due to the openings for the "windows" and hatches, and the nose/recovery section being a little larger in diameter than the main portion of the body. By following the instructions and cutting the windows/hatches out early, it makes the body flimsy in those areas and difficult to roll into the final cone shape. I am having to do some testing, trimming, and note taking to and assembly sequence locked down. Once I have that in order, I will build a final version and insert the cockpit from the rear.

Otherwise, the kit is nice. There is enough detail for me right now, being a beginner. I am still learning as I go, and enjoying every minute.

Comments and advice welcome.

Thanks,

James
IMG_5781.JPGIMG_5782.JPGIMG_5784.JPG get the best fit
 

zathros

*****SENIOR ADMINISTRATOR*****
Staff member
Administrator
Moderator
Use a dowel, or round pencil to roll body shapes. That is a really nice model offered by Delta studios. :)
 
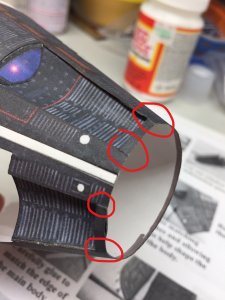
Here is a look at some of the issue I have had trying to build the body of the Spacecraft and get it right.

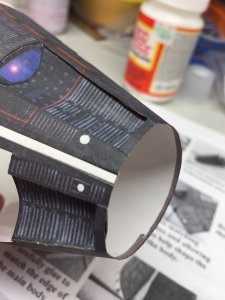
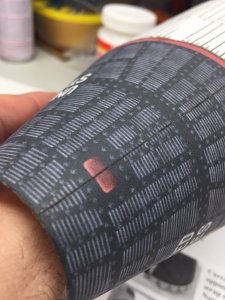
1. Early in the instructions, it is called for to cut out the holes for the hatches and windows. Unfortunately this leads to weakness in those areas when it comes time to roll the body into it's cone shape. The thin strip left at the front of both openings, and at the rear of the left hatch, flexes and distorts as you try to roll the form. See red circles in the next picture. You can also see how the "window" indentions don't fit right if built as per instructions. The cut out hole is much smaller than the built window sub assembly, making for quite a visible lip. This will be handled differently on the final build. My solution to the cut hole weakness issue is to assemble the
body into the cone shape first, add the instrument package cylinder to the front of the body, then add the support body to the rear, then cut the window holes. This shoud add enough strength to the whole assembly to prevent distortion. See second picture.
InkedInkedIMG_5787_L2.jpg
IMG_5787 (1).JPG

The cone is split, and meant to be glued at the parachute strap line(white Stripe), this also makes for a fiddly assembly and a weak area that tends to distort when rolling the body. Because of its proximity to the windows, there is not much room for internal overlap of the glue joints. My solution is to cut capsule piece at a point oposite of where the parachute strap is located. Then glue body pieces to the parachute strap piece. Once dry, roll the body into the cone shape and fix together with a but joint at the rear. A line will be visible at a place where there should not be a line, but I believe the trade off is worth it.
IMG_5789.JPG

Once the body is assembled as described above, I will make a thick cone that I can slip in from the rear to use as a base to steady my knife as I cut out the window holes. Then proceed with getting those done right, and on to finish the model as required.

Comments and advice welcome.

James B.
 

zathros

*****SENIOR ADMINISTRATOR*****
Staff member
Administrator
Moderator
I would start cutting the windows out from the center, working you way outwards. :)
 
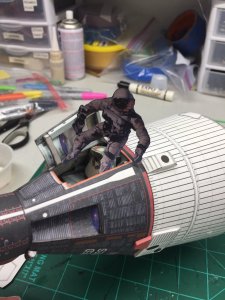
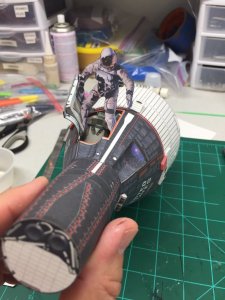
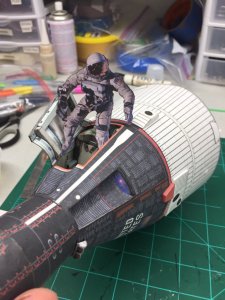
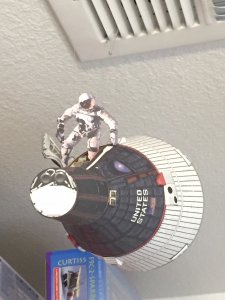
Progress on the 1/24 Gemini IV. I still have a few detail parts to add, and Ed White is just wedged in for now. Not sure if I want him like this or free floating attached to a short hose.

I failed to read the instructions and look at reference photos like I should have and attached the service module 45 degrees in rotation off from where it was supposed to be aligned. When I realized the issue, I had to carefully re-wet the glue joints from the inside so that I could remove the service module from the capsule. This completely ruined the service module pieces, but the capsule was OK. Easy enough to print another set of parts and start again. Lesson learned. At least I had not attached any of the detail parts.

As always comments and advice welcome.IMG_5817.JPGIMG_5816.JPGIMG_5815.JPG
 

Rhaven Blaack

!!!THE MAN BEHIND THE CURTAIN!!!
Staff member
Administrator
Moderator
Everything looks GREAT!!!
I like the figure! It brings life tot he model as a whole.
 

zathros

*****SENIOR ADMINISTRATOR*****
Staff member
Administrator
Moderator
That is as good as this model could be made. Adding texture to the skin would take if over the top, but that would be so difficult do to, I can't imagine anyone doing that. Excellent job. When I was very young I've always enjoyed the Gemini series as it seemed to look like a space ship should look, windows and doors. I am now motivated to make this model as it was gifted to me. thumbsup
 
That is as good as this model could be made. Adding texture to the skin would take if over the top, but that would be so difficult do to, I can't imagine anyone doing that. Excellent job. When I was very young I've always enjoyed the Gemini series as it seemed to look like a space ship should look, windows and doors. I am now motivated to make this model as it was gifted to me. thumbsup
Thanks for the compliment! See my final comments on my next post below.
 
Last edited:
Calling it done!

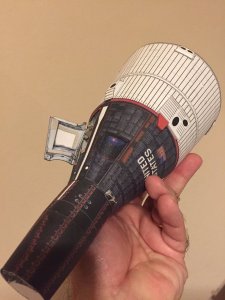
I love the look of this model but be prepared for a few problems. The service module diameter and capsule body diameter do not quite match, with the service module being slightly larger. And with no internal bulk head in the service module, it is a little tricky to test fist the two together so you can know how much to trim away. You have to ignore the instructions and install the cockpit before the service module is attached to have some structure to steady the whole assembly. (As I write this, I realize I could have made a couple of temporary circle bulkheads to wedge in there to make it round for test fitting. Another lesson learned.)

The two nose pieces are a bit larger diameter than the main body, so some trimming has to be done there as well to get the diameters to match. For all of the external pieces, make sure you have good reference photos handy as the instructions leave a piece out.

Other than that, I love the model. The images and printed details are very nice and it build into and impressively sized model. For me, It made a good second model learning experience. Enough small detail to fiddle and play with, but not enough to make me throw up my hands in frustration. IMG_5820.JPGIMG_5821.JPGIMG_5822.JPGIMG_5828.JPGIMG_5829.JPGIMG_5831.JPGIMG_5819.JPG
 
Top