I started working on a project I've been wanting to do for at least 3 years (when I found out the template existed over at the BWC Archive) and that's the Land Raider Mk1.
Now I know a lot of people like the new Land Raider model, but I have a special fondness for this old kit. And I thought it would be great to have one for a small Renegade Space Marine force I am building (Sons of Malice). I only wish I had bought one of the plastic kits back when I started playing 40k in 1995 with the arrival of 2nd edition. They go for exorbitant prices on eBay now.
I've split my time between this model and working on the little details on the Macharius build in the other thread.
The 1st thing of note is that there are no instructions for this model. Though it's fairly easy to determine what all the various items are on the 7 or so pages the pattern takes. And there are some images of the assembled model (presumably by Bile (pronouned Be - Lay) himself).
Also there seems to be a couple of versions of this template. Another one I have actually has some faint grey lines pointing out where various parts were to go... it is marked as v1.03 and it also has guides on the main body for where to place certain parts. This is the version I used. I got these templates in one big package called Paperhammer40k. It's a fairly large collection of 40k templates (mostly gathered from the BWC Archives) with some of Pataroch's models sprinkled in.
I printed the templates onto 110bp Georgia Pacific cardstock that is widely available in the US at stores like Walmart, OfficeDepot, Kmart, etc. I used cereal box card for most of the reinforcement laminates.
The outer track/wheel structure (Page 1 of the templates) must be printed 2x. This is not noted anywhere...but each page makes one complete assembly. Keep in mind that whatever application you are opening the templates in they will probably need re-sized. There is a scale on the newer templates that says print 27cm x 19xcm. That is what I did.
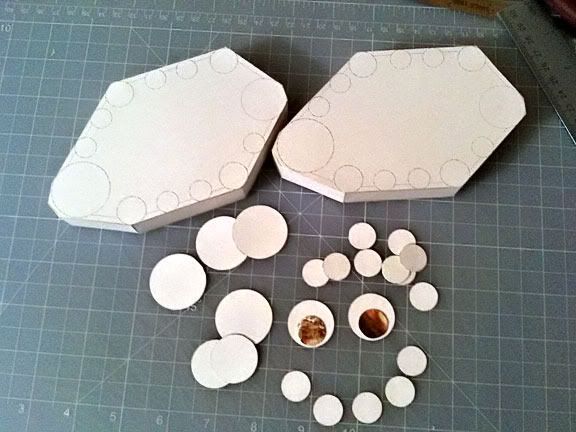
Here are the assemblies mid-build. Each face (outer and inner) are laminated to the cereal card using white PVA glue. I like Aleen's Fast Grab & Quick Dry glue.
Note: I cut strips of Cereal card the same width as the assemblies and bent like a Z or zig zag shape to glued inside the hollow volumes to provide rigidity and strength the sides and prevent warping. This works really well.

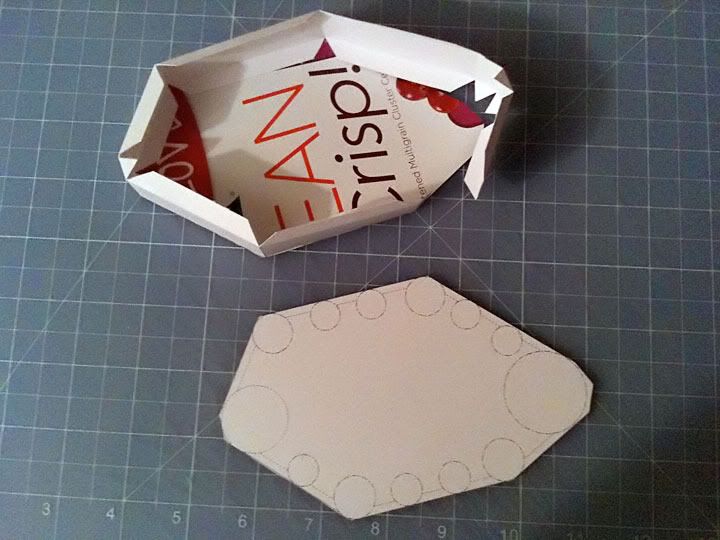
The Circles were also laminated to the Cereal card for added thickness. I cut them out with a pair of small scissors. I then glued them on to the fronts and backs of the track/wheel assemblies.
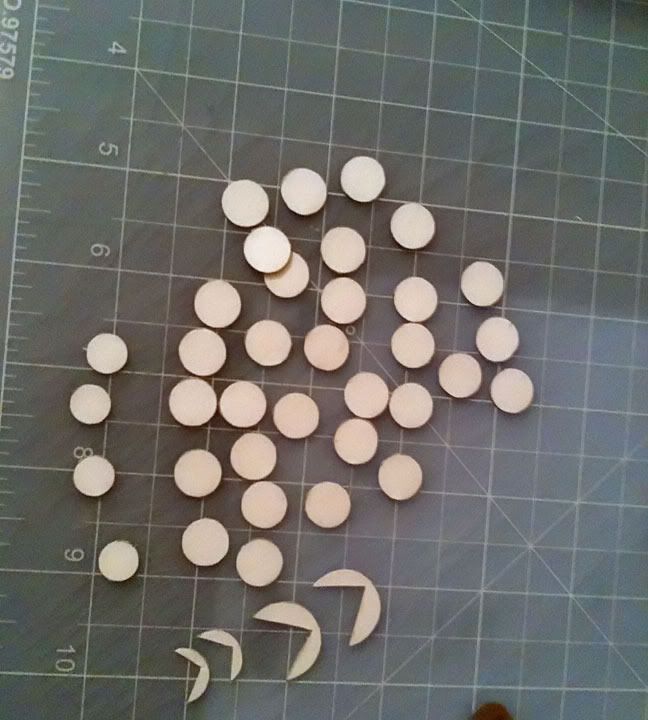
Ugh even more circles...my fingers are actually hurting from cutting these out... I don't show all of this step, but this is Page 2 of the Templates. All of it was laminated to cereal card and sat under a 2 big/heavy books to dry while I worked on the main body.
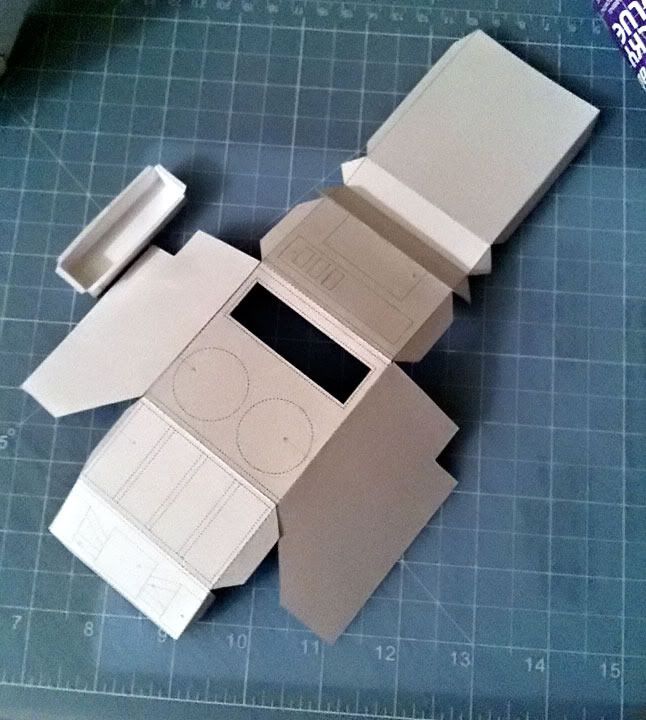
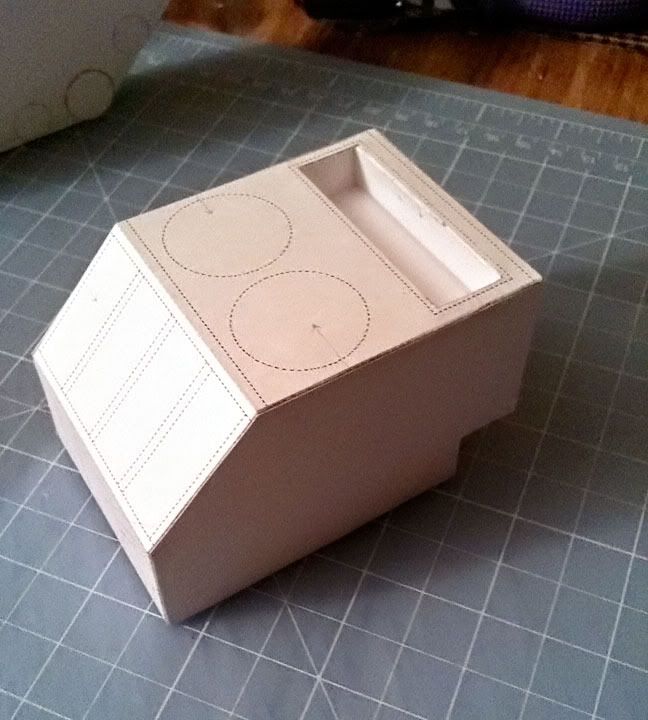
The main body/hull section and the storage compartment. I precut the storage area that sits atop the tank. And built the internal part as it needs to be glued inside before gluing the hull volume closed.
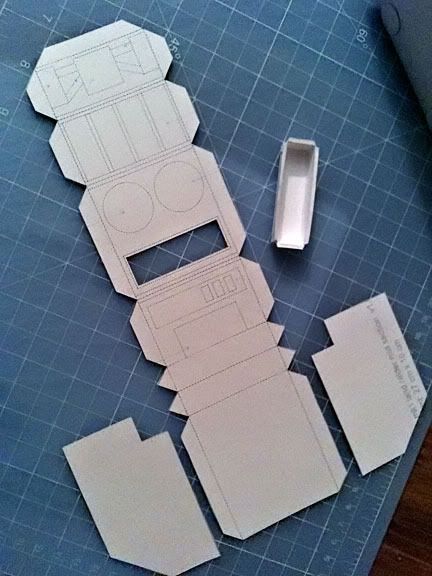
Note: It is not shown but I laminated the entire center section with cereal box card. I also built a center structure that stretches the width of the entire hull to provide more rigidity through the center to each of the sides.
Also, note that I glued the side parts more towards the front of the hull before rather than leave it at the very end of the pattern where it was "implied" as the location to be glued. I think it helped minimize any alignment and sizing issues common with cutting and scoring thicker card. BTW the center hull folded and aligned perfectly.
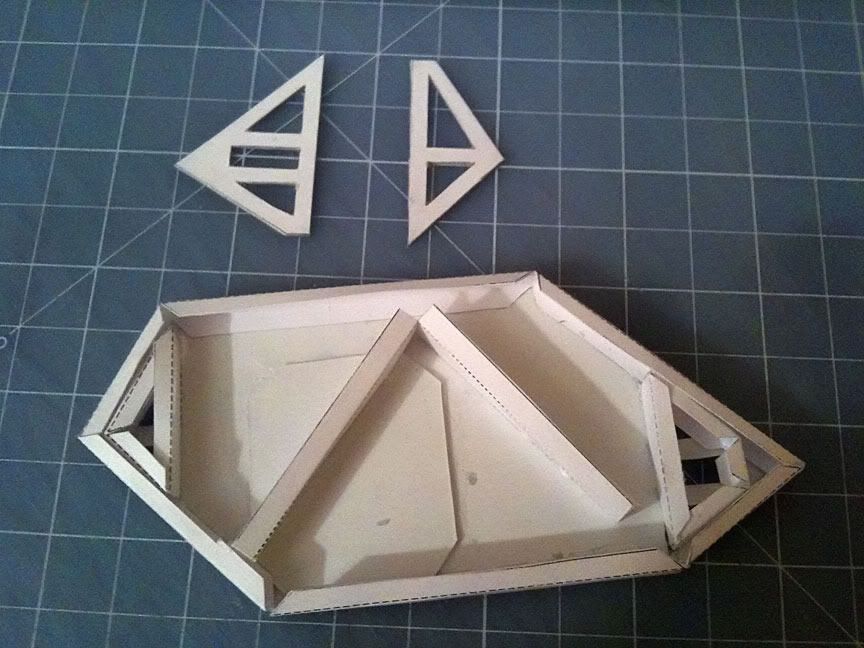
Here are some of the front and rear parts to build and attach to the main body.
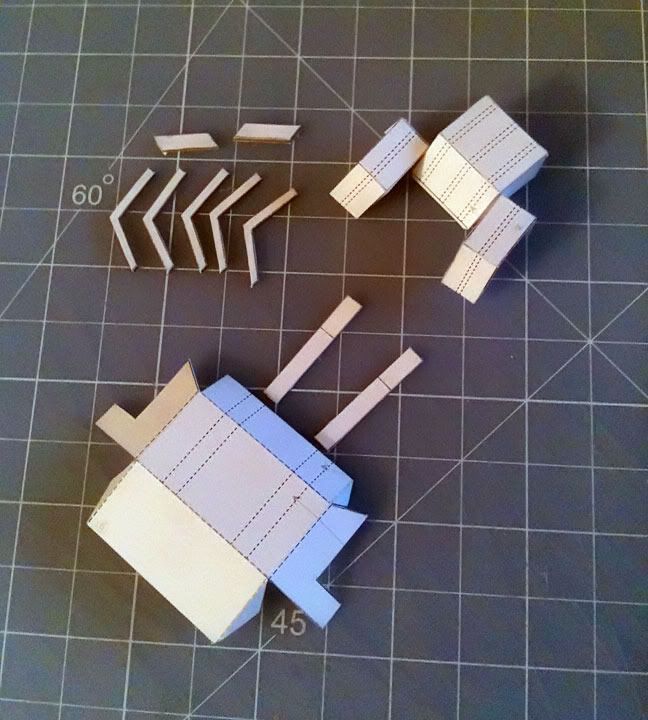
This appears to be part of the Engine assembly.
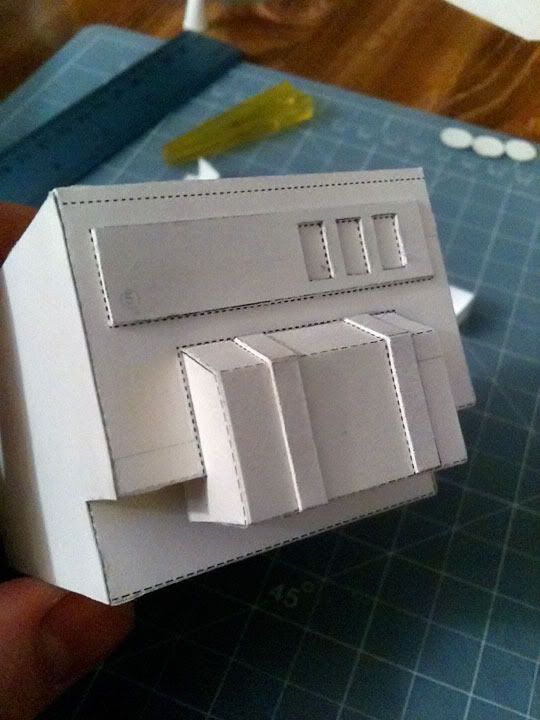
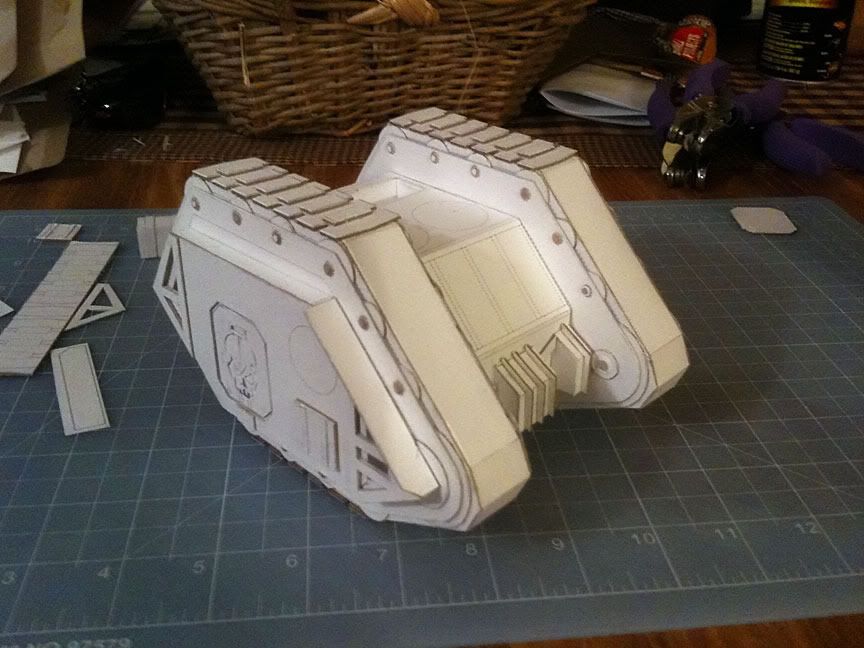
Here is a shot of the front grill piece assembled and placed on the hull. As well as the entire track side assemblies in place. I made some addition smaller rivets/bolts to place onto the exposed axels (the small circles that encompass the front back sides of the track/wheel assemblies) using a couple of small hole punches I bought at a craft store. They are hard to see on the white model but should as a nice looking additional layer of detail.
The outer assembly's internal supports
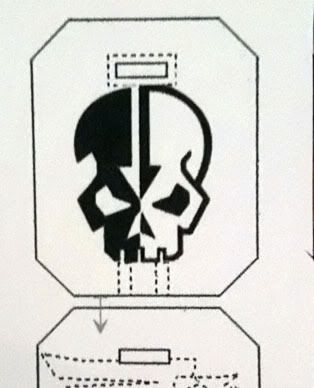
Here is the custom Assault Ramp design I did for the Sons of Malice. The black areas were cut out to provide a relief image of the skull.
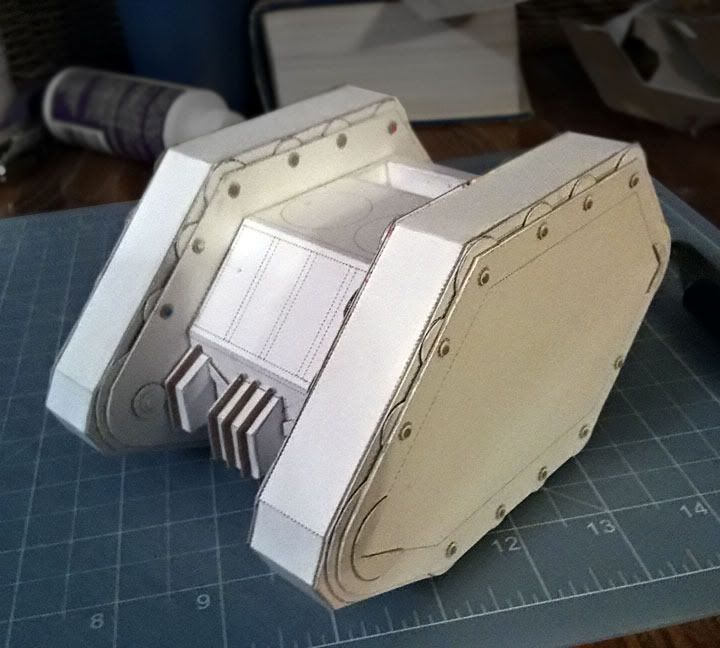
Here is the outer assembly attached to the almost completed Land Raider.
Note, the outer assembly does not line up exactly with the dashed lines on the Track Wheel Hub. But it's fairly easy to get lined up correctly.
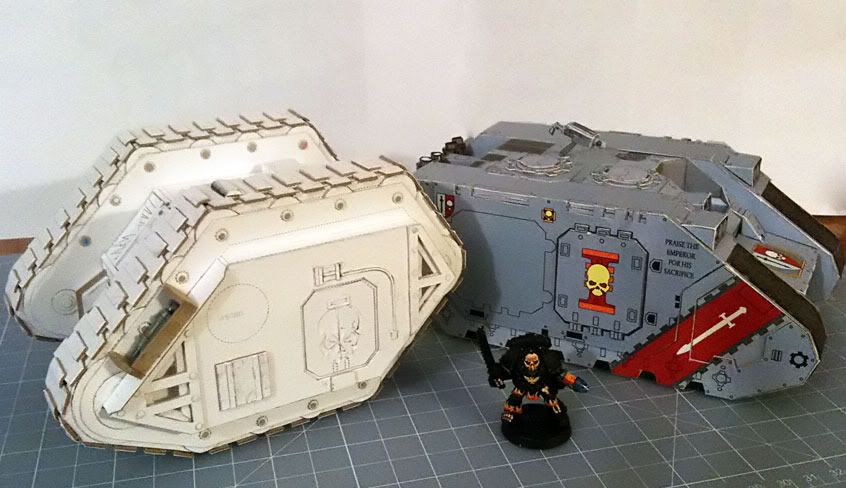
Tracks have been completed. And I am now in the process of creating the extra details, hatches, exhaust pipes, weapons and rivets. (Figure shown for scale). I made the greebles over and around the side of the ramp they are not in the template files but are on the plastic kit. The small plastic rivets on the front port hatch are cut from an IG Sentinel Walker canopy.
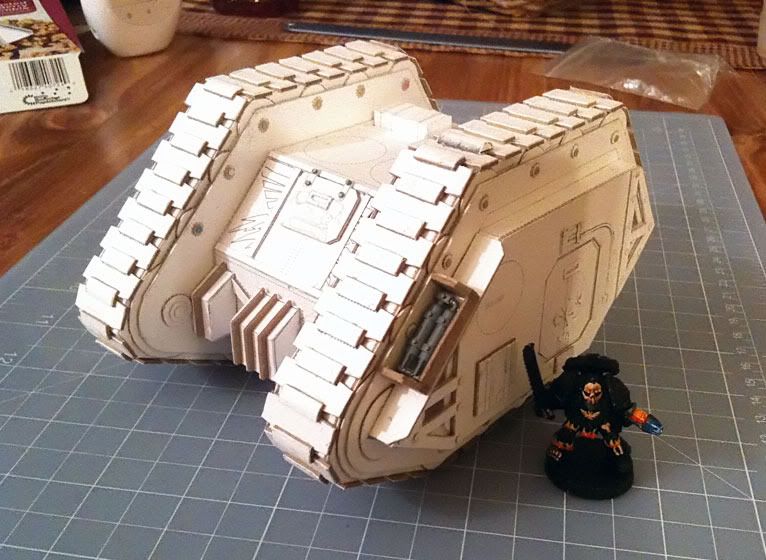
I am working on rounded caps for all the tracks to make it look more like the real plastic model.
~Floyd
~Floyd
Now I know a lot of people like the new Land Raider model, but I have a special fondness for this old kit. And I thought it would be great to have one for a small Renegade Space Marine force I am building (Sons of Malice). I only wish I had bought one of the plastic kits back when I started playing 40k in 1995 with the arrival of 2nd edition. They go for exorbitant prices on eBay now.
I've split my time between this model and working on the little details on the Macharius build in the other thread.
The 1st thing of note is that there are no instructions for this model. Though it's fairly easy to determine what all the various items are on the 7 or so pages the pattern takes. And there are some images of the assembled model (presumably by Bile (pronouned Be - Lay) himself).
Also there seems to be a couple of versions of this template. Another one I have actually has some faint grey lines pointing out where various parts were to go... it is marked as v1.03 and it also has guides on the main body for where to place certain parts. This is the version I used. I got these templates in one big package called Paperhammer40k. It's a fairly large collection of 40k templates (mostly gathered from the BWC Archives) with some of Pataroch's models sprinkled in.
I printed the templates onto 110bp Georgia Pacific cardstock that is widely available in the US at stores like Walmart, OfficeDepot, Kmart, etc. I used cereal box card for most of the reinforcement laminates.
The outer track/wheel structure (Page 1 of the templates) must be printed 2x. This is not noted anywhere...but each page makes one complete assembly. Keep in mind that whatever application you are opening the templates in they will probably need re-sized. There is a scale on the newer templates that says print 27cm x 19xcm. That is what I did.
Here are the assemblies mid-build. Each face (outer and inner) are laminated to the cereal card using white PVA glue. I like Aleen's Fast Grab & Quick Dry glue.
Note: I cut strips of Cereal card the same width as the assemblies and bent like a Z or zig zag shape to glued inside the hollow volumes to provide rigidity and strength the sides and prevent warping. This works really well.
The Circles were also laminated to the Cereal card for added thickness. I cut them out with a pair of small scissors. I then glued them on to the fronts and backs of the track/wheel assemblies.
Ugh even more circles...my fingers are actually hurting from cutting these out... I don't show all of this step, but this is Page 2 of the Templates. All of it was laminated to cereal card and sat under a 2 big/heavy books to dry while I worked on the main body.
The main body/hull section and the storage compartment. I precut the storage area that sits atop the tank. And built the internal part as it needs to be glued inside before gluing the hull volume closed.
Note: It is not shown but I laminated the entire center section with cereal box card. I also built a center structure that stretches the width of the entire hull to provide more rigidity through the center to each of the sides.
Also, note that I glued the side parts more towards the front of the hull before rather than leave it at the very end of the pattern where it was "implied" as the location to be glued. I think it helped minimize any alignment and sizing issues common with cutting and scoring thicker card. BTW the center hull folded and aligned perfectly.
Here are some of the front and rear parts to build and attach to the main body.
This appears to be part of the Engine assembly.
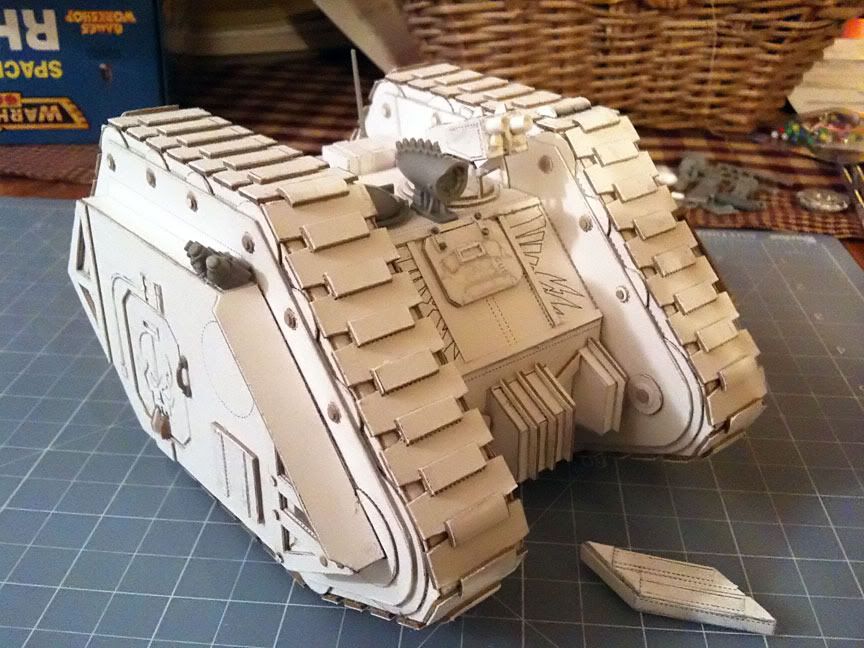
Here is a shot of the front grill piece assembled and placed on the hull. As well as the entire track side assemblies in place. I made some addition smaller rivets/bolts to place onto the exposed axels (the small circles that encompass the front back sides of the track/wheel assemblies) using a couple of small hole punches I bought at a craft store. They are hard to see on the white model but should as a nice looking additional layer of detail.
The outer assembly's internal supports
Here is the custom Assault Ramp design I did for the Sons of Malice. The black areas were cut out to provide a relief image of the skull.
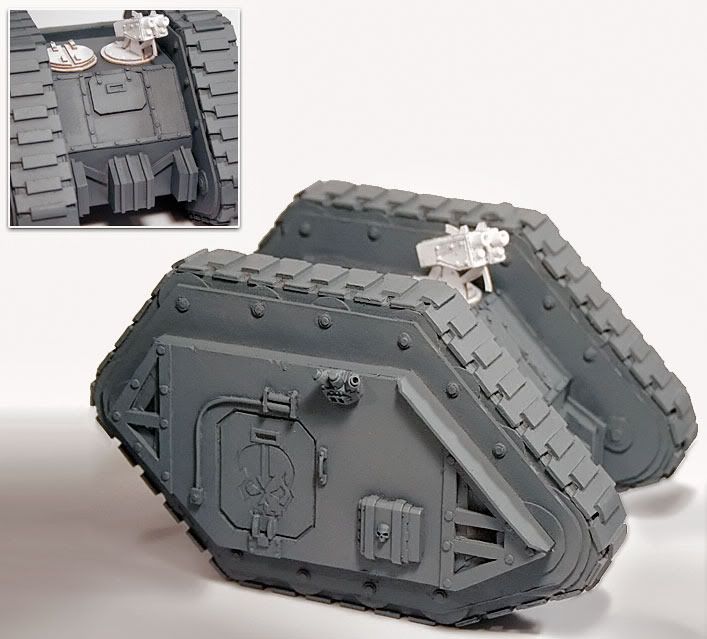
Here is the outer assembly attached to the almost completed Land Raider.
Note, the outer assembly does not line up exactly with the dashed lines on the Track Wheel Hub. But it's fairly easy to get lined up correctly.
Tracks have been completed. And I am now in the process of creating the extra details, hatches, exhaust pipes, weapons and rivets. (Figure shown for scale). I made the greebles over and around the side of the ramp they are not in the template files but are on the plastic kit. The small plastic rivets on the front port hatch are cut from an IG Sentinel Walker canopy.
I am working on rounded caps for all the tracks to make it look more like the real plastic model.
~Floyd
~Floyd