New Bend Track modules started

dannparks

New Member
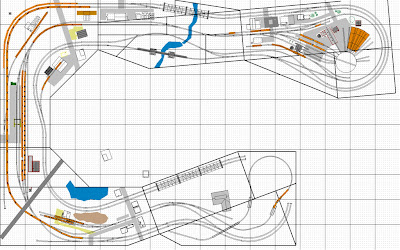
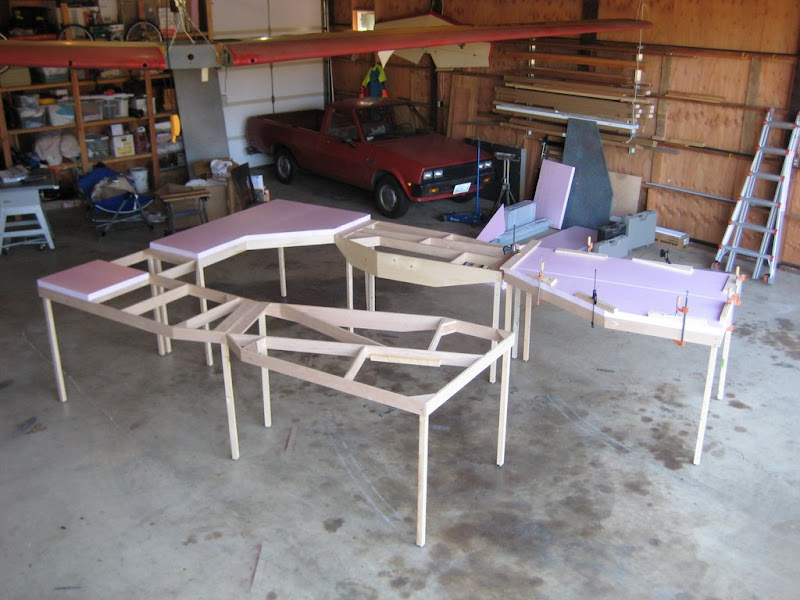
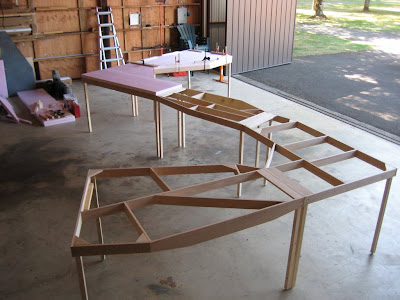
I've taken the plunge and started 5 new Bend Track modules to replace the 4' x 10' layout in my shop space. I realized that if I went around the walls, I could have 3x more mainline, and the trains would go somewhere -- and come back. This is based on Bend Track standards with a branch line down the middle (I think called Frend Track). Track will be Peco code 55 with 19' min radius. Flat, but with a mountain/logging run climbing over one of the end modules.

shop%205c.jpg


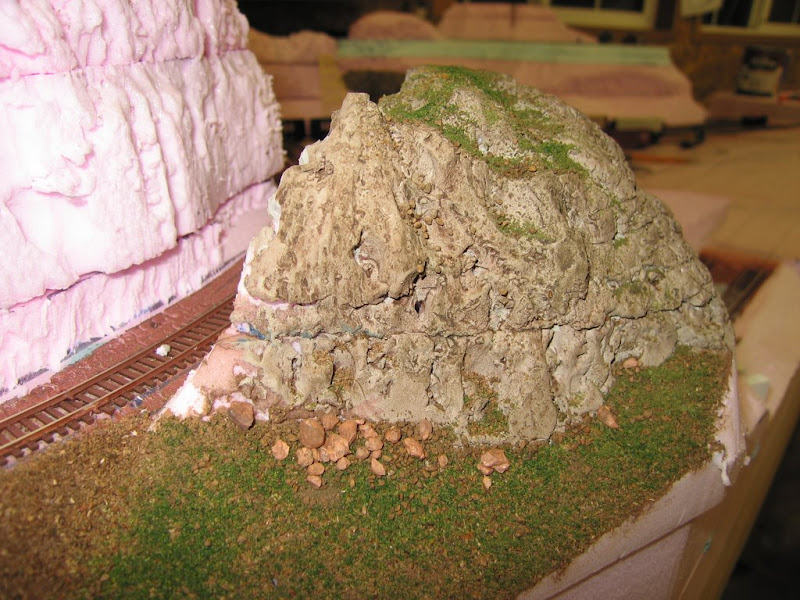
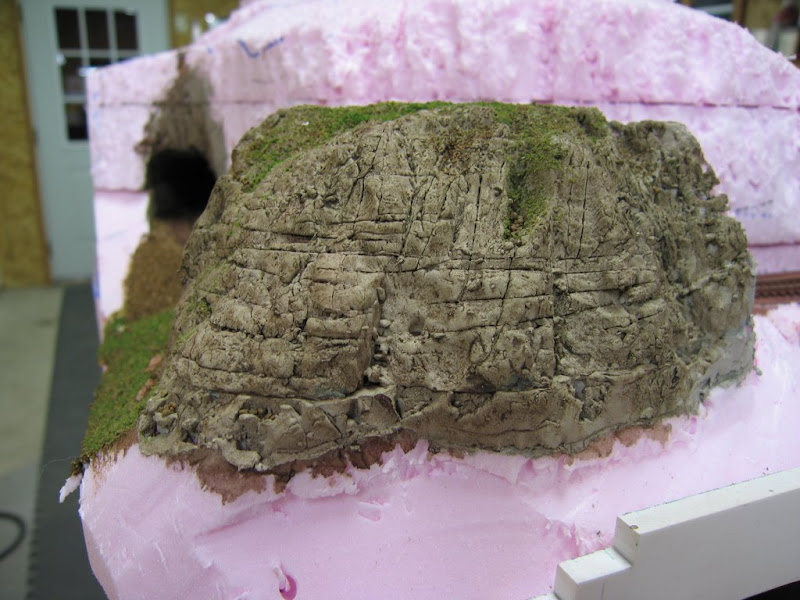
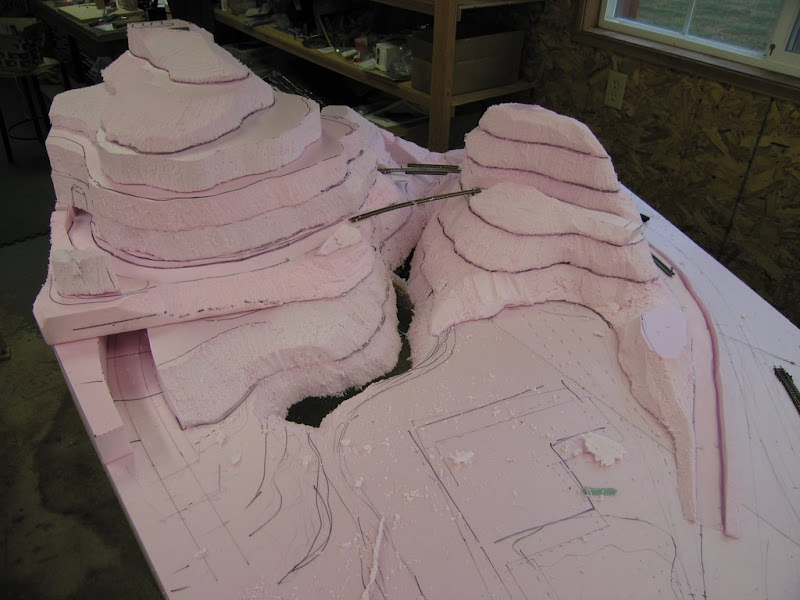
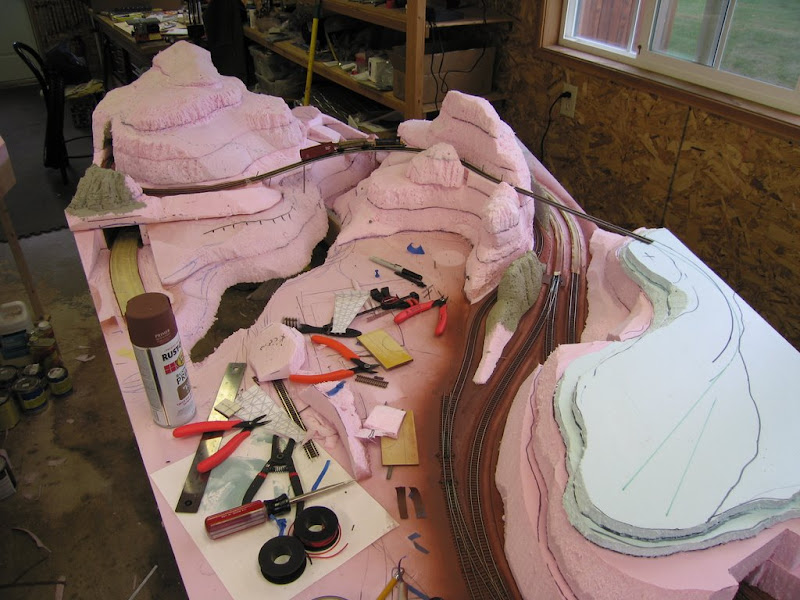
I am trying a super light construction method of gluing foam directly to the frames and reinforcing with fiberglass on the fascias to protect the foam and securely bond it to the frames. The foam and fascias will be cut down in a few places for some deep valleys.

frames_%20016.jpg


The modules are designed to fit into the square shop space, but can be arranged into much more undulating arrangements outside the shop.

frames_%20023.jpg


More pictures and descriptions at:
http://picasaweb.google.com/dannsparks/BendTrack#
I'll try to keep them updated.

Thanks for all the ideas and advice from forum members.
 

MasonJar

It's not rocket surgery
Nice work!

HOTrak.ca (my local modular club) standards allow the foam to be recessed inside the outer frame. No further protection for the foam is required.

You may need to experiment to ensure yoru fibreglas resin does not attack the foam. Alternatives include thick styrene or thin (~1/8") luaun ("doorskin") plywood.

Looking forward to more pictures!

Andrew
 

jesso

Member
Those look great! I really like how you have kept to the standards and yet made the layout not be a boring straight line. Can't wait to see your progress!
 

dannparks

New Member
I plan to use epoxy resin which doesn't harm the foam. I'm hoping that it won't be much more work than thin plywood or Masonite.

Does anyone know any double-track bridges that have a 1.5" track spacing?

BTW: Andrew, HoTrak has some nice modules...
 

dannparks

New Member
Progress update

Foam is flying! I decided to start with the mountain/lumber module. It is the most difficult and it has an elevation change which I had never done before. I initially looked at the Woodland Scenics risers to create the elevations, but in the end decided to cut it all out of pink Styrofoam. It turned out to be fairly easy to cut the curved risers with a small band saw. It turned into kind of a Chinese puzzle making intricate cuts and pulling pieces out to create openings (tunnels) running through solid blocks (mountains) of foam. It is a fairly steep 4% rise, but it is just for a lumber run spur from the cutting area in the mountains to the lumber mill at base level -- and interconnected with the rest of the layout.

9-28_%20005.jpg


The mountains are a bit extreme and I have been slowly cutting them back, but I want them to be dynamic, so some artistic license is applied. I'm hoping that when they are painted and covered with trees they won't look so steep.

10-03_%20017.jpg


bend_%20003.jpg


The last photo shows where the wooden trestle will go. I'm using a jig from Black Bear Construction Co. http://www.blackbearcc.com and real wood to make the trestle. It's a really cool system. More pictures soon.

mountain_%20014.jpg
 

tetters

Rail Spiking Fool!
Stupid question. This is N scale right?

Either way this looks really cool. I like how you can arrange the layout in different configurations. Amazing! Thanks for sharing.

I took the liberty of checking out your "old" stand alone layout which is equally amazing. Nice job. Have you disassembled it to make room for this new one?

I also checked out your planes. Looks like tons o' fun! :thumb:
 

tetters

Rail Spiking Fool!
Uhhh Tetter's in the first post it Dan says:


**Code 55 meaning N scale**

hehehehe sign1 sign1

You can use code 55 in ho scale for light rail. :p sign1 :mrgreen:

But yeah I clued in when I saw the initial tracks on the actual layout.
 

dannparks

New Member
I took the liberty of checking out your "old" stand alone layout. Have you disassembled it to make room for this new one?

I also checked out your planes. Looks like tons o' fun! :thumb:

I'm not sure what to do with the old layout. I will probably salvage all the buildings and trees. What's left would be a great starting layout for someone who wanted to run trains right away. The track and switches all work great. It would just need scenery. If anyone in the Portland, Oregon area is interested in it, let me know.

Yes, airplanes is my other hobby. Lots of fun and a sense of accomplishment when you fly away in something you've built. But I like model railroading just as much. They complement each other very well. One is big, one is small. One is serious and the other is less life-or-death critical. And I can spend $25 in a hobby store and it will keep me busy for weeks. Can't say that about airplanes.
 
Having carved a few hills out of Styrofoam on my Bancroft and Irondale HOTRAK modules, I can really see the potential for that Styrofoam scenery!! It looks as if you're using 4" Styrofoam to layer the hills. Or is it my eyes because I'm looking at an N-scale layout?

The serations (lines) on the Styrofoam indicate that you used a saw (hacksaw blade maybe?) to cut the Styrofoam blocks to shape? But what did you use to start to put some slope into the blocks?

Any ideas yet on how you're going to blend in the different layers of Styrofoam so that you have some "seamless" mountains? Because I transport my modules, I wanted to use something that would be very light. Plaster was out because of its weight. I discovered spackling compound which is fluffy like Dream Whip, easy to apply, and I can take my time moving it into place as it takes a couple of hours before it starts to set up. Depending on how thick it's applied, it is fully dried within 24-48 hours and can then be readily sanded.

For sculpting the Styrofoam into hills, I used a foam cutter. It made all the difference in the world. I got mine from a friend in our club. Just make sure you're well ventilated when you use the foam cutter.

I didn't want all that pink showing, so I applied a couple of coats of flat latex brown which served as a base for the scenery. I later changed it to flat latex light gray. It really turned out quite well!

I'm very impressed with your use of styrofoam and, no doubt, you're extremely pleased with the results.

Bob M.
 

Triplex

Active Member
It looks as if you're using 4" Styrofoam to layer the hills. Or is it my eyes because I'm looking at an N-scale layout?
Notice the one shot where there's a train to compare. The layers are less thick than the 40' boxcar is long (3" in N).
 

dannparks

New Member
The foam is 2" thick. It comes in 2'x8' sheets at Home Depot. The blue foam is 5/8" thick. I make the rough cuts with a handsaw in a jabbing fashion to create random cliffs and gorges. I then go in and gouge and rip smaller chunks with a small knife. Hiding the seem between layers can be difficult. You can use spackling to cover them or put in more horizontal cuts to make them blend in.

bend_%20029.jpg


Here is a test painted section.

bend_%20032.jpg


I use a hotwire cutter to cut the ballast shoulder next to the track.
 
Top