N&W CF Caboose - AMB (IMAGE HEAVY!)

Fluesheet

Member
Those of you who have been around for more than a few months, were paying attention and have good memories may remember that I embarked on this caboose model awhile back. My last post about it was to ask questions about mixing the right red.

Since then I've worked on it off and on and decided it'd be worthwhile to post my progress (even if the updates are six months behind).

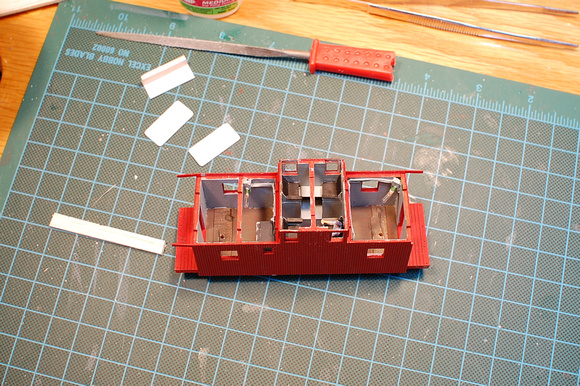
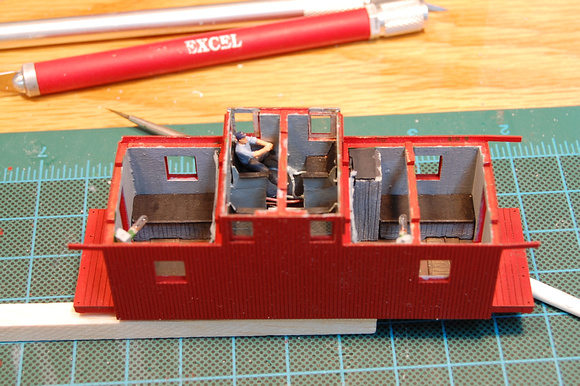
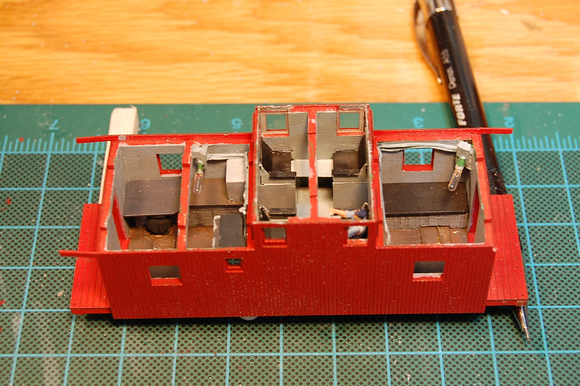
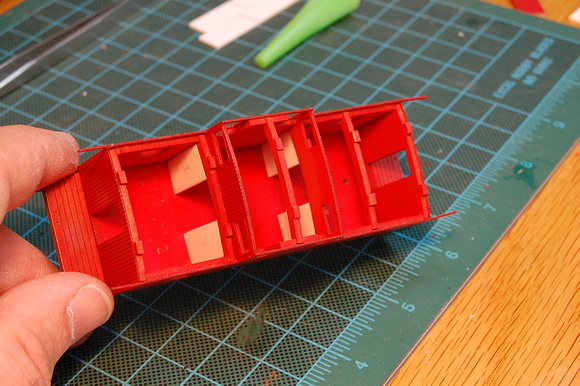
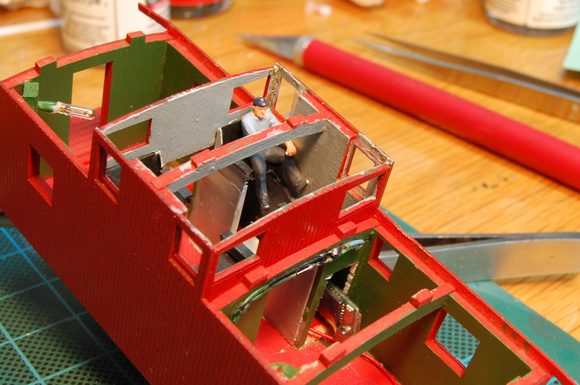
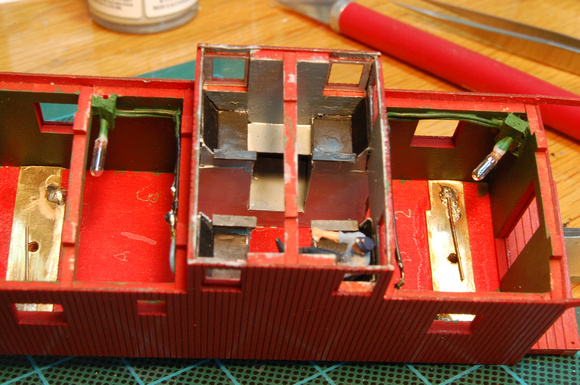
First, the kit is by American Model Builders from their Laserkit series and is of a Norfolk and Western class CF caboose. The prototype was a wood sided, steel underframed caboose that was produced between 1914 and 1924, with some staying in service in some capacity into the 60's.

The kit comes relatively complete, but did need some extras:
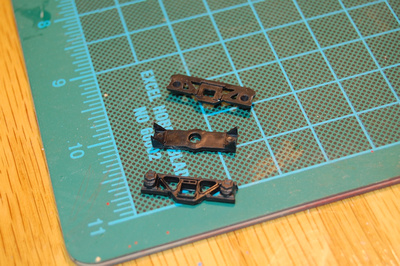
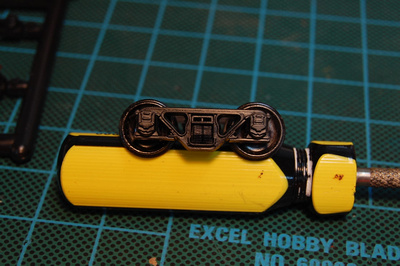
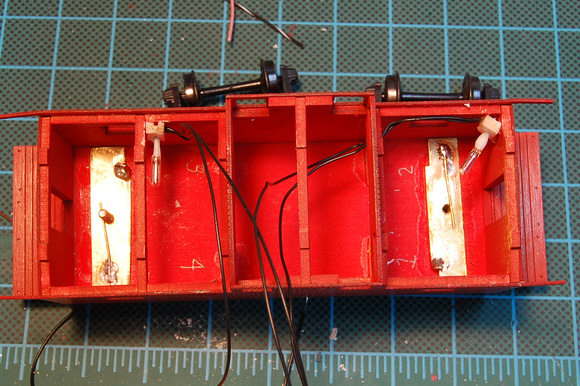
- Andrews "caboose" trucks from Eastern Car Works
- Brake gear detail kit from Tichy Train Group. I chose the KC style because of the era that I model (prior to 1940). This kit included the air resevoir / cylinder assembly (one piece on the KC's), various actuating levers and brake wheel. A nice set.
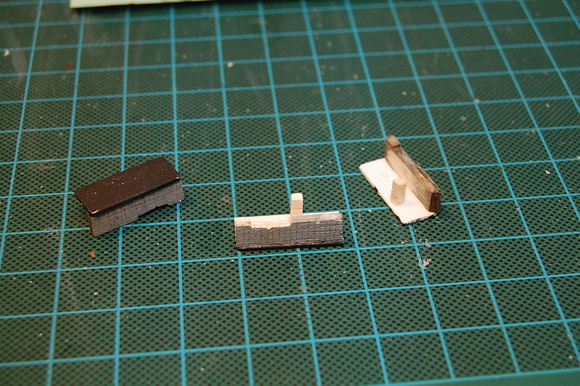
- Caboose detail kit from Detail Associates. This contains many pre-bent grabs, ladders and some bolt details. The grabs are generic and I haven't decided how many are going to be useful - more later.
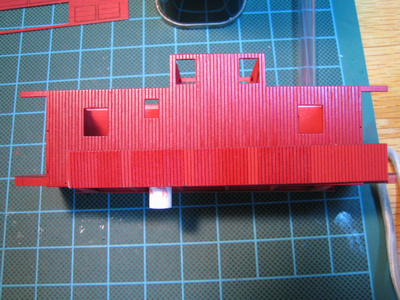
- Paint. The two big ones for me are Caboose red and Soo Line red, both from floquil. The rest of the paints are various grays, blacks and brown acryllics.

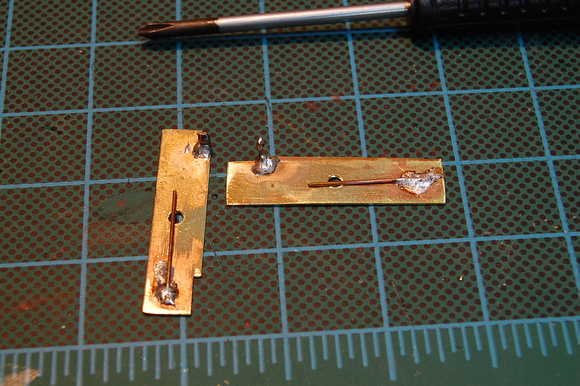
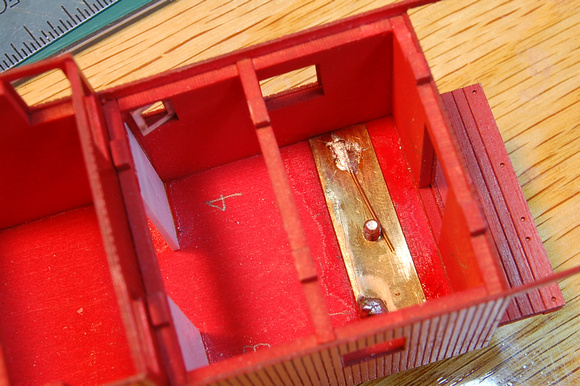
I also decided to add lights (internal), so the additional stuff was aquired:
- Miniatronics 1.3mm 12v bulbs
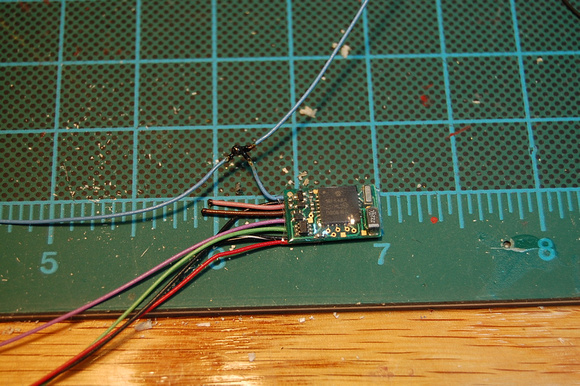
- TCS FL4 decoder (four output, function only)
- Axle wipers from Richmond Controls

I've taken a bunch of pictures over time while building this and will present a few at a time until caught up. Bear with me, and wipe off that glassy eyed stare!

More to come...

fluesheet
 

Fluesheet

Member
This is the earliest image I took. The siding is peel and stick plywood, the structure itself (the wood to which the siding is peeled and stuck) is about 1/8" thick.

A couple things worth noting here:
First, the paint. The shop I bought this from was owned by an old hand who counciled me to paint everything front and back to seal out moisture. Because of the thickness of the internal structure and the adhesive on the back of the siding, I wouldn't do this the same way again. The siding, yes (it was quite thirsty), but not everything else. Areas that are supposed to be brown / black are bit harder to cover than had it been naked wood. The red covering everything at this point is Floquil Caboose Red, applied with an airbrush.

The second was that the instructions clearly stated not to glue the bottom in. My first step during assembly? I glued the bottom in, of course.... :eek:ops: THAT would come back to haunt me.
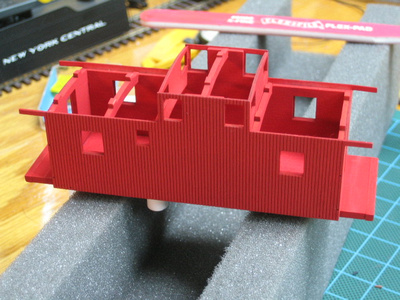
p790026943-2.jpg


The Caboose red was too flat and too muted for my mental image of caboose red, plus the flat would present decal issues down the road, so a little color experimentation on some scrap was in order. In the image below;
-The first glossy section is 1:1 Soo Line to Caboose Red (Floquil)
-The second is straight Soo Line
-The third is 2:1 Soo Line to Caboose Red
-The far right end is straight Caboose red. This ended up server as a "primer" layer.

It's hard to see the difference in the image, but the 2:1 mix gave a nice gloss that was not TOO red.
Note: by the time this picture was taken I'd already put the first coat of "fluesheet caboose red" onto the carbody.
p745908502-2.jpg


I ended up putting three coats of my custom color on.
 

Fluesheet

Member
The next step was to assemble the trucks:

Prior to assembly
p932517650-2.jpg


Assembly complete. Getting all four springs in square and consistent was a little more difficult than I expected (I made it harder than it should have been), otherwise, the Eastern Car Works trucks went together pretty easily.
p835118701-2.jpg


Then I installed some internal partitions between each end and the cupola area. The goal here was separate the light into "rooms" like the real thing. I didn't want one bulb to light up the whole interior.

p930161859-3.jpg
 

Fluesheet

Member
Electrical Stuff

Next was getting power to the interior. After some consideration, I decided that I did NOT want a "hard wired" connection between the trucks and the carbody. I know the way I work, and I would definitely have found reason to remove the trucks moments after the solder cooled...

My solution was to drill and tap a small sheet of brass that the truck mounting screw could thread into and transfer power to. To make it a little easier to solder wire leads to, I bent up and tinned the small "ears" you see in the photos so I wouldn't have use as much heat to attach the decoder leads. Tap size was 2-56

As kind of a last minute thing, I decided to add the phosphor bronze wire to make sure electrical pickup was reliable.

p1054752968-3.jpg


p575868707-3.jpg


Next would be to light the interior and install the decoder, but I'll have to do that tomorrow.
 
N

nachoman

That is coming along quite nicely! I like your solution to the truck pickups. Does the truck have wipers on the axles?

Kevin
 

Fluesheet

Member
That is coming along quite nicely! I like your solution to the truck pickups. Does the truck have wipers on the axles?

Kevin

Not installed yet, but yes. That part of the circuit has not yet been tested, but from the truck mounting screw to the lights has been, and works well!
 

sgtcarl

Member
Very cool! I like the pictures. You sure must have steady hands. I'm new to all this, but would fiber optics be practical? I also have quite a few photos of the N&W rolling stock that is at the Virginia Museum of Transportation, if any body is interested. (Including the J series 611.)
 

Fluesheet

Member
Thanks for the feedback dw and sgt!

I don't know if fiber optics are practical as I didn't look into that. There are a couple of vendors that supply lighted marker lights (and the decoder I used could have supported two more outputs), but that was a level of complexity that I didn't want to get into.
 

Glen Haasdyk

Active Member
This is really neat. The peel and stick siding must make it a little easier on construction? I like the way the structure goes together with the roof supports.
 

Fluesheet

Member
Internal Wiring and Decoder

As mentioned in the first post, I'd decided to put a decoder into the caboose so I could control the "lamps" as my 1:87 conductor / brakeman got their ride ready at the start of their run. After scratching my head for a bit, I decided the best location would be on it's side in the cupola area within what would be the lockers and toilet.

The first photo shows the beginning of the wiring for the lamps as well as their placement. My intention was to put them in the same place as the real ones, but have since determined that that really doesn't matter (as far as lighting is concerned) - if I build another, they will be placed where the bulbs will be least directly visible if they turn out to be too obvious. The decoder eventually ended up between the penciled "1" and "4".

p695381716-3.jpg


The next image is of the TCS FL4 decoder I installed to control the lights. One nice thing about this decoder is a function that cuts the power to the lamp in half. This makes for a much more believeable brightness without using a resistor. I will experiment with a resistor if I attempt this again - if both lights are on and one is turned off, the second will momentarily brighten. Not a big deal, but something worth learning from.

The blue wire is the common positive wire that is split to feed each lamp. The purple and green wires are the function (negative) leads for the lamps - these are the decoder outputs that turn the lights off and on. If the mood strikes you, the functions can also be set to imitate a mars, strobe, firebox flicker, etc. , which is very amusing coming from the inside of a caboose! :mrgreen: Last, the red and black wires are the leads from the power pickups (the remaining two functions have been bobbed).

p702659458-3.jpg


Unfortunately, I didn't take any photos while mounting the decoder; the following so-so photo was taken much later, but is the only one I have that shows it in place.

The visible part of the decoder is in the not yet enclosed toilet area. In a fit of not-needed-but-seems-like-a-good-idea creativity, I drilled a hole in the floor (the red wire crosses over it) into the toilet collection tank which is a tube open to the outside. This, in combination with leaving a cupola window open would create a draft that surely be a great way to keep that decoder nice and cool! :rolleyes:

This photo also shows the lamp wiring across the bulkhead (an identical routing is on the opposite side), and a glimpse of the red pickup wire that is soldered to the brass pickup shown previously. The wiring and pickups were secured with medium CA. More on the interior detailing later.

p596411798-3.jpg


More later!
 
Thanks for this thread - I've been considering buying one of these kits off ebay for some time. There was one vendor who offered it with the wire detail kit in a package deal but I spent the disposable income other places...still, I have a couple cabeese I will be working up for the railway in the future and your lighting tips may be very helpful when that day comes!
 

Fluesheet

Member
Thanks for this thread - I've been considering buying one of these kits off ebay for some time. There was one vendor who offered it with the wire detail kit in a package deal but I spent the disposable income other places...still, I have a couple cabeese I will be working up for the railway in the future and your lighting tips may be very helpful when that day comes!

Thanks for the comments! The jury is still out for me on the grab detail kit. I've just started applying the grabs and have bent my own so far. I'll probably use the cupola top grabs from the kit, though I'm not sure if any rebending will be needed.
 

Fluesheet

Member
Interior

The interior is where having glued the carbody to the floor (mentioned in the first post) hurt me.

The model actually comes with a very thin sheet of paper on the back of the window glazing, giving them a "frosted" look when a light is put behind them. I decided to remove this for the cupola windows (and eventually all windows) so I a hard-working Preiser figure would be visible.

One thing led to another and I ended up building a complete approximation of the interior - seats and lockers. The latter would do dual duty to hide the decoder.
Unfortunately, after completing the build, I found my guesstimate on how high the seats should be was incorrect, so I had to channel about approximately 9 scale inches out of the entire assembly (hence the horizontal cut below the armrest):eek:. And all of this had to be done through the cupola roof! Argh!

p846251827-3.jpg


Initially the interior walls were going to be green all around, however after looking at the real thing at the Roanoke Transportation Museum, I deferred to a light gray. Plus, I couldn't confirm that green was ever used in my references.

Next, the lav went in (the small black roof) the rest of the interior was repainted gray and the floor roof brown. For expediency, the toilet was made of balsa. This was put in place to prevent interior light from being visible through the lav window. It's also indicative of the slippery interior detailing slope extending to the car ends. :)
p968675772-3.jpg
 

Fluesheet

Member
I next manufactured the beds. Mattresses are .040" styrene, support is scribed, painted and washed balsa. The prototype, as built, had six beds; a pair of bunk beds in the "B" end and a single bunk bed in the "A" end along with the domestic area and toilet.

p577953130-3.jpg


Though not yet in place in this photo, these I chose to put the top bunks on this side...

p539605362-3.jpg


but not this side (due to the close proximity of the bulb). Between these two photos, I've also added the domestic area; stove, counter domestic water tank and cabinets below. Still to go is the stove flue, windows, doors and some final detail painting.

p849355304-3.jpg


My daughter made a prescient comment somewhere during this construction: "Why are you doing all that Dad? You won't be able to see any of it after you put the roof on." :mrgreen:

Tested the lights one more time. Next up is the roof, then exterior detailing.

Matt
 

Fluesheet

Member
Thanks! Depending on how visible the details are, I may or may not include them in other cabooses (I need at least one more). My father has just completed the same kit (though no interior) and did an outstanding job - so I've got a good target to shoot for as far as external detail is concerned.
 
Top