Hhmmm again trouble with the engines. Must be something in the air tonight.
Y-WING BUILD - Construction continues...
- Thread starter Chuffy70
- Start date
You are using an out of date browser. It may not display this or other websites correctly.
You should upgrade or use an alternative browser.
You should upgrade or use an alternative browser.
Engines, every good star ship needs power!
I had been reluctant to start the rear of the Y, as there was no CGI rendering of this in the files.
After a little digging I finally found the image I was looking for, but there was good news and bad news.
Firstly we'll start with the good news and start with the thrusters.
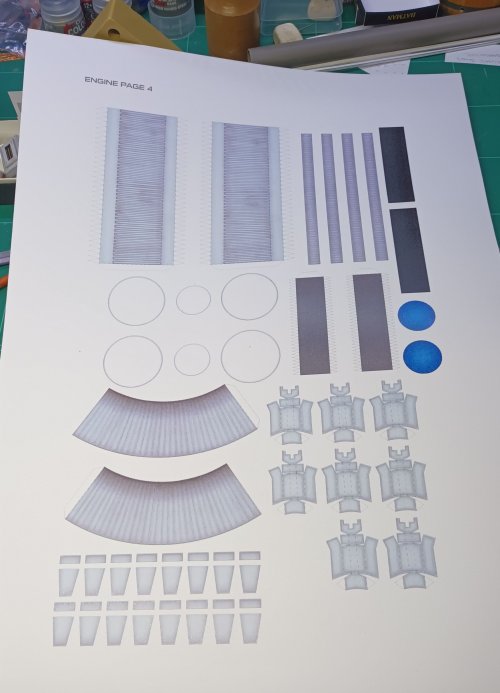
With the picture secured it was time to identify the parts which the first page needed was ENGINE PAGE 4.
Taking it purely by eye as none of the parts are numbered or named, pieces which looked as if they belonged were selected.
Engine cone or turkey feathers some people call them.
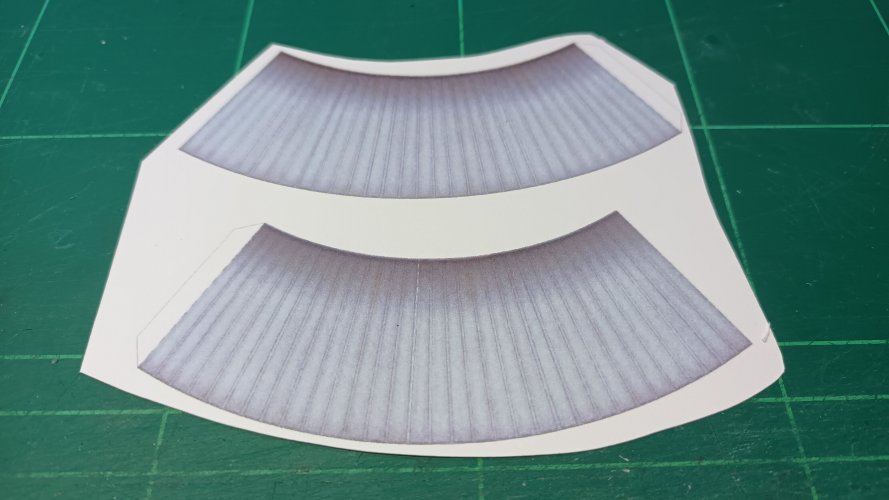
These lacked a little character, so I added crease lines to the individual sections, I could've reprinted the part and layered them up, but not this time around.
Maine engine pipe and associated bands
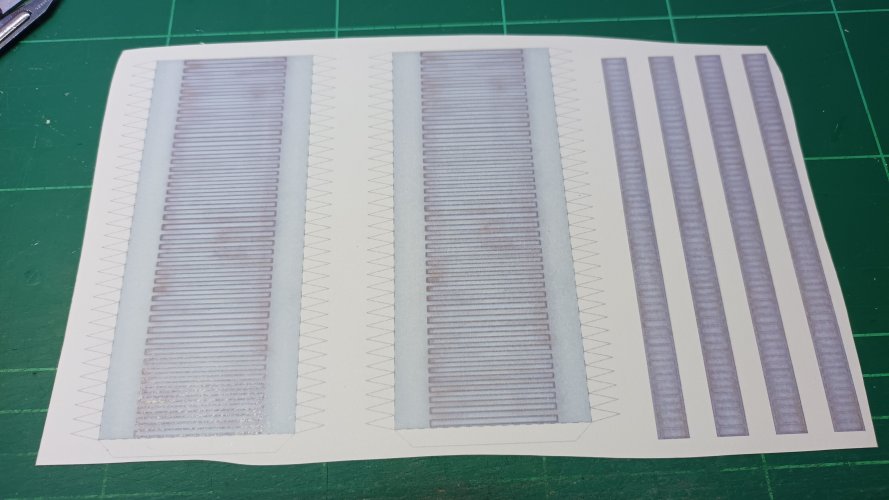
These form the top and bottoms of the engine tubes and pipes.
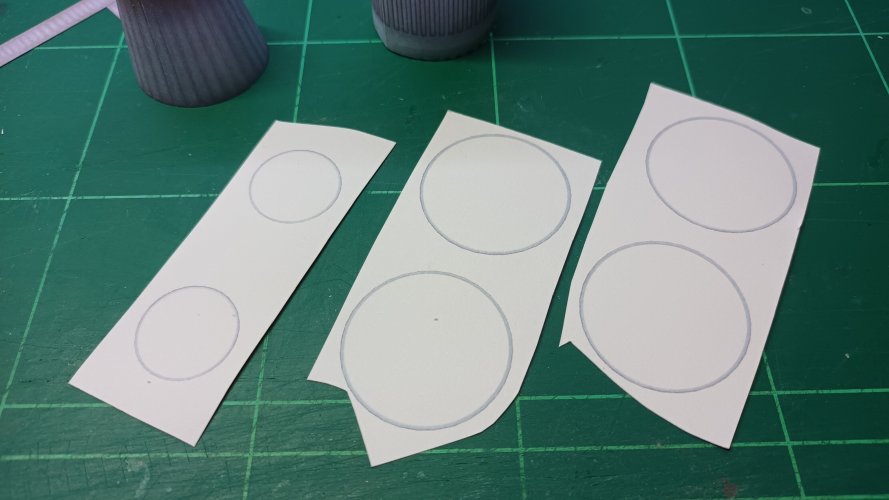
Engine lights and thrust tubes.
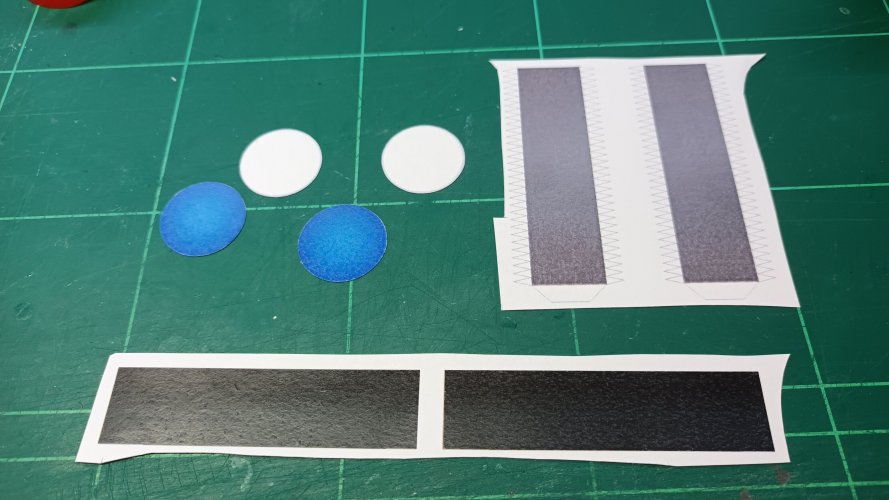
Main engine tubes constructed and bands added around the top and bottom.
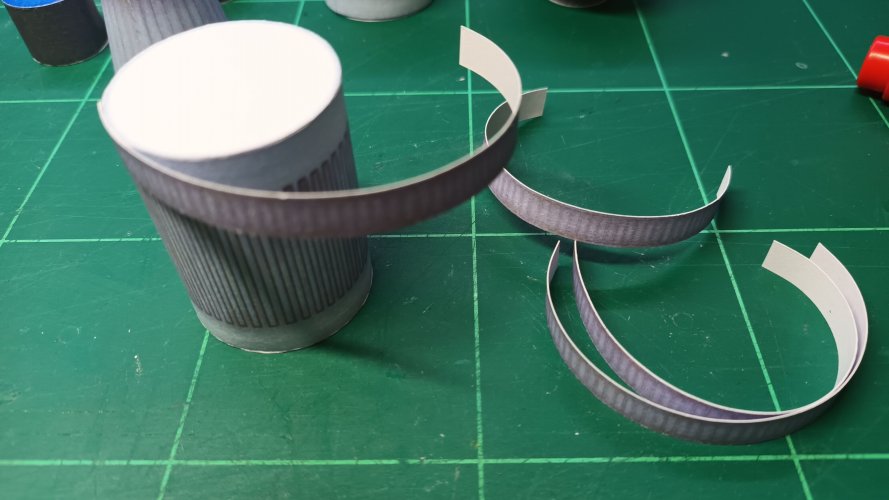
Hopefully this picture shows how all the components fit together as far as I could fathom it.
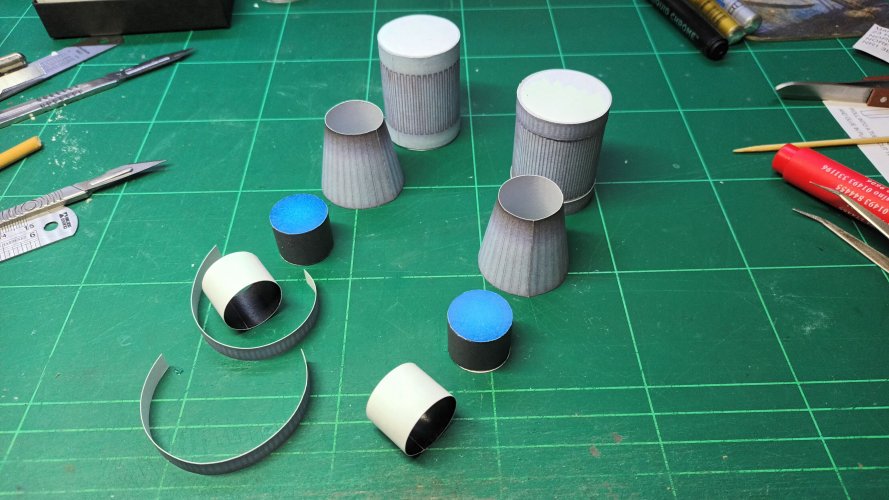
Main engine tube, then smaller lighted piece, followed by darker tube.
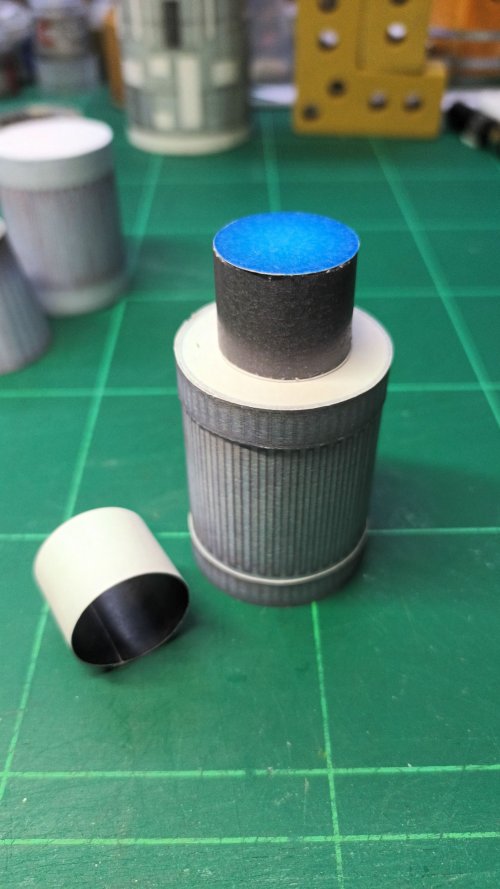
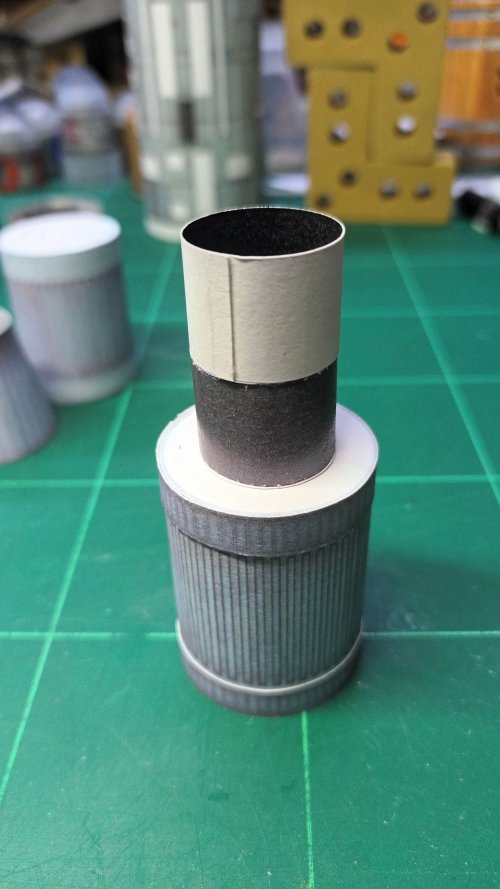
A dry fit of all these components together threw up some problems to sort.
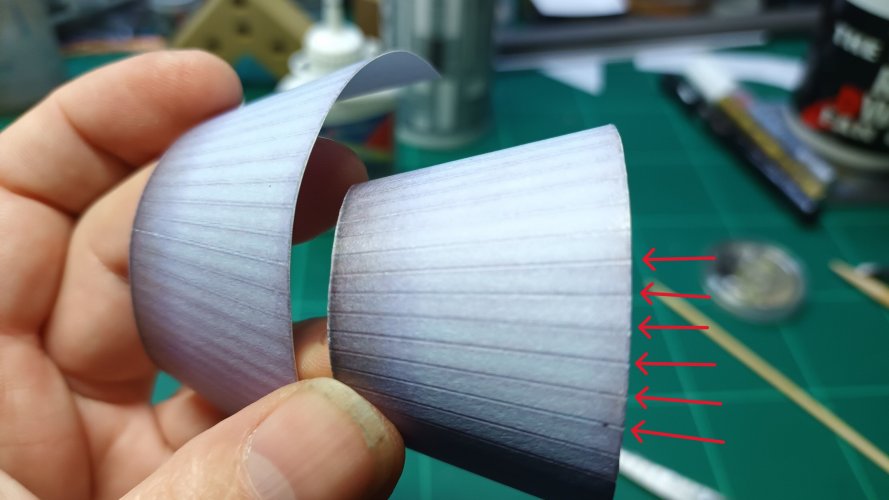
First being the two internal tubes extend out of the end of the cone...
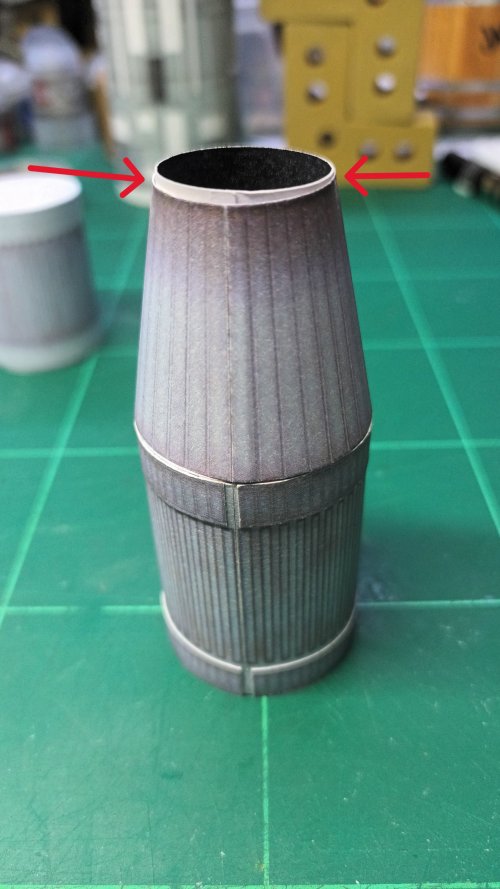
…and also a large rim gap was also in need of rectifying. The blue arrow was where a hacksaw blade went into my thumb many years ago, never really noticed how much it shows up, anyway on with the matter in hand...
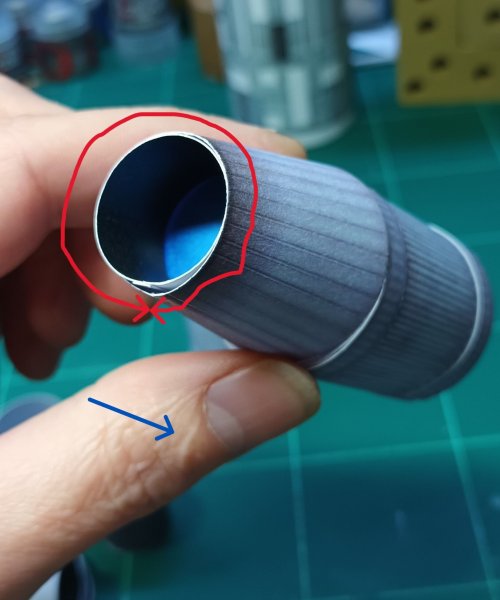
With all the fit issues to be sorted I started to glue parts together. A small band was added to the top of the lower of the little tubes to help locate the upper small tube.
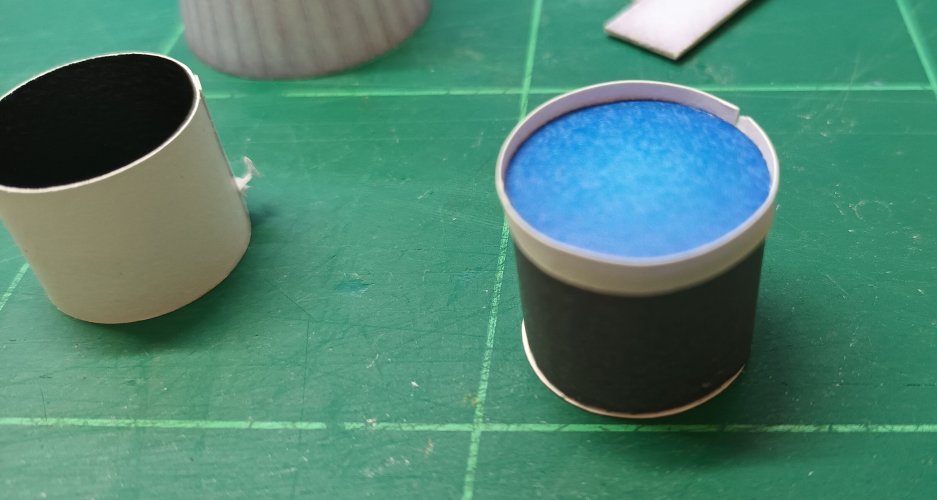
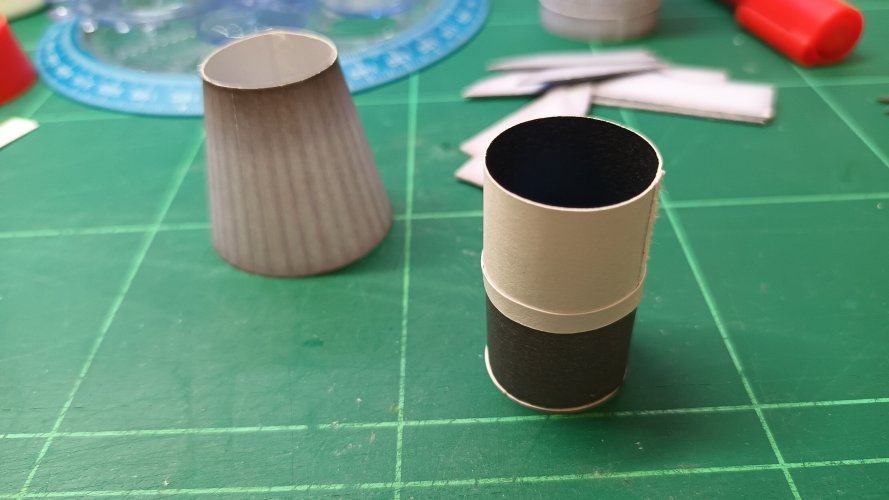
Now to sort the first problem of the loose end rim.
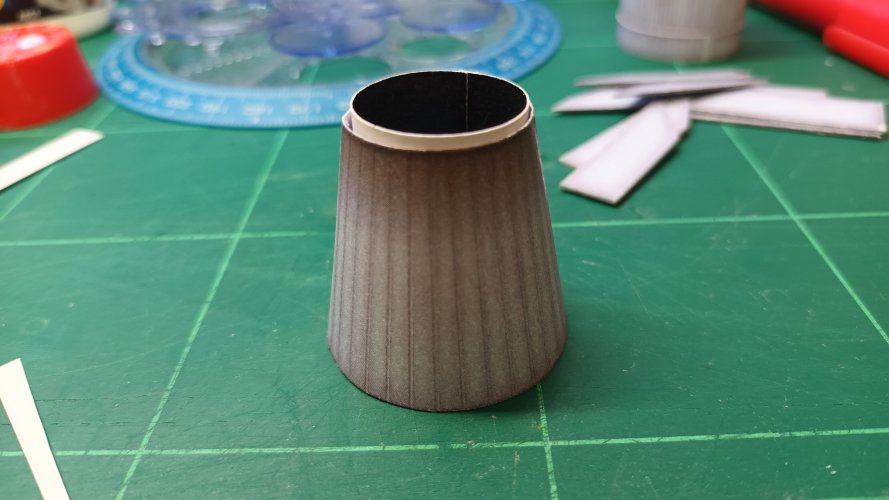
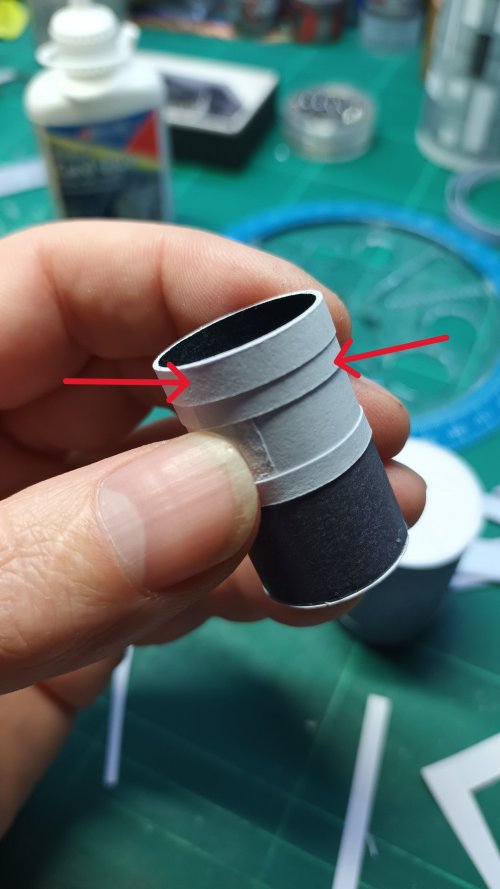
I added two outside bands to the upper of the top tube thus increasing its width.
I then inserted the two small tubes into the cone and pushed lightly onto a flat surface.
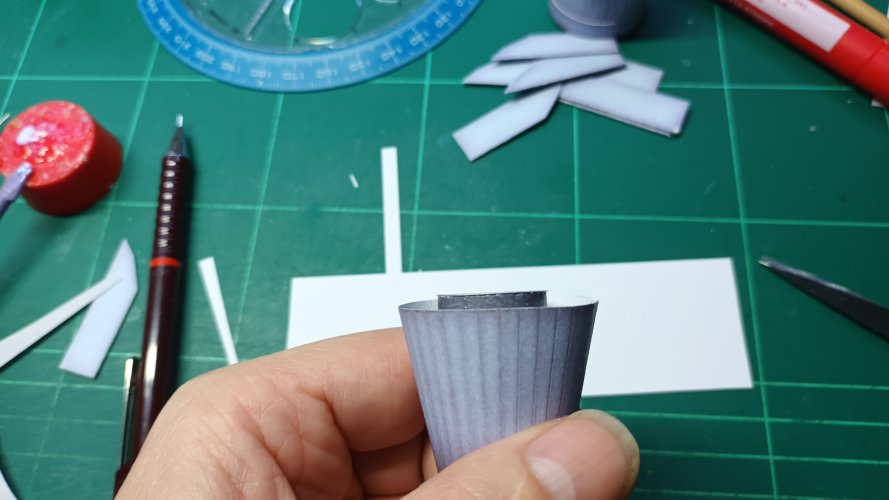
The result was very satisfying as the gap was closed tightly and giving me a near perfect circular cone, rather than the ugly fit issue on the left.
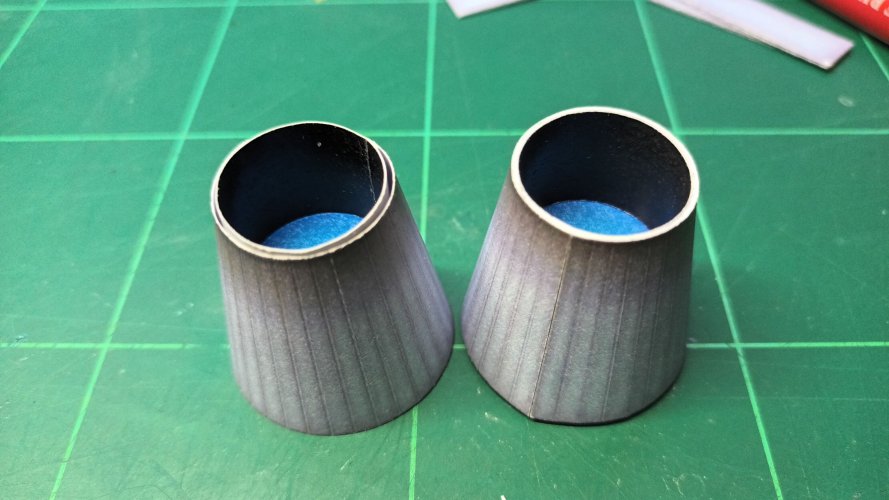
TUNE IN LATER THIS WEEK FOR THE SECOND PART
THANKS FOR WATCHING
I had been reluctant to start the rear of the Y, as there was no CGI rendering of this in the files.
After a little digging I finally found the image I was looking for, but there was good news and bad news.
Firstly we'll start with the good news and start with the thrusters.
With the picture secured it was time to identify the parts which the first page needed was ENGINE PAGE 4.
Taking it purely by eye as none of the parts are numbered or named, pieces which looked as if they belonged were selected.

Engine cone or turkey feathers some people call them.

These lacked a little character, so I added crease lines to the individual sections, I could've reprinted the part and layered them up, but not this time around.

Maine engine pipe and associated bands

These form the top and bottoms of the engine tubes and pipes.

Engine lights and thrust tubes.

Main engine tubes constructed and bands added around the top and bottom.

Hopefully this picture shows how all the components fit together as far as I could fathom it.

Main engine tube, then smaller lighted piece, followed by darker tube.


A dry fit of all these components together threw up some problems to sort.
First being the two internal tubes extend out of the end of the cone...

…and also a large rim gap was also in need of rectifying. The blue arrow was where a hacksaw blade went into my thumb many years ago, never really noticed how much it shows up, anyway on with the matter in hand...

With all the fit issues to be sorted I started to glue parts together. A small band was added to the top of the lower of the little tubes to help locate the upper small tube.


Now to sort the first problem of the loose end rim.

I added two outside bands to the upper of the top tube thus increasing its width.

I then inserted the two small tubes into the cone and pushed lightly onto a flat surface.

The result was very satisfying as the gap was closed tightly and giving me a near perfect circular cone, rather than the ugly fit issue on the left.

TUNE IN LATER THIS WEEK FOR THE SECOND PART
THANKS FOR WATCHING
One of many 'fixes' more to come!Hell yeah thats a good looking engine and a great fix.
@Revell-Fan - Koensayr took the R200 ion jet engines and added Imperial ionic plasma converters to a 90 kilowatt range which reduced the flow of fission in the Class 1 Koensayr R300-h hyperdrive motivator, thus adding a blue glow...Great progress! I like the scored lines. However, is that blue disc correct? Shouldn't the Y have a red-orange thruster glow?
That's what they said when I rang them up
- Apr 5, 2013
- 13,498
- 9,549
- 228
Doesn't seem like much power based on what the U.S. Navy's LASER just mounted to an Aegis ship. The Google images show a Red Laser beam, but in reality, they have no color, which kind of makes them even scarier. The enemy ship's command and control turns the pilot house into dust (or Oven), and you don't really know where it came from. 
With the top Cones/Feathers done it was time to finish the bottom.
We move onto ENGINE PAGE 3
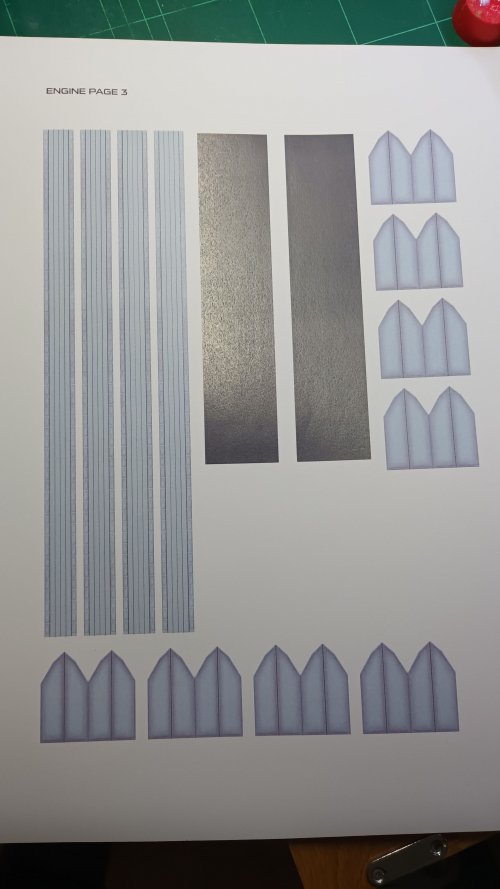
The large block coloured stripes on the left, we'll deal with later on in the build.
The double shield type shapes on the right will form the engine fins. On all of these shield type parts parts, I creased all three lines and folded colour inwards to the middle, the folding down the sides. Think of the letter 'M' and fold as such. This will leave a piece of four laminations.
I thought I took a picture, but must have missed the folding process.
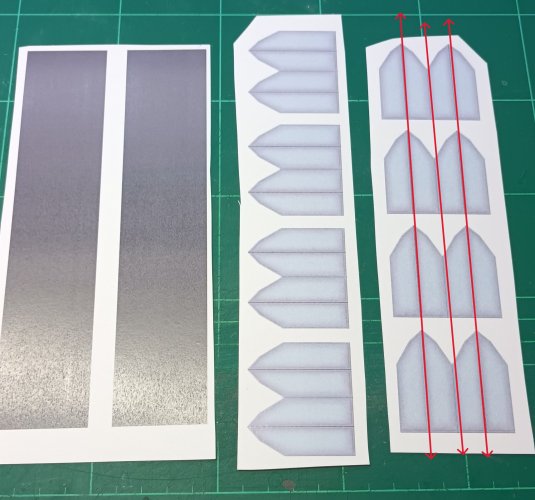
Fins folded and glued.
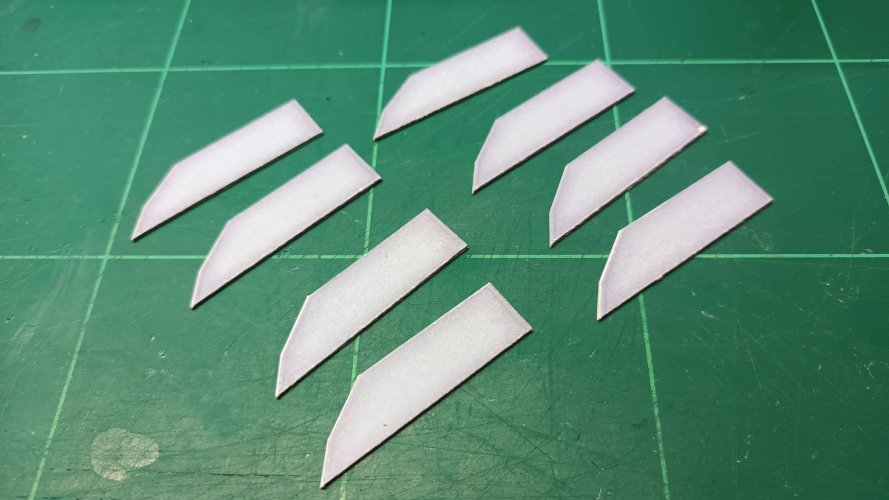
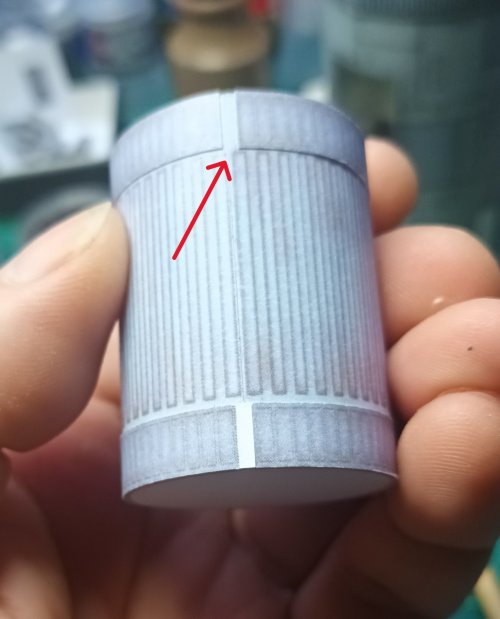
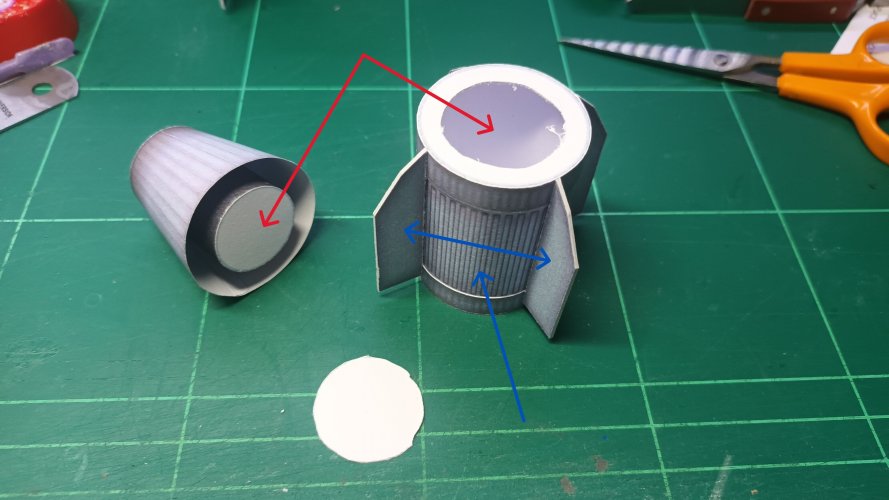
Before attaching the cone and fins, there was a gap to fill where the bands had not met.
I can only assume the bands were made the same size as the barrel and not allowed for the outer circumference. Top of arrow shows gap and the bottom of barrel with added strip.
I could have left these out and put them at the bottom, but filling these will then be covered up by one of the fins and painted.
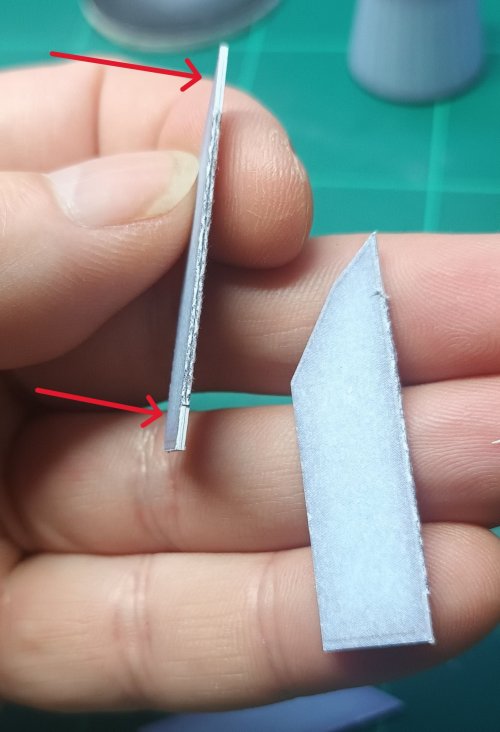
Small notches were cut into the top and bottom of the fins to accommodate the paper thickness.
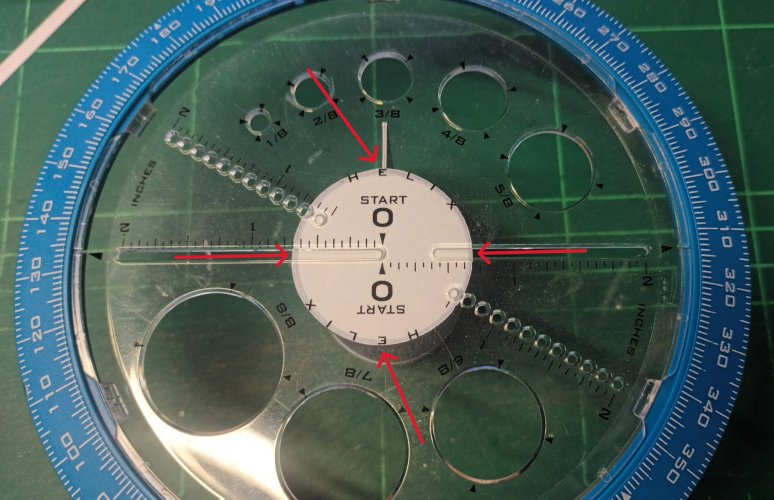
The first fin was attached to where the barrel was joined together. Using a doo-dah, circular thingy I used the markings and slots to give me a rough datum to help locate the other three.
I put one fin directly opposite the first, then used the markings on the barrel to count between the two for the location of the other two fins.
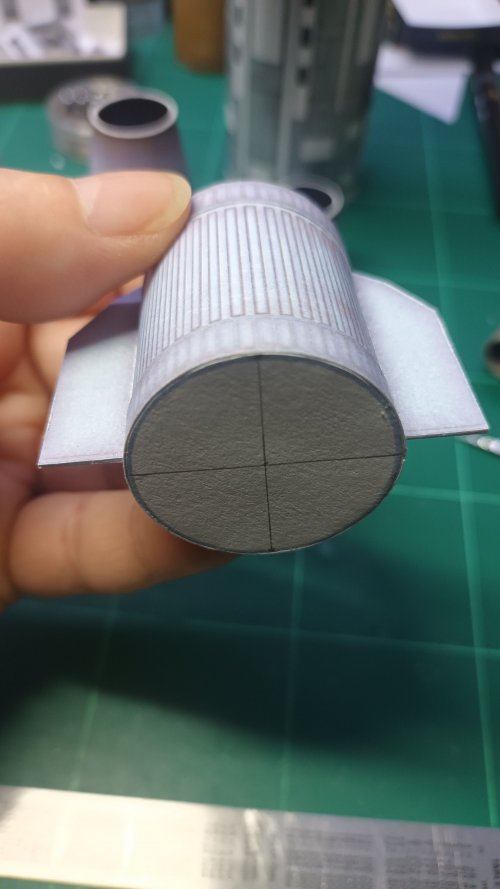
After fitting the top barrels level with the end of the cone, they now stick out too much from the bottom. So I just cut a hole into the top of the lower barrel for the upper to pass through.
Blue arrows showing the outside makings used to space the fins.
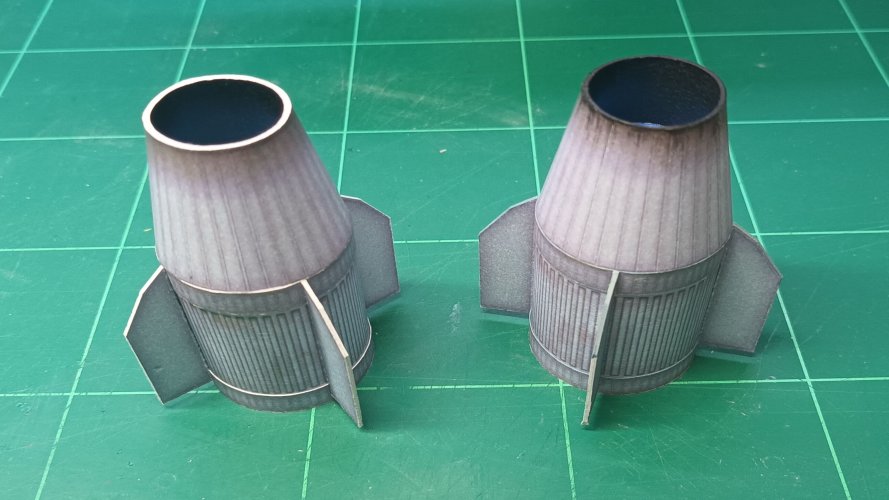
Finished cone with paint on the right vs left un-painted.
NEXT UP THIS WEEK, I FACE THE PROBLEM OF PUTTING THESE INTO THE MAIN ENGINE CASE DUE TO ANOTHER PROBLEM WHICH HAS ARISEN!
THANKS FOR WATCHING...
We move onto ENGINE PAGE 3

The large block coloured stripes on the left, we'll deal with later on in the build.
The double shield type shapes on the right will form the engine fins. On all of these shield type parts parts, I creased all three lines and folded colour inwards to the middle, the folding down the sides. Think of the letter 'M' and fold as such. This will leave a piece of four laminations.
I thought I took a picture, but must have missed the folding process.

Fins folded and glued.

Before attaching the cone and fins, there was a gap to fill where the bands had not met.
I can only assume the bands were made the same size as the barrel and not allowed for the outer circumference. Top of arrow shows gap and the bottom of barrel with added strip.
I could have left these out and put them at the bottom, but filling these will then be covered up by one of the fins and painted.

Small notches were cut into the top and bottom of the fins to accommodate the paper thickness.

The first fin was attached to where the barrel was joined together. Using a doo-dah, circular thingy I used the markings and slots to give me a rough datum to help locate the other three.

I put one fin directly opposite the first, then used the markings on the barrel to count between the two for the location of the other two fins.

After fitting the top barrels level with the end of the cone, they now stick out too much from the bottom. So I just cut a hole into the top of the lower barrel for the upper to pass through.
Blue arrows showing the outside makings used to space the fins.

Finished cone with paint on the right vs left un-painted.

NEXT UP THIS WEEK, I FACE THE PROBLEM OF PUTTING THESE INTO THE MAIN ENGINE CASE DUE TO ANOTHER PROBLEM WHICH HAS ARISEN!
THANKS FOR WATCHING...
..and I thank you too for watching, I'm glad you are enjoying itThank you, I am really enjoying this build
I appreciate your kind words, great I'll take, but fantastic might be wide of the mark...This is a great build thread! You are doing a FANTASTIC JOB on this project! KEEP UP THE GREAT WORK!!!
I've nearly 'popped' the model for real a couple of times, thanks for the praise.You did a great job on the interior. It really makes the model pop!
Indeed, a little paint here and there goes a long way into selling a paper model - one of these days it might fool my plastic loving pals at my club.Again nice fixes and indeed you had to paint the engine it makes such a difference.
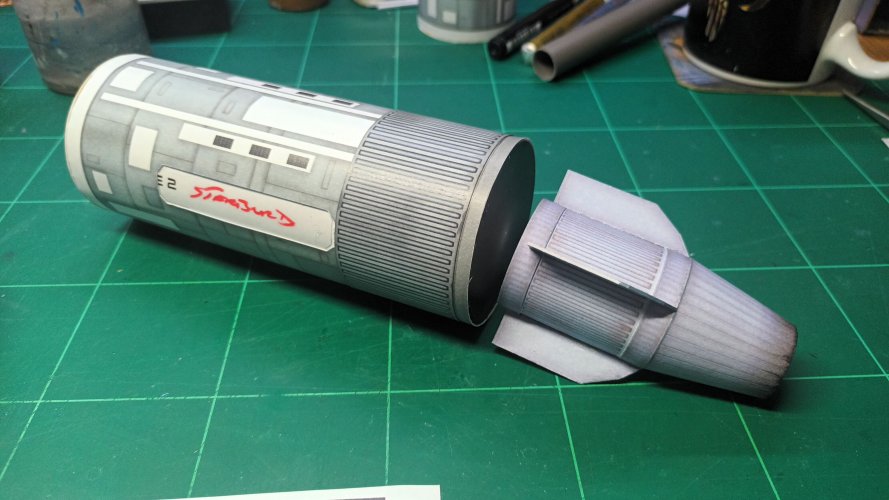
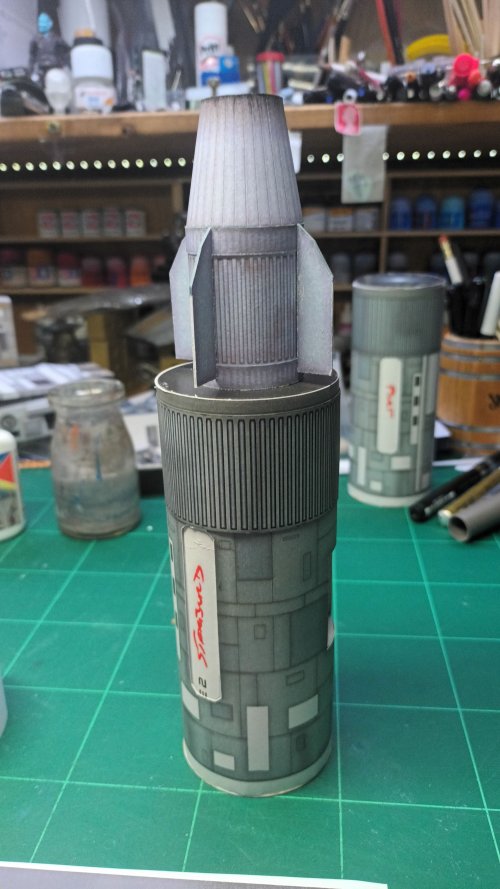
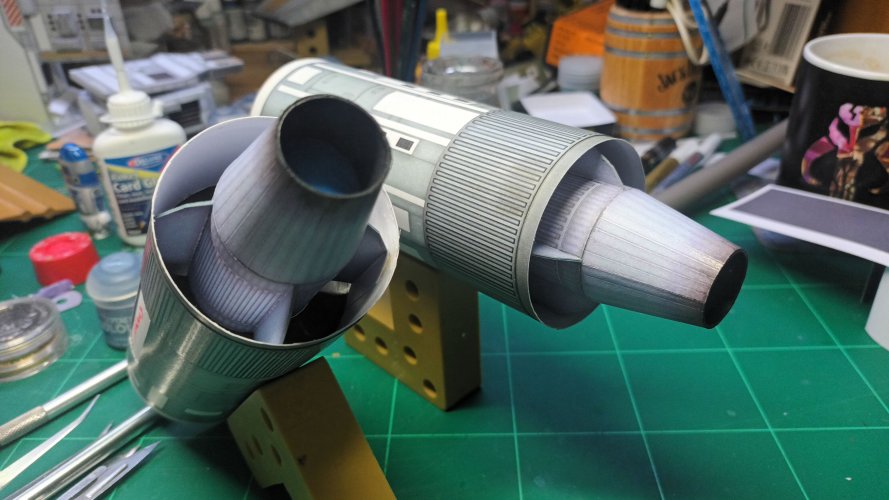
Thruster cones finished, there was the next problem where do they fit?
Well they certainly don't flush mount as I had thought - Also there was this rather telling piece of evidence left over...
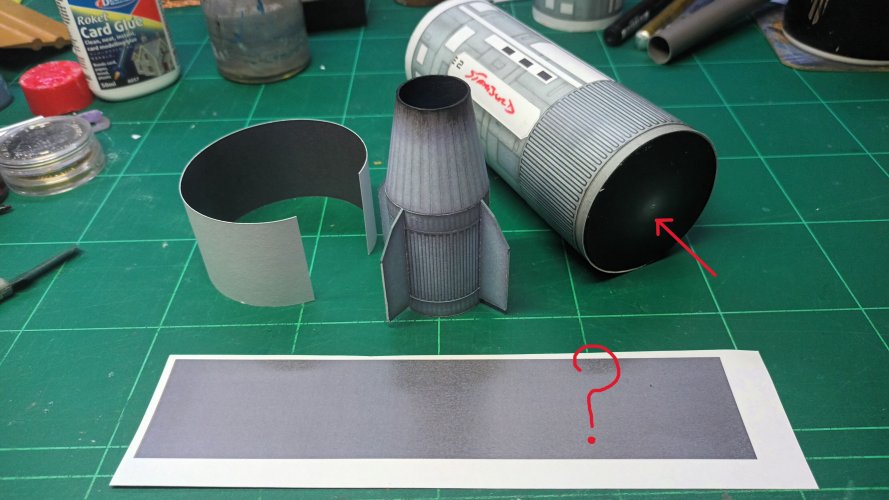
As the thruster lay next to the main engine pod I knew there must be an answer...
Even vertical I knew they didn't look right...
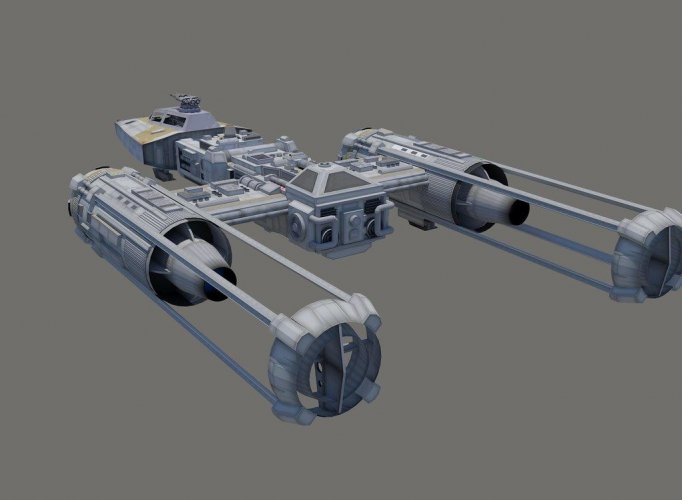
After a trawl of copious websites, there was a eureka moment when I found the missing link. 'REAR VIEW'
The CGI picture below was missing from my files, and thus shows the thrusters fit 'INSIDE' the pods!!!
Remembering back to all the bloody hassle I had with these at the start of the build, I really didn't want to start building these again..!
Surgery time!
I managed to lift of the lip around the edge and pry the circular sections off.
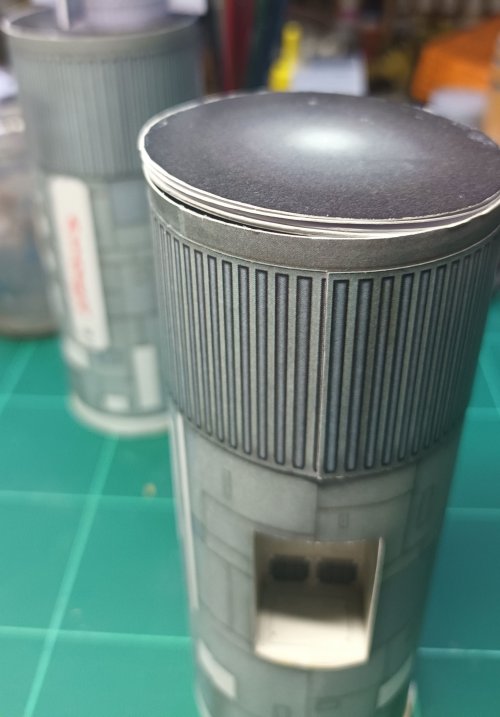
With all the skills of a blind butcher, the very top layer was free from the others
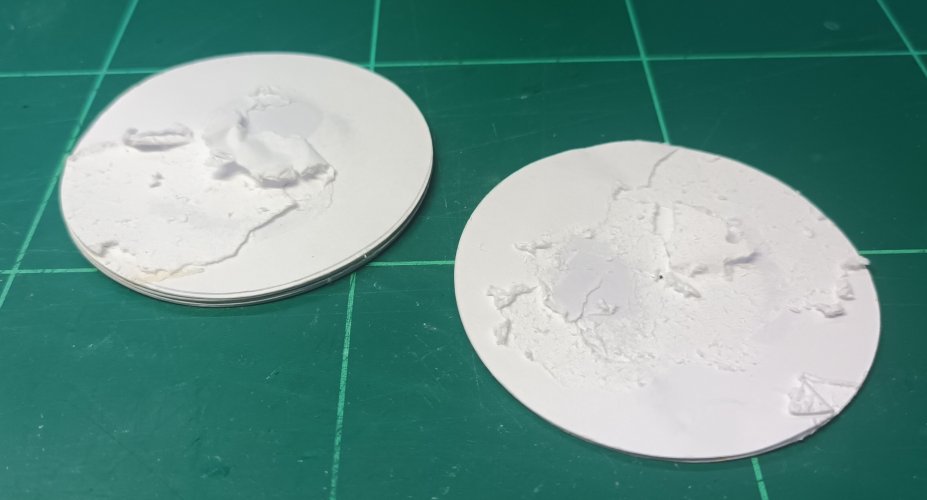
Just the coloured portion was kept.
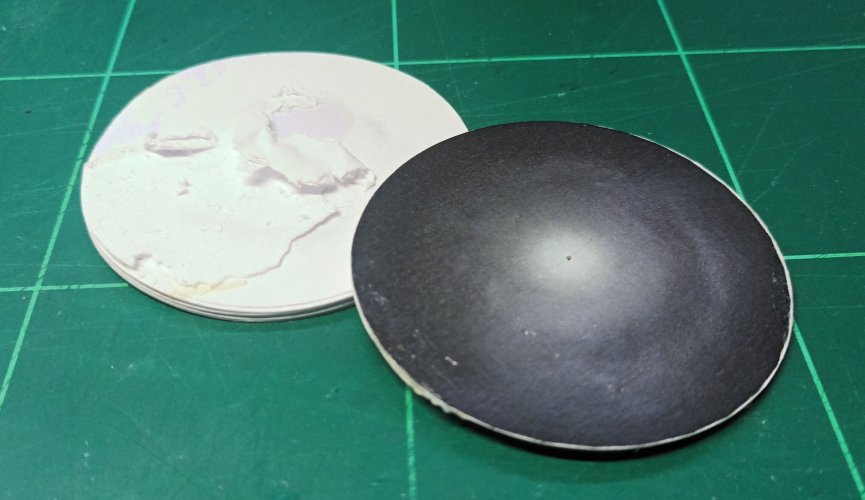
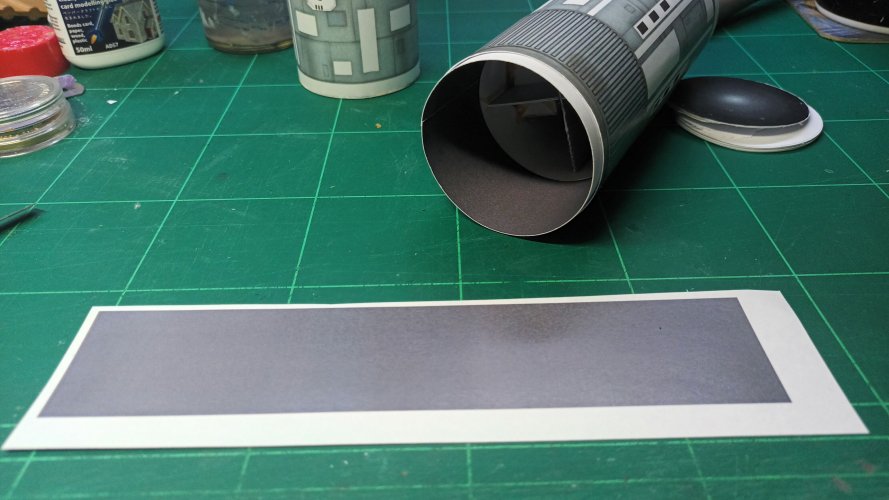
Back where we started today, the strip and the disc of the same colour now make sense.
The strip being an inner-liner to the rear of the main engine pod.
As the tolerance here was so tight, I could not fit the liner anyway, without slicing the edges off the thruster fins. I'm probably just going to paint the inside black instead of faffing about!
Easy when you know how, as the saying goes... The thrusters fit with millimetre precision.
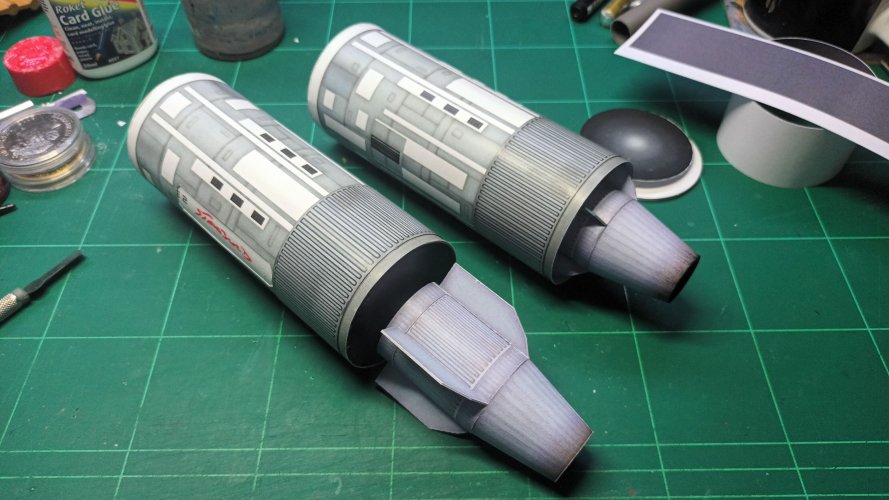
I will just be leaving these loose for the time being and fix them in later - NOTE the black disc has been re-inserted to the back of the thrusters.
ANOTHER BUMP IN THE ROAD FLATTENED, ITS TIME TO MOVE ONTO THE THRUST VECTORS WHICH SIT AT THE VERY END OF THE MAIN STRUTS...
THANKS FOR WATCHING AS ALWAYS
Well they certainly don't flush mount as I had thought - Also there was this rather telling piece of evidence left over...

As the thruster lay next to the main engine pod I knew there must be an answer...

Even vertical I knew they didn't look right...

After a trawl of copious websites, there was a eureka moment when I found the missing link. 'REAR VIEW'
The CGI picture below was missing from my files, and thus shows the thrusters fit 'INSIDE' the pods!!!
Remembering back to all the bloody hassle I had with these at the start of the build, I really didn't want to start building these again..!

Surgery time!
I managed to lift of the lip around the edge and pry the circular sections off.

With all the skills of a blind butcher, the very top layer was free from the others

Just the coloured portion was kept.

Back where we started today, the strip and the disc of the same colour now make sense.
The strip being an inner-liner to the rear of the main engine pod.
As the tolerance here was so tight, I could not fit the liner anyway, without slicing the edges off the thruster fins. I'm probably just going to paint the inside black instead of faffing about!

Easy when you know how, as the saying goes... The thrusters fit with millimetre precision.

I will just be leaving these loose for the time being and fix them in later - NOTE the black disc has been re-inserted to the back of the thrusters.

ANOTHER BUMP IN THE ROAD FLATTENED, ITS TIME TO MOVE ONTO THE THRUST VECTORS WHICH SIT AT THE VERY END OF THE MAIN STRUTS...
THANKS FOR WATCHING AS ALWAYS
That is coming together nicely! This is a very informative thread. I like how you are addressing each issue as you are coming across each one.
This model has its fair share of 'ISSUES' the pattern/model-makers words continues to echo in my mind as I proceed...That is coming together nicely! This is a very informative thread. I like how you are addressing each issue as you are coming across each one.
He said...
"I would suggest only create this model if you are more advanced at paper modelling as it will frustrate you!"
Hopefully by showing all my mistakes and issues, will help future builders and maybe by the end of this one I shall be an 'ADVANCED MODELLER'
This is the reason why I (and the forum as a whole) promotes build threads. The hope is always to inspire and help those who see threads like this and answer any questions that they may have about the template.This model has its fair share of 'ISSUES' the pattern/model-makers words continues to echo in my mind as I proceed...
He said...
"I would suggest only create this model if you are more advanced at paper modelling as it will frustrate you!"
Hopefully by showing all my mistakes and issues, will help future builders and maybe by the end of this one I shall be an 'ADVANCED MODELLER'
KEEP UP THE GREAT WORK!
Those 'foxes' are very cunning, they usually take 2 to 3 chickens to fix...You foxes make the model appear excellent. Usually, tabs cause this kind of accrued intolerance. You have fixed all the problems you have come across excellently.
Praise indeed, I'll add that to 'award winning' (one model at local level!) I wonder how far it is to the top and what comes after advanced?In my opinion you are already an advanced builder.

