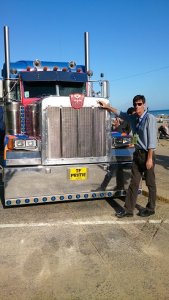
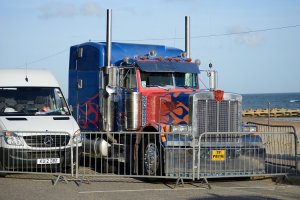
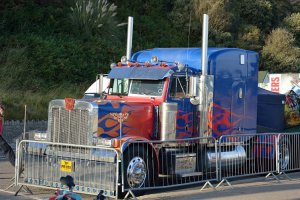
Good to hear! Please share some pictures when you get her all set up. She's a beautiful piece of art!At the moment she is still in her packing boxes awaiting me to fit a shelving unit for the display case.
I'll get there at some point....

Warming up, with Optimus Prime.
- Thread starter DanBKing
- Start date
You are using an out of date browser. It may not display this or other websites correctly.
You should upgrade or use an alternative browser.
You should upgrade or use an alternative browser.
Plodding along ....
I prepared the last parts to complete the rear end of the model and also the chassis mounts for the fuel tanks.
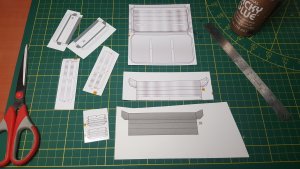
My knowledge of truck parts is limited, but I made up the mounting rails for the 'box/plate thingy with a storage box thingy hanging off it thing', that hangs off the back of the sleeper cab!
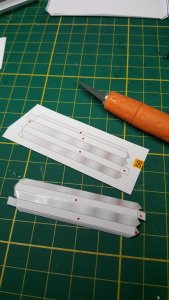
A little trick I use when making up long square tube type parts, is to glue the long edge seam with the parts folded in the flat. Once the seam has tacked up, but before it dries, I apply light pressure across the folded seams and the box shape will pop into shape. Do this before the glue dries, because if you had any glue seep into the part from the glued tab, the part will glue itself together.
Doing it this way, I find once the ends have been glued, you end up with a nice straight part.
I used the same method for the other parts
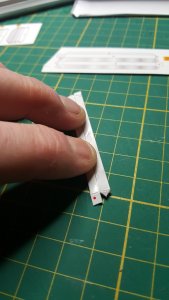

The mounting rails and two parts on the other face were attached in the flat, before the 'box/plate thingy with a storage box thingy hanging off it thing' was made up.
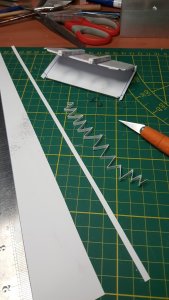
I measured the distance between the inner rear and front faces of the 'thing', and cut out two strips of spare card to this measurement, 4mm wide. The strips were then roughly folded into a zigzag pattern. I glued the long edge of the 'thing' part in the same way as above. I glued up one of the side faces but left the other unglued. I then stuffed the two zigzag strips into the cavity from the unglued side. I gave the part a good shake to spread the zigzags a bit and then glued up the remaining edge face.
Hopefully this will prevent the main faces of the 'thing' from bowing. Also it made the part stronger for applying pressure when attaching the part to the model
I could of laminated the inside with card instead, I suppose, but I didn't want to make the part too heavy.
It came out nice and strong in the end.

Now it's time to start gluing on all the sub-assemblies to the model......
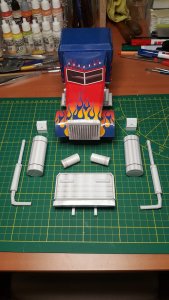
I glued the 'thing' to the back of the sleeper cab. I stood the model on its nose and let gravity hold the 'thing' in place while the glue dried.
'The Beast' watched on with the desire to visit the worktop.......... No chance!
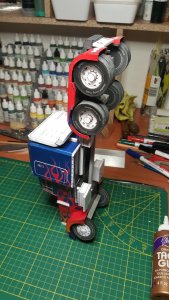
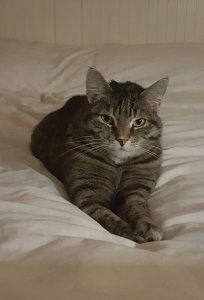
Once the 'thing' was dry, I glued on the storage boxes in front of the rear wheels, completing the rear of the model....
Nice a$$ !!!
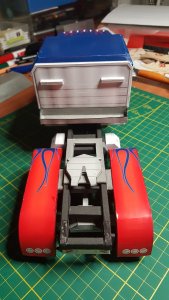
The fuel tank mounts were then attached to the chassis and then the exhaust stacks were attached. Nothing special there.
Finally, the fuel tanks were attached, completing this stage of the build.
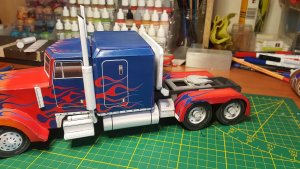
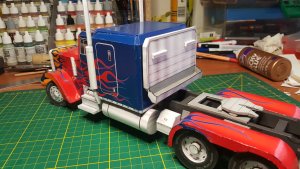
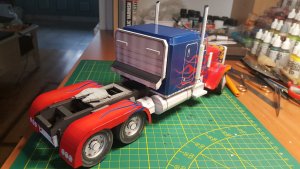
Optimus is now starting to look the part .....
I'm not happy with the roof sides of the sleeper cab though. I'll have to try and sort them somehow....
In the next, and I think, final build post of this thread, I will be finishing the front end of the model, including the cab running lights, sun visor, rear-view mirrors, headlights and front bumper......
See ya'll then !!

I prepared the last parts to complete the rear end of the model and also the chassis mounts for the fuel tanks.

My knowledge of truck parts is limited, but I made up the mounting rails for the 'box/plate thingy with a storage box thingy hanging off it thing', that hangs off the back of the sleeper cab!


A little trick I use when making up long square tube type parts, is to glue the long edge seam with the parts folded in the flat. Once the seam has tacked up, but before it dries, I apply light pressure across the folded seams and the box shape will pop into shape. Do this before the glue dries, because if you had any glue seep into the part from the glued tab, the part will glue itself together.
Doing it this way, I find once the ends have been glued, you end up with a nice straight part.
I used the same method for the other parts


The mounting rails and two parts on the other face were attached in the flat, before the 'box/plate thingy with a storage box thingy hanging off it thing' was made up.
I measured the distance between the inner rear and front faces of the 'thing', and cut out two strips of spare card to this measurement, 4mm wide. The strips were then roughly folded into a zigzag pattern. I glued the long edge of the 'thing' part in the same way as above. I glued up one of the side faces but left the other unglued. I then stuffed the two zigzag strips into the cavity from the unglued side. I gave the part a good shake to spread the zigzags a bit and then glued up the remaining edge face.
Hopefully this will prevent the main faces of the 'thing' from bowing. Also it made the part stronger for applying pressure when attaching the part to the model
I could of laminated the inside with card instead, I suppose, but I didn't want to make the part too heavy.
It came out nice and strong in the end.


Now it's time to start gluing on all the sub-assemblies to the model......

I glued the 'thing' to the back of the sleeper cab. I stood the model on its nose and let gravity hold the 'thing' in place while the glue dried.
'The Beast' watched on with the desire to visit the worktop.......... No chance!


Once the 'thing' was dry, I glued on the storage boxes in front of the rear wheels, completing the rear of the model....
Nice a$$ !!!

The fuel tank mounts were then attached to the chassis and then the exhaust stacks were attached. Nothing special there.
Finally, the fuel tanks were attached, completing this stage of the build.


Optimus is now starting to look the part .....
I'm not happy with the roof sides of the sleeper cab though. I'll have to try and sort them somehow....
In the next, and I think, final build post of this thread, I will be finishing the front end of the model, including the cab running lights, sun visor, rear-view mirrors, headlights and front bumper......
See ya'll then !!

Last edited:
- Apr 5, 2013
- 13,878
- 10,220
- 228
I know I wrote this before, but this model looks way better than I thought it would. I see what you mean about that cabin sides, you'll undoubtedly sort that out. This model was a great choice. Great job!! 
Your cat looks exactly like the Kitten I just rescued. I named him Perseus (Percy for short) He has cost me $2000 dollars so far, he has some kind of problem (blockage) in his intestine. Getting ready for some serious work. You get to loving these animals, I told myself I wouldn't spend more than a couple of $100 bucks on him, yeah right. I had a cat (Kitty Carlisle was her name, and her offspring "Rambette", for former lived 23 years, Carlisle lived for 25 years) Best friends you could ever have.
Your cat looks exactly like the Kitten I just rescued. I named him Perseus (Percy for short) He has cost me $2000 dollars so far, he has some kind of problem (blockage) in his intestine. Getting ready for some serious work. You get to loving these animals, I told myself I wouldn't spend more than a couple of $100 bucks on him, yeah right. I had a cat (Kitty Carlisle was her name, and her offspring "Rambette", for former lived 23 years, Carlisle lived for 25 years) Best friends you could ever have.
You're a good man @zathros ! It makes me happy when people rescue cats! There'll be a special place in heaven for you.
Great job on this!! I still have to try a photo paper glossy model. Did you watch ''WAR FOR CYBERTRON'' on Netflix? I found it entertaining. ( as for the tv cartoon, I only liked megatron, then Galvatron-LOL]
So, final update time!
I continued with building up the sub-assemblies for the front section of the model....
The running lights on the cab roof were cut out without any tabs or scored fold lines. I basically dumped a load of glue on the inside of the part and squished it into shape with my fingers....
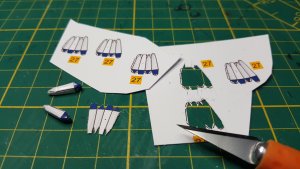
The mirrors were made up next and the sun visor was shaped..... The template calls for the mirror mounts to be double laminated, I didn't bother as I was already using thick card and didn't want them to look out of scale.
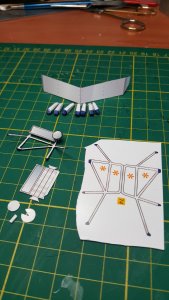
The running lights and mirror assemblies were attached to the model...
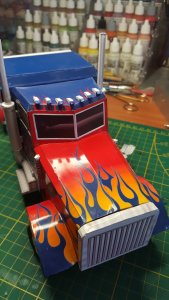

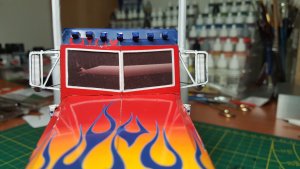
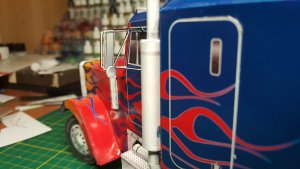
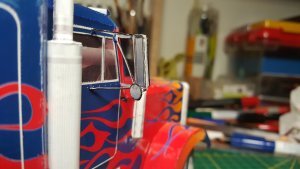
The sun visor and earlier assembled air filter canisters were attached...
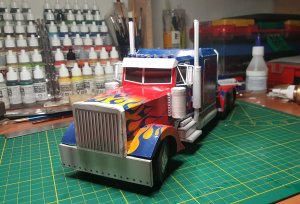
The headlamp and indicator assemblies were made up next. I cheated a bit with the headlights themselves, as instead of making them up with 3 separate parts, I just glued the lenses to the correct thickness of card and punched them out.....
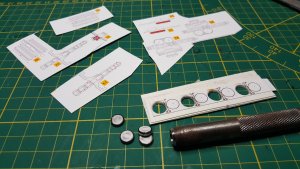
I spent some time repairing the sleeper cab roof joints, and realized where mistakes were made, both by me and the designer of the template.
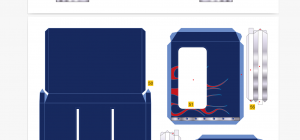
As I mentioned earlier in the build, the tabs at the top of the sleeper cab sides (part 51 in pic) should not be folded. That is INCORRECT! These tabs are indeed folded.
Where the problem lies is in the template..... The roof section (part 50) shows that the left and right edges have a fold line. THIS IS INCORRECT, and these lines should not be shown, as the roof is attached as one flat piece....
I did my best to sort out the mess and it didn't turn out too bad.
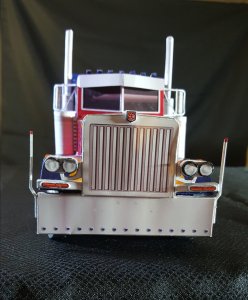
I attached the bumper, light assemblies to the front of the model to complete it.
I am going to build this model again in the near future. This particular model is going on display at my work.
I am not satisfied with the end result of the model and when I build it again for myself, I am going to use printable silver-coated card for the 'chrome' parts of the model, that will really make the whole model POP! Also, I have learnt a lot from this build and will use this info to improve the template. There are a lot of errors in this model........ I might even design a cab interior for the 'improved' version...... we will see.....
But for now, I have to put up with this version.....
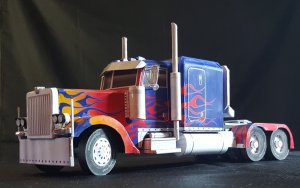
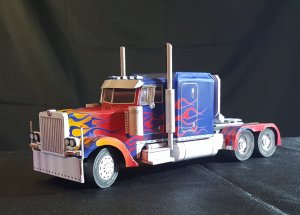
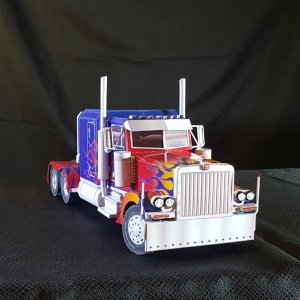
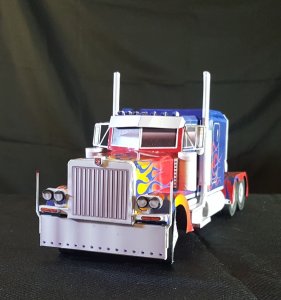
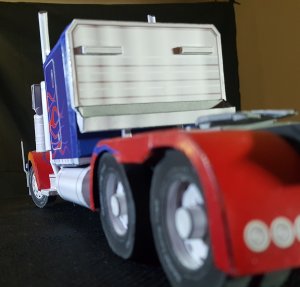
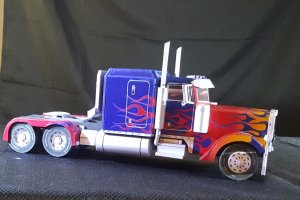
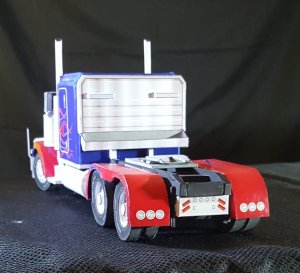
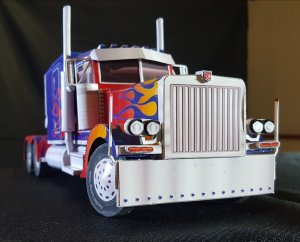
So, here are the beauty shots of the finished model..... (Note: I still have to spray a good few coats of gloss clear-coat onto the model, but due to the below-zero weather here at the moment, that is not possible to do as I can only spray outside where I currently live......)
ENJOY!
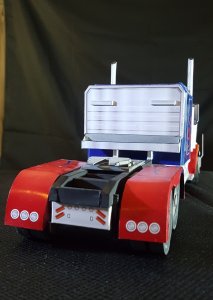
See you all around soon!!

I continued with building up the sub-assemblies for the front section of the model....
The running lights on the cab roof were cut out without any tabs or scored fold lines. I basically dumped a load of glue on the inside of the part and squished it into shape with my fingers....

The mirrors were made up next and the sun visor was shaped..... The template calls for the mirror mounts to be double laminated, I didn't bother as I was already using thick card and didn't want them to look out of scale.

The running lights and mirror assemblies were attached to the model...


The sun visor and earlier assembled air filter canisters were attached...

The headlamp and indicator assemblies were made up next. I cheated a bit with the headlights themselves, as instead of making them up with 3 separate parts, I just glued the lenses to the correct thickness of card and punched them out.....

I spent some time repairing the sleeper cab roof joints, and realized where mistakes were made, both by me and the designer of the template.
As I mentioned earlier in the build, the tabs at the top of the sleeper cab sides (part 51 in pic) should not be folded. That is INCORRECT! These tabs are indeed folded.
Where the problem lies is in the template..... The roof section (part 50) shows that the left and right edges have a fold line. THIS IS INCORRECT, and these lines should not be shown, as the roof is attached as one flat piece....

I did my best to sort out the mess and it didn't turn out too bad.
I attached the bumper, light assemblies to the front of the model to complete it.
I am going to build this model again in the near future. This particular model is going on display at my work.
I am not satisfied with the end result of the model and when I build it again for myself, I am going to use printable silver-coated card for the 'chrome' parts of the model, that will really make the whole model POP! Also, I have learnt a lot from this build and will use this info to improve the template. There are a lot of errors in this model........ I might even design a cab interior for the 'improved' version...... we will see.....
But for now, I have to put up with this version.....
So, here are the beauty shots of the finished model..... (Note: I still have to spray a good few coats of gloss clear-coat onto the model, but due to the below-zero weather here at the moment, that is not possible to do as I can only spray outside where I currently live......)
ENJOY!


See you all around soon!!

You complain about this not being good enough, and to me it looks AWESOME.
You complain about this not being good enough, and to me it looks AWESOME.
Thanks!
Beauty is in the eye of the beholder, I guess.....
@DanBKing If there is one lesson that I can take from this hobby as being paramount (and yes, I have learned a great deal from this hobby), is that we are our own worse critics. We always see all of our own flaws, where others do not.
You have done a FANTASTIC JOB on this project!
You have done a FANTASTIC JOB on this project!
Excellent work on this project! I will second what @Rhaven Blaack said, we are our own worst critics. Our flaws will always stand out to us, but we eventually come to like them -- and sometimes admire them!
- Apr 5, 2013
- 13,878
- 10,220
- 228


