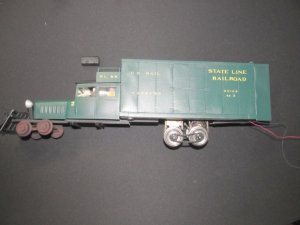
reviving an old G scale project!

Bill Nelson

Well-Known Member
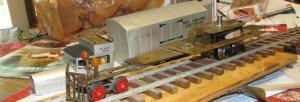
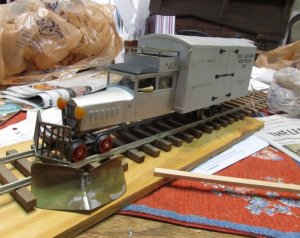
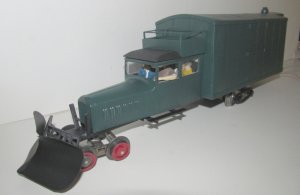
SML Goose#2 drive.jpg SMLgoose#2-1.jpg SMLgs#2whlhledt.jpg One of my friends is planning a g scale garden railway. Years ago my dad had one, and I started to kitbash a RGS Goose #2 for him.
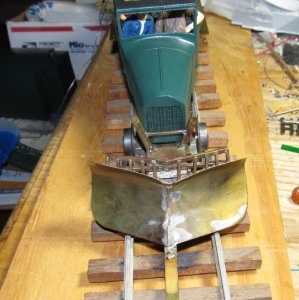
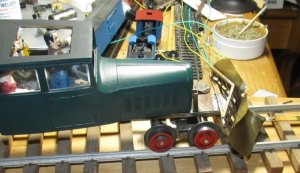
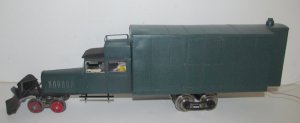
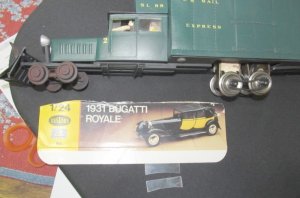
I used a plastic kit for a Bugatti limosine as a start, scratchbuilt the frame and the grille, a snowplow, and the frieght body. I stuck a couple NWSL magic carpets together to make a power truck.


As I was getting close, I found out that my Dad had dissasembled his outside RR, in favor of an indor #1 gauge tinplate RR using a bunch of stuff he'd collected over the years. He was going to find me a tinplate mechanism for the goose, but it never happened.

As my friend contemplates an outdoor RR, I'm studying the old goose #2, to see what it would take to set it up for battery power and R/C. O studied the G/ O/ &S sub forum, and they don't got much G (I prefer the 1-22.5 Fn3- but the goose was built before I knew about that). In anycase, I'm posting progress, or at least thoughst about progress, on a project that has been dormant for 20 years!

Here is the goose, dusted off! I have loose pieces in a box somewhere, a cow catcher and a snow plow scratched in brass, possibly other stuff, after so much time it is hard to remember.


My Ho stuff is in the logging & Minning area under
icon1.gif
Eastern Tn logging on the DG CC & W RR 1928

there is some narrow gauge stuff in there too

Bill Nelson
 
Last edited:

Bill Nelson

Well-Known Member
The Buggatti kit was the only thing I could find with a long enough hood. I had to cut off about eight or ten louvers to get the hood correctly sized. and then had to remove every third louver to get it to look right.


I didn't have drawings, I worked from a photo. I guesstimated the dimension of something, I think it was the width of the metal sheeting on the frieght body, based on the size of something else in the photo I used (not even sure what photo I used now), and based everything else on that. when I got as far as I am now, I found a scale drawing, and frome beak to tailfeathers I was about four and a half inches off, so I quessed real well.


If you look on the model, behind at the back bottom of the coach portion, there is a semi circular patch, where I filled in part of the rear wheel opening with styreene. I worked like the devil to make that line dissapear, and couldn't. when I got beter information, I found out the Goose # 2 had that same line, in exactly the same place, for the same reason, so that was a very cool accident.

Bill Nelson
 

Bill Nelson

Well-Known Member
SML Gs #2 x1.jpg SMLA_! gs#2 X2.jpg SML Gs #2 x1.jpg SMLA_! gs#2 X2.jpg a little more work on the critter.

I am getting ready to send this animal to the paint shops, to paint it green, to match the sceme on my Hon3 goose that is lettered for the State line RR. the gooses were originality a dark color (hard to tell in black and white photos, but a friend who has scrapped paint on one, said the bottom layer was dark green similar to Pullman green, so that is what my eastern Tennessee Geese get.


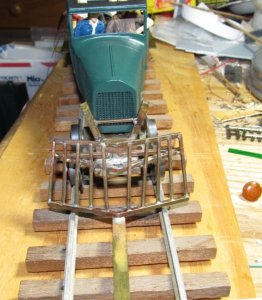
Before painting I had a headlight bracket that the solder joint had broken on, also I had never soldered the cow catcher on to the frame. that is done now. The angle is not ideal on it, but it has a solid solder joint, and I don't want to do anything that will weaken it. when I get the snowplow mounted, the angle of the cowcatcher won't show anyway.


as well as finding a solid way to mount the snowplow, I need to design and build some running boards before the frame gets painted black.
 
Last edited:

Bill Nelson

Well-Known Member
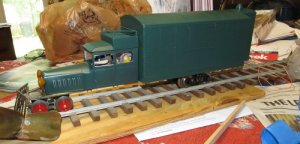
SMLA-1 grn gs #2a.jpg SMLA-1 grn gs#1.jpg SMLA-1 grn gs #2a.jpg Its green

its green now!


I broke the cowcatcher trying to adjust it for the plow, more soldering to do before I can paint the frame.

here is a link to a video of the mechanism

 
Last edited:

Bill Nelson

Well-Known Member
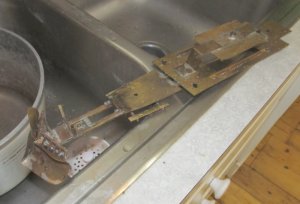
SMLA-1Gs lwr snpl brkt1.jpg SMLA-1 gs lwr snplw brkt #2.jpg Smla-1gs snwplw lwr brkt #3.jpg SMLA-1  GS frmrdt ro pnt.jpg SMLA-1Gs lwr snpl brkt1.jpg SMLA-1 gs lwr snplw brkt #2.jpg Smla-1gs snwplw lwr brkt #3.jpg SMLA-1  GS frmrdt ro pnt.jpg frame work

I got the cow catcher soldered back on to the frame, and at an able closer to what it should be, I was happy to get that done without a disaster (the cow catcher is soldered up from about twelve different pieces of brass structural shapes, so I was relived to get it soldered back on to the frame without it coming all apart.


that success made me a little braver, and I soldered a brass strap to the bottom of the cow catcher to support the snow plow, and soldered the front of the snow plow to it, before trimming it to fit. I then made a small bracket to hold the top of the snow plow in place, and soldered it in place, so the snowplow was secured at the top and the bottom. I then soldered it to one of the vertical members of the cowcatcher on the left and right side.


after that I added some brackets for foot boards, and the foot boards them selves took the frame to the sink, where it got dunked in boiling hot water with detergent in it, and then got rinsed. after it got dry I got a shot of gray auto body primer, and the some satin black.


I can't find my stash of dry transfers, I'm hoping I have some yellow or gold letters that will still work this really needs something to contrast with the green, and let some of the details show better.

I need to paint the headlights and get them on their brackets, they are cast of clear epoxy, and the idea was to light them with mini mag bulbs . I still have the bulbs, but the headlights have yellowed so much in the twenty years this project has been shelved that the effect won't be anywhere near impressive
 
Last edited:

Bill Nelson

Well-Known Member
SMLA-1 gs #2  w  pnted frm 2a.jpg SMLA_1 gs #2 w pntd frm #1.jpg the painted frame is on!

The frame is back on and painted. the RGS silver paint job had black letters and cargo hinges and clasp. I will be going with gold r yellow letters not sure if I'll do yellow hinges, as I don't like the look my yellow paint has on this color green, so I may try something else to make the hinges and hasp stand out.


I have to do some touch up around the driver's open window. I had to mask to keep from painting the driver and dash green , and some silver shows around the driver door window opening as a result.


If I can find my dry transfer stash, and they haven't died of old age, I will try to mirror the RGS lettering placement one this model, as it gets painted for the State Line railroad.


The front truck needs to be painted as well.
 
Last edited:

Bill Nelson

Well-Known Member
SMLA-1  gse w  ltrs 1:2 don3.jpg letters half way done

I have the lettering half way done, and I have ordered a radio and some batteries, once those come in I can start making new and different mistakes with this old model.

I painted the front truck, unfortunately I was painting the possum Hollow Utility District's water tower at the same time, and I got carried away with the rust, so it will have to get redone. I kind of like it and am tempted to do the same to the frame, but then I'd have to weather the body too, and I would probably overdo it


Bill Nelson
 
Last edited:
Bill Nelson

Well-Known Member
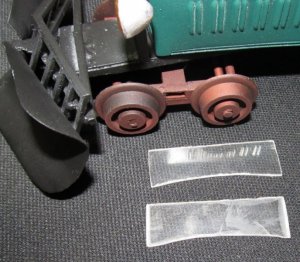
SMLA-1  GS ktbsh prts.jpg SMLA-1  GS ktbsh prts.jpg New windsheild

Up briefly from my daytime sleep period ( my internal clock is all messed up from working nights), I fabricated a new windshield; the original had some sctatches and had been damaged by solvent glue.

The second windshield I fabricated out of a piece of an old cassette tape box. the material is very brittle, but it reflects well, and is about the thickness I wanted. Note the reflections of the hood louvers at the top of the new windshield in the photo.


I'll keep the old one as a reference in case the neww one comes out and gets lost, as it is a perfect fit. Making the new one was relatively easy. making the first one years ago was a ***** trying to get the shape just right.


also in a box of parts for this I found a piece of the box the car kit I used to kitbash the cab came in.
 

Attachments

  • SMLA-1 GS rplcmnt  windsheild.jpg
    SMLA-1 GS rplcmnt windsheild.jpg
    192 KB · Views: 24
Last edited:

Bill Nelson

Well-Known Member
SMLA-1 ltring processs gs 2.jpg SMLA-1 gs2 wndshld #  G T a.jpg SMLA-1 GS 2 lettered..jpg lettering and gas tank

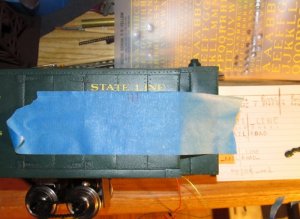
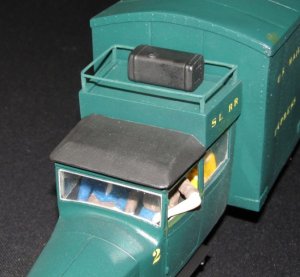
I got one side of the goose's lettering finished, and I have dug out and repaired the gas tank I made 20 something years ago, and I got the new windshield in place.

Note the masking tape I use to get the lettering straight has marks it show where the center is for centering the letters, also, before using it, I have stuck it on the leg of my clean blue jeans and pulled it off several times, so the stickiness is reduced to limit the danger of the masking tape pulling off some of the green paint, exposing the old silver paint from RGS paint scheme it wore when I was originally building it for my Dad's railroad, many long years ago.

for now the gas tank is just sitting there, I need to decide if I'm going to glue it in place. the deck of the raised section of roof is brass, and is just a press fit into the rest of the roof, so it should be possible to remove it and drill holes through it and screw the gas tank in place, if I don't want to glue it in place.


a radio has been ordered!
 
Last edited:
Top