Mini Cooper ‘67 Monte Carlo

RichRod

Member
Nov 19, 2022
24
77
15
52
Mifflinburg, PA
As mentioned on my intro thread, I’ve selected what will by my first paper model:

Found this on one of the sites that @Revell-Fan linked
papermau.blogspot.com

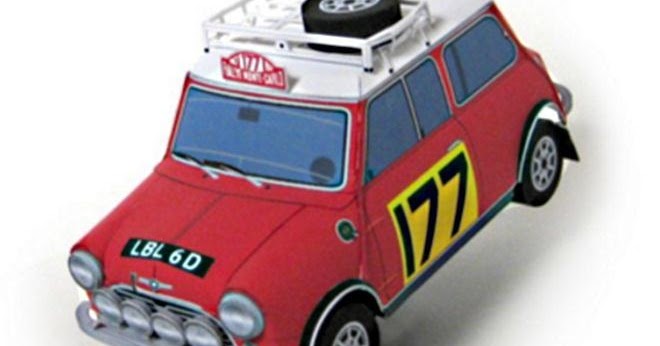
1967`s Mini Cooper Monte Carlo Paper Model - by Takayoshi Ichiyama

Free Original and Exclusive Paper Models and the Best, Rare and Unusual Free Papercrafts of All the World!
papermau.blogspot.com

Just two sheets of parts. Looks like a good place to start.

I have some real live pictures of this car I can use for reference. The dealership where I used to have my MINI serviced had a 1967 Monte Carlo replica in the showroom.


BA9237F2-6929-4E73-82C1-FEB8A8DAB0C4.jpeg

D9FA34BE-B522-4A21-B303-48A9A32E9F8B.jpeg

81FA635D-504D-4E8B-A6CC-B5266B7CAEB9.jpeg


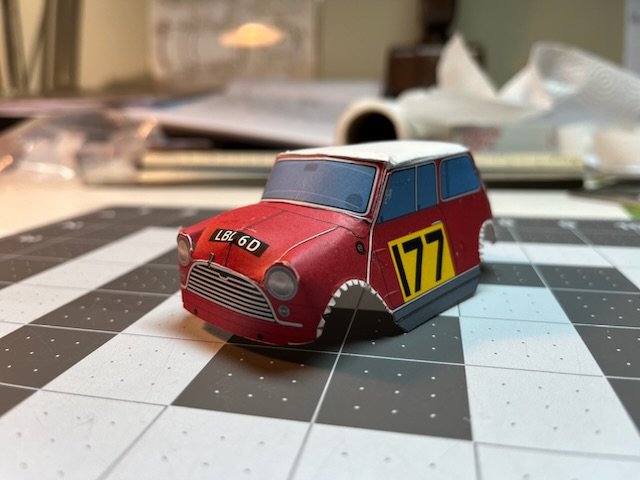
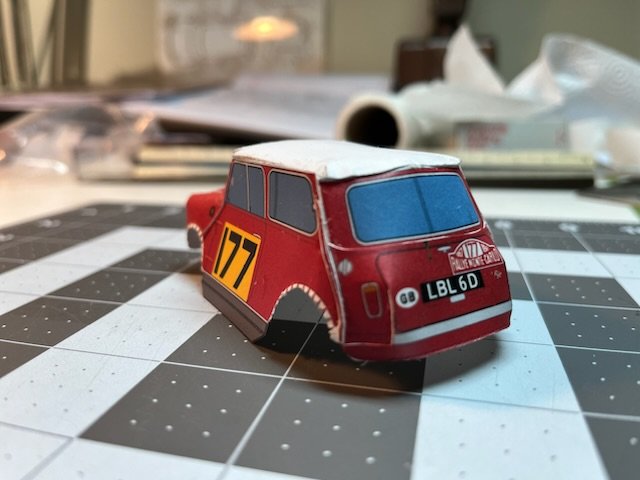
I started today with the Main Body and Hood. After figuring out a little of the instructions (in Japanese, I think), which colored lines mean scoring on the front and which color means score in the back, I got to work: cut and shaped the hood and glued the hood to the main part of the body.

notes so far:
This Mini is really Mini. A slightly larger scale may have been a better choice for a first build.
the 65lb paper seems to be a good choice.
Blue painters tape used to help alignment of back side scoring pulled off a bit of ink off the front side.
Lots of complex curves on this model. But I think I’m doing OK so far.
I’m not going to be too hard on myself on this first model.

bWyAK7Yh.jpg
 
Last edited:

zathros

*****SENIOR ADMINISTRATOR*****
Staff member
Administrator
Moderator
Apr 5, 2013
13,498
9,549
228
Cutting the template clean, like you have is probably the single most important step. Some people (like myself0 cut off the tabs, and use strip's instead. This keeps the adjoining part on the same plane, and makes for tighter seams. :)
 
Last edited:
  • Like
Reactions: RichRod

RichRod

Member
Nov 19, 2022
24
77
15
52
Mifflinburg, PA
……and use stri's instead. This keeps the adjoining part on the same plane, and makes for tighter seams. :)
Zathros, would you mind elaborating on this or link to a thread so I can get a better understanding of this?

Oh, I think I get it. Cut the tabs off then use a small piece of paper to glue the two pieces underneath. In this case, I could have done that to keep the cut edge of the hood from showing and that cut edge would have ended up in the same plane as the top of the rounded-over fender. Good tip. Thanks.
 
Last edited:
  • Like
Reactions: mijob and zathros

zathros

*****SENIOR ADMINISTRATOR*****
Staff member
Administrator
Moderator
Apr 5, 2013
13,498
9,549
228
Exactly. I don't want to be overbearing, so sometimes I don't say stuff when maybe I should. The best way to learn is to do. You can easily fix the hood on your car by cutting the center along the white wedge, trim off the white, and locate it from the backside, with a strip of paper. The nice thing about paper models is they are very forgiving, and in a worse case scenario, you just print out another page of parts. Most people when start to get ahead cut off the tabs. This allows for compound curves to form, and who cares how it looks underneath, you never see that side. When you cut off the tabs, you glue one half of the strip, then attach the mating piece dry for fitting. Once your happy, a little glue, and your set.

I made a Lotus Europa for my Flight Instructor's son over 20 years ago. This young man treasured it. It's so weird to go over his house, and see this paper model sitting on his shelf, and his father told me he doesn't let anyone touch it. He was so young when I made it for him, I figured it would last a couple of days. Paper models make great gifts, especially when people see how much effort went into making them. There are so many subjects to make, most which are not available in any other medium. :)
 

RichRod

Member
Nov 19, 2022
24
77
15
52
Mifflinburg, PA
I’ll take any constructive criticism you want to give. You won’t hurt my feelings. Just don’t be offended if I don’t go back and try to perfect everything.
 
  • Like
Reactions: zathros

zathros

*****SENIOR ADMINISTRATOR*****
Staff member
Administrator
Moderator
Apr 5, 2013
13,498
9,549
228
Believe you me, I am the farthest from a perfectionist you could imagine. You should see the guys who make derelect vehicle models, painted on rust, cars that look like real rust balls. It's a craft and art form. Mostly, it's whatever makes you happy. :)
 

micahrogers

Moderator "Where am I, and how did I get here?"
Staff member
Moderator
Jul 12, 2012
3,772
4,639
113
Shannon GA
Small steps, at first, then you learn to run, then to fly. This is looking great.
My first paper model was a tank, lots ot rectangular solids, very few curves.
 

Revell-Fan

Co-Administrator
Staff member
Administrator
Moderator
Aug 1, 2009
11,611
12,352
228
Vreden
1670263984243.png


:animated:

In CorelDRAW you can adjust the outlines of the parts so that they are behind the actual faces. That way you can cut off the outline completely without compromising the shape of the part. In the end you get a clean part without any lines around it. I will test this procedure on the big Vipers. ;)
 
  • Like
Reactions: mijob and RichRod

RichRod

Member
Nov 19, 2022
24
77
15
52
Mifflinburg, PA
Had a little time to work on this today. Folding over and glueing the roof corners did not go great. I rushed it, and it shows. I’m learning. No going back now. I am happy with the boot, mostly. Oh well, the body is done. Not sure when I’ll get some more done. Thanks for following along, fellas.

D3376092-8E30-45F1-B81B-604A582C3DC3.jpeg

A8907DB9-D7CC-4AEE-8A6F-AA756136BA5A.jpeg
 
Last edited: