Eldar Wave Serpent

silveroxide

Senior Member
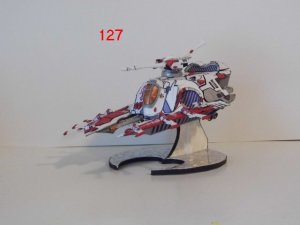
The weapons system looks FANTASTIC!!!

Overwhelming!

Thanks for looking in and for the comments guys. There are a few more techniques to come this way but be patient, they are almost here.


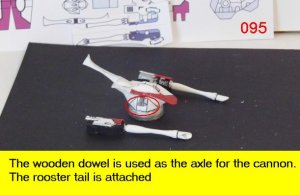
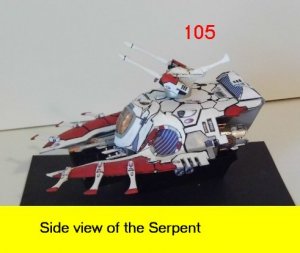
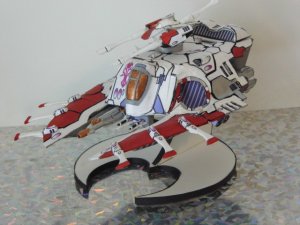
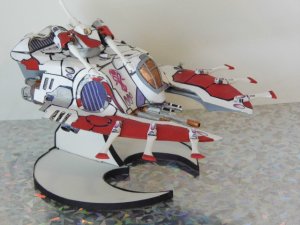
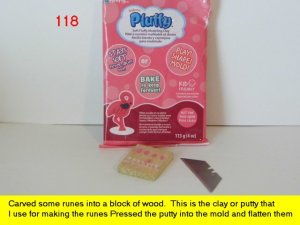
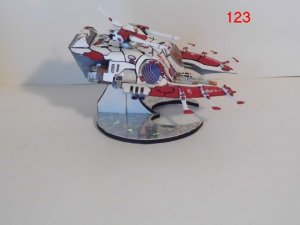
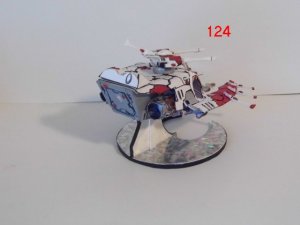
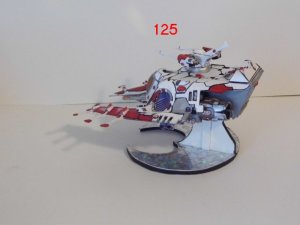
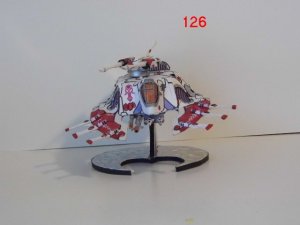
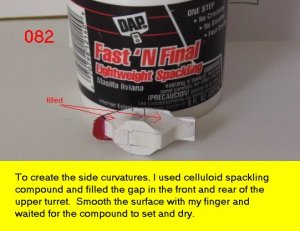
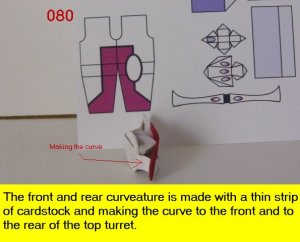
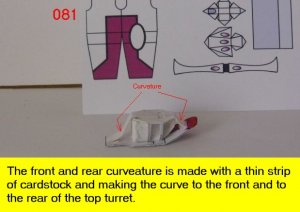
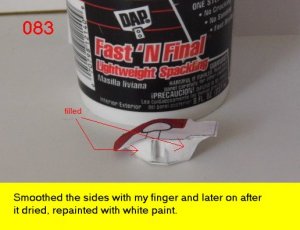
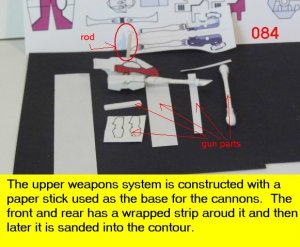
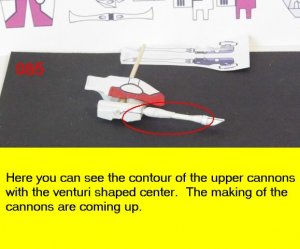
So here we have the making of the turret. Here I used the spacklling compound. This one depicted, is a celluloid base. There is another spackling compound but it is a putty base and stays soft. The sides will be placed on later in the build since I have to drill a hole and if the side was up, it could get damaged. The next posting will cover how the turret twin cannons are construted. Enjoy and see you all next posting.:wave:
 

Attachments

  • 078.jpg
    078.jpg
    54.2 KB · Views: 10
  • 079.jpg
    079.jpg
    49.7 KB · Views: 10
  • 080.jpg
    080.jpg
    46.7 KB · Views: 8
  • 081.jpg
    081.jpg
    45.6 KB · Views: 10
  • 082.jpg
    082.jpg
    49 KB · Views: 31
  • 083.jpg
    083.jpg
    36.9 KB · Views: 9
  • 084.jpg
    084.jpg
    58.9 KB · Views: 14
  • 085.jpg
    085.jpg
    42.8 KB · Views: 13

zathros

*****SENIOR ADMINISTRATOR*****
Staff member
Administrator
Moderator
Your kick butt, perfect instruction, excellently executed models, are starting to piss me off!! :)
 

silveroxide

Senior Member
Your kick butt, perfect instruction, excellently executed models, are starting to piss me off!! :)

As long as you do a number one, it is ok. You do a number two, I might start to worry about you.:twisted:


And now for more techniques and modeling tricks. The main housing of the cannons and the barrels are made by using regular bond paper. If you use heavier weight paper, it will tend to wrinkle and split. Be sure to glue all of the surface of the paper strip. If you use the glue sparingly, there will be dry spots and when you sand or file the part, it will rip apart at that point. It will tend to be messy, so keep a paper towel or rag handy to keep your finger glue free. If you do not keep your fingers clean, the excess glue will attach to the surface of the model and create smudges. Enjoy and see you all next posting.:thumb:
 

Attachments

  • 086.jpg
    086.jpg
    37.4 KB · Views: 9
  • 087.jpg
    087.jpg
    35.1 KB · Views: 7
  • 088.jpg
    088.jpg
    43.8 KB · Views: 9
  • 089.jpg
    089.jpg
    47.4 KB · Views: 66
  • 090.jpg
    090.jpg
    38.8 KB · Views: 10
  • 091.jpg
    091.jpg
    56.2 KB · Views: 9
  • 092.jpg
    092.jpg
    60.6 KB · Views: 60
  • 093.jpg
    093.jpg
    56.5 KB · Views: 63

silveroxide

Senior Member
Oh, man I'm so not worthy! What a great job!


Thanks for looking in, I am glad that you have enjoyed the thread. The finish is almost here. I have place the finished photos over at dakkadakka.

Here are some photos of the turret build. The eldar wave serpent by all accounts is finished at this junture but it needs more details. The plans do not call for a stand so that will be coming up shortly and the details for making the runes. Until then, see you all next posting.:thumb:
 

Attachments

  • 094.jpg
    094.jpg
    66 KB · Views: 12
  • 095.jpg
    095.jpg
    42 KB · Views: 10
  • 096.jpg
    096.jpg
    37.1 KB · Views: 12
  • 097.jpg
    097.jpg
    65.2 KB · Views: 12
  • 098.jpg
    098.jpg
    61.9 KB · Views: 14
  • 099.jpg
    099.jpg
    54.8 KB · Views: 11

Rhaven Blaack

!!!THE MAN BEHIND THE CURTAIN!!!
Staff member
Administrator
Moderator
That looks ABSOLUTELY AMAZING!!!
The amount of work that you have put into this model really paid off in HUGE DIVIDENS, and it show!!!
KUDOS TO YOU ON A FINE JOB WELL DONE!!!
 

silveroxide

Senior Member
That looks ABSOLUTELY AMAZING!!!
The amount of work that you have put into this model really paid off in HUGE DIVIDENS, and it show!!!
KUDOS TO YOU ON A FINE JOB WELL DONE!!!


Thanks for the kudos, but I still have a few more details and surprises coming up.

This is the section where I build the feelers. The plans have them being glued at the end tip, but I went and cut them of and made an extension for the ends. This part was laminated into a raised end at the glue point. it will help to hold the cover in place when it is placed on the wing connection point. The cover also was forced into a cup shape by using the tweezer point but a small rounded dowel or paint brush end could be used. I forgot to show the bottom support bracket but it helped in shaping the position for the feelers so that they will not droop.

Next on the build, will be a custom stand and finally the making of the runes.:thumb:
 

Attachments

  • 100.jpg
    100.jpg
    45.7 KB · Views: 6
  • 101.jpg
    101.jpg
    52.2 KB · Views: 7
  • 102.jpg
    102.jpg
    63.4 KB · Views: 6
  • 103.jpg
    103.jpg
    46 KB · Views: 10
  • 104.jpg
    104.jpg
    34.2 KB · Views: 7
  • 105.jpg
    105.jpg
    30 KB · Views: 65
  • 106.jpg
    106.jpg
    40.3 KB · Views: 6
  • 107.jpg
    107.jpg
    32.4 KB · Views: 105

zathros

*****SENIOR ADMINISTRATOR*****
Staff member
Administrator
Moderator
Oh, man I'm so not worthy! What a great job!

O.K., enough with the "I'm not so worthy" stuff, yes you are!:p

@Silver, I don't get how the texture of the part seems different once your magical fingers touch them. Are you using
VooDoo! :eek:
 

silveroxide

Senior Member
O.K., enough with the "I'm not so worthy" stuff, yes you are!:p

@Silver, I don't get how the texture of the part seems different once your magical fingers touch them. Are you using
VooDoo! :eek:

The wytches and warlocks use their mystic powers and help in construction.


Here is the part on the base construction. Enjoy and see you all with the next posting on the making of the runes. The photos are slightly off sequence but they are numbered.
 

Attachments

  • 108.jpg
    108.jpg
    25.7 KB · Views: 50
  • 109.jpg
    109.jpg
    26.8 KB · Views: 51
  • 110.jpg
    110.jpg
    24.2 KB · Views: 7
  • 111.jpg
    111.jpg
    23.1 KB · Views: 8
  • 112.jpg
    112.jpg
    40.6 KB · Views: 6
  • 113.jpg
    113.jpg
    25.4 KB · Views: 60
  • 114.jpg
    114.jpg
    39.2 KB · Views: 7
  • 115.jpg
    115.jpg
    33 KB · Views: 10
  • 116.JPG
    116.JPG
    176.9 KB · Views: 6
  • 117.JPG
    117.JPG
    175.6 KB · Views: 59

Zeebeest

New Member
Hi,

First of all, Very nice work!!!

Secondly, perhapse a dumb question, but do any of you paint the models or is that not done on card models.

Again, very nice work!
 

silveroxide

Senior Member
Hi,

First of all, Very nice work!!!

Secondly, perhapse a dumb question, but do any of you paint the models or is that not done on card models.

Again, very nice work!

Thanks for looking in and enjoying my works. As for your coloring question. Many here build their models from the plans and the only coloring they do, is to the edges to cover the white edges that show. For this there are many different techniques, I use acrylic paints but some use markers, felt pens, color pencils, or any medium that will work. Now as for myself, If you check out my build threads, the majority of them are hand painted using acrylic paints..


And now, the final sequence in the build thread. I hope that you have all enjoyed my build thread as much as I did in making it. If just one person learned something from my works, then it was well worth the effort. The next model is already in the works but I will not post until I am almost half way done with it. So until the next posting, enjoy and see you all around the forum.:wave::wave::wave:
 

Attachments

  • 118.jpg
    118.jpg
    46.9 KB · Views: 19
  • 119.jpg
    119.jpg
    58.9 KB · Views: 17
  • 120.jpg
    120.jpg
    55.1 KB · Views: 14
  • 121.jpg
    121.jpg
    38.1 KB · Views: 16
  • 123.jpg
    123.jpg
    30.8 KB · Views: 15
  • 124.jpg
    124.jpg
    26.8 KB · Views: 14
  • 125.jpg
    125.jpg
    29.9 KB · Views: 69
  • 126.jpg
    126.jpg
    28.3 KB · Views: 14
  • 127.jpg
    127.jpg
    28.4 KB · Views: 72
  • 128.jpg
    128.jpg
    29 KB · Views: 16
Top