D.H.82 Tiger Moth,in 1/32

Dagger

Active Member
20190526_093536.jpg20190520_125912.jpg20190521_074709.jpg20190521_074730.jpg20190522_071100.jpg20190522_073928.jpg20190523_203648.jpg20190524_222902.jpg20190524_222922.jpg20190525_133401.jpg20190526_093536.jpgGreetings, since I haven't published anything in a while, it's time to put something in.
This year I had a lot of sick time but with ups and downs I built several airplanes exclusively, I know that science fiction is the dominant theme here and there are fabulous things and in aviation you can't see Many publications so I will try to contribute a little.
This is a design by Gerard Methorst, with whom I maintain a cordial relationship and as I am one of the few lucky ones who receives their designs it seems that lately I am the only one who builds and publishes their designs. A shame because they are very good designs and although sometimes you have to make adjustments and there are few instructions the result is great.
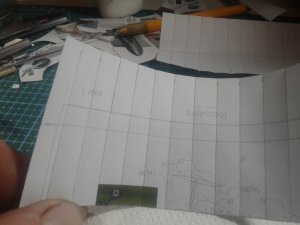
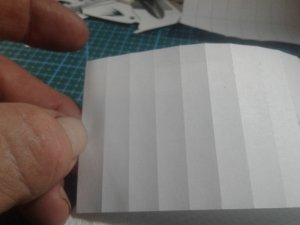
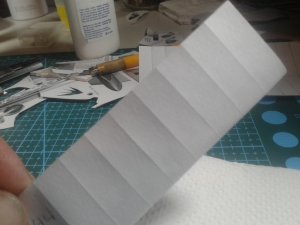
A while ago I commented that I was thinking about releasing his designs again, but to date he has not done so. This is a Nice representation of the famous and elegant Tiger Moth. Here the process.
 

Ponytail2

Member
Very Good!
Love Gerards designs but haven't build enough of them having too much to do...
Maybe this will inspire me, again.
 

Dagger

Active Member
Very Good!
Love Gerards designs but haven't build enough of them having too much to do...
Maybe this will inspire me, again.
Thank you very much Willem! I have seen that you are busy in another category, I remember your magnificent work in Gerard 262. Now I am with the Meteor, another great Gerard design.
 

zathros

*****SENIOR ADMINISTRATOR*****
Staff member
Administrator
Moderator
It is an elegant design. I am lucky to have downloaded it a long time ago. The way you creased the paper to make the wings look like canvas stretched over the wing formers adds great texture. You really did a great job on a great model. Thanks for posting his elegant bird. ;)
 

Dagger

Active Member
Thank you very much everyone for your kind comments, like or just stop by and look, they are very cordial.
 

Dagger

Active Member
It is an elegant design. I am lucky to have downloaded it a long time ago. The way you creased the paper to make the wings look like canvas stretched over the wing formers adds great texture. You really did a great job on a great model. Thanks for posting his elegant bird. ;)

Thank you very much zathros. The burnished by the reverse of the wings gives it another aspect and is simple, although it takes a long time to mark the lines behind and the pressure to burn has to be smooth.
 

Ponytail2

Member
Thank you very much zathros. The burnished by the reverse of the wings gives it another aspect and is simple, although it takes a long time to mark the lines behind and the pressure to burn has to be smooth.

Maybe you can explain and enlight some about the techniques and tools you used for this. Never done this, but think to kow how... But or the less experienced among us perhaps a big help.
 

Dagger

Active Member
Maybe you can explain and enlight some about the techniques and tools you used for this. Never done this, but think to kow how... But or the less experienced among us perhaps a big help.

Tonight when I return home I will take some time to explain the Willem process. It is very simple and the result is very good.
 

zathros

*****SENIOR ADMINISTRATOR*****
Staff member
Administrator
Moderator
One method is to make the lines and use a dull pizza cutter (round wheel kind), just don't push so hard that it cuts. You need to have a cutting mate behind the piece. :)
 

Dagger

Active Member
Greetings.To simulate the internal ribs on the wings use this simple and very effective method to copy it I do not remember who or where.
It consists simply in burnishing or marking the position of the ribs on the inside of the wing.
The most laborious is transfer the printed external lines to the internal part of the piece, then the rest is easy, the piece is placed on a soft surface, for example a cloth or tissue paper, use the latter, eight paper cloths give a good soft mattress.
We support a rule on the lines and with the chosen tool we give one or more passes on the line exerting a slight pressure that varies depending on the paper we are using, thinner less, thicker more pressure.
Be careful, if you press a lot We cut the piece.
Use the clamp that is seen in the photo because it was the best thing I had, the cutter recommended by Zathros I think it would work very well and better.
That's it, a simple system, a little extra work but I think it was It's worth it.
 

Attachments

  • 20191119_210446.jpg
    20191119_210446.jpg
    750.6 KB · Views: 3
  • 20191119_210512.jpg
    20191119_210512.jpg
    606 KB · Views: 3
  • 20191119_210546.jpg
    20191119_210546.jpg
    662.1 KB · Views: 3
  • 20191119_211925.jpg
    20191119_211925.jpg
    585.9 KB · Views: 3
  • 20191119_212049.jpg
    20191119_212049.jpg
    565.2 KB · Views: 3
  • 20191119_212057.jpg
    20191119_212057.jpg
    472.4 KB · Views: 3
  • 20191119_212151.jpg
    20191119_212151.jpg
    551.6 KB · Views: 3

zathros

*****SENIOR ADMINISTRATOR*****
Staff member
Administrator
Moderator
One other thing, if you are going through this level of detail, make sure the lines are in scale with the side of the formers,something I noticed on Biplanes at Old Rhinebeck Aerodrome, home of the oldest flying aircraft in the U.S.A.. Look closely at the pic below, and what appear as lines is actually one side of the flat of the wide of the wing former, which you can see at the other end of the wings. Enlarge picture from thumbnail to see detail, it's a big pic. :)

D71_8094.jpg
 
Top