hello sudsy long time no see. first of all wow dude this papercraft is looking really good hope you can finish it. got a some questions and highlights about your build or papercraft
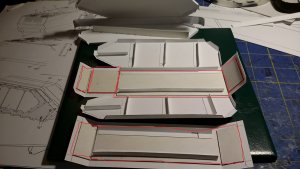
1) it has my attention that you alongside of your sheat paper beams to reinforce the main body of the papercraft you put some carboard sheets in some sections how you do that im interested in that (see picture)
2) not need to question how to do radiators the pictures are enough tutorials they look awesome.
3) still looking for a screw puncher to do holes in the exhaust like you do
above all else again the model looks good are you plan to paint it?