So, I've been ruminating about what kind of sheet metal design methods I can apply to my paper model building. Some of the bends, folds, and rolls sorta work out, but not always. Then I ran across something that really did transfer quite well.
While I've employed some of the methods used here before (namely the folded gussets and support shapes such as the triangle, sorry I don't remember who wrote the tutorial here, but I remember one here involving such supports...), I think I found a bit more of a simple method using less paper. Really, just another way to skin the proverbial cat.

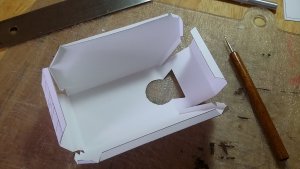
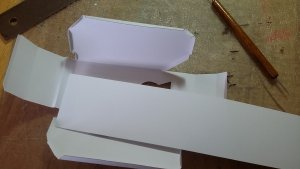
So the above is the bottom sheet from Proteus II build in the Gaming and Toys/Warhammer forum. This consists of a polyhedron 'box' with some long runs that are far from the folds that hold the shape of the paper rigid. Just like my old sheet metal designs when I drew aggregate handling equipment.... To prevent warping on those aggregate bins, we would weld various shapes of extruded steel, most commonly either angles (equal and un-equal "L" shapes) or channels ("C" or "[" shapes) at intervals across the sheets for both strength and stiffness at the center of the sheets. Paper, like sheet metal, tends to warp the most in the centers of these long runs leading to many of the frustrations beginners like myself experience.
How to get those shapes onto paper:

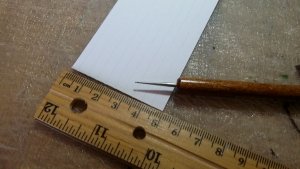
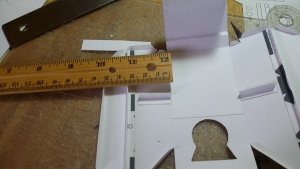
Above is one of my scraps that I marked with 5mm intervals and proceeded to score bend points with my smallest ball end tool. Once I get a few of those, I cut off a 10mm wide by however long section I need and break...er....fold it 90 degrees. Cut, trim, and glue where ever you feel it is necessary. In the case of the Proteus II build, the roof, side walls, and bottom required the most attention with distances of unsupported card stock 25mm away from any fold (that 1"/25.4mm distance tends to be a good ball park interval of fairly even numbers to throw out there).


I'm pretty pleased the results. Now that I think about it, I think the extra card on the inside of the hull seemed to be sufficient for the roof, but the side walls and floor just got my angles instead.
That is all for now for this tip regarding sheet metal tricks being translated into something useful for papercraft! I will likely add more later as I encounter such things in the future!
While I've employed some of the methods used here before (namely the folded gussets and support shapes such as the triangle, sorry I don't remember who wrote the tutorial here, but I remember one here involving such supports...), I think I found a bit more of a simple method using less paper. Really, just another way to skin the proverbial cat.
So the above is the bottom sheet from Proteus II build in the Gaming and Toys/Warhammer forum. This consists of a polyhedron 'box' with some long runs that are far from the folds that hold the shape of the paper rigid. Just like my old sheet metal designs when I drew aggregate handling equipment.... To prevent warping on those aggregate bins, we would weld various shapes of extruded steel, most commonly either angles (equal and un-equal "L" shapes) or channels ("C" or "[" shapes) at intervals across the sheets for both strength and stiffness at the center of the sheets. Paper, like sheet metal, tends to warp the most in the centers of these long runs leading to many of the frustrations beginners like myself experience.
How to get those shapes onto paper:
Above is one of my scraps that I marked with 5mm intervals and proceeded to score bend points with my smallest ball end tool. Once I get a few of those, I cut off a 10mm wide by however long section I need and break...er....fold it 90 degrees. Cut, trim, and glue where ever you feel it is necessary. In the case of the Proteus II build, the roof, side walls, and bottom required the most attention with distances of unsupported card stock 25mm away from any fold (that 1"/25.4mm distance tends to be a good ball park interval of fairly even numbers to throw out there).
I'm pretty pleased the results. Now that I think about it, I think the extra card on the inside of the hull seemed to be sufficient for the roof, but the side walls and floor just got my angles instead.
That is all for now for this tip regarding sheet metal tricks being translated into something useful for papercraft! I will likely add more later as I encounter such things in the future!