

Zedob's Layout Party
- Thread starter zedob
- Start date
You are using an out of date browser. It may not display this or other websites correctly.
You should upgrade or use an alternative browser.
You should upgrade or use an alternative browser.
Thanks Guys,
Installment V
I was able to do some work on the river a bit more today. I didn’t get to pour anything because after everything had dried I noticed there were areas that had not received any paint. I also had to individually paint some of the rocks and boulders because they were way too light.
Installment V
I was able to do some work on the river a bit more today. I didn’t get to pour anything because after everything had dried I noticed there were areas that had not received any paint. I also had to individually paint some of the rocks and boulders because they were way too light.
Attachments
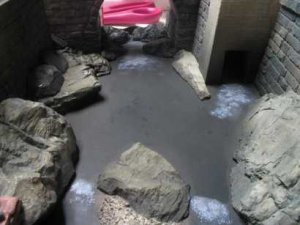
This pic shows what everything looks like after I painted the missed spots, touched up the boulders and blended the sand bars with the airbrush. I used a mixture of steam black, a few drops of boxcar red and a couple drops of dirt colored paint to do the blending between the banks and the deep areas. I used the boxcar red to give it a brownish coloring and the dirt to lighten it up.
I like the results, but I’ll probably tweak it some more.
I like the results, but I’ll probably tweak it some more.
Attachments
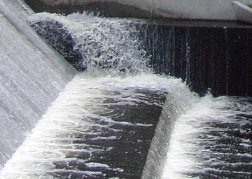
I went ahead and added some subsurface white water highlights, which I hope works out. I decided not to have rushing tail water from the turbine house. I decide to copy one that I saw in Holyoke, MA, which actually had a greenish tint.
Attachments

Cont…from the other night.
These pics are from yesterday and today.
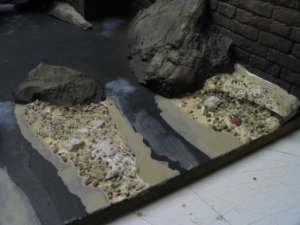
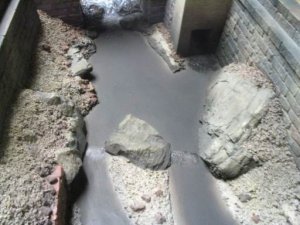
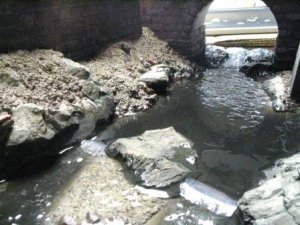
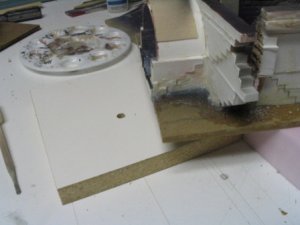
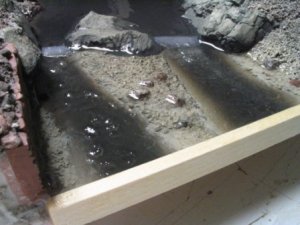
I piled on the fill this time. It’s a mixture of WS talus and ballast and was laid coarse first, medium next and then fine on top all the time letting it flow where it wanted to go. I did have to coax it into certain spots to make it look more real, but most of it was just left to fall where it wanted to. Standard 50-50 WG/H20 Dawn drop mixture applied with a dropper. I did not spray the whole thing down with wet water. I did not have any problems with the talus balling up, but that stuff seems like it’s made out of a porous plaster-like material that acts like a sponge, so maybe that had something to do with it. Anyways, this process went on without a hitch, except that I destroyed my painted water.
Actually, after viewing this picture later on, I noticed that if I had left the small WS talus stones where they lay in the water would probably look pretty good for a shallow run, but I have committed myself to the deeper water idea and really wanted to see how well it would look, so…
These pics are from yesterday and today.
I piled on the fill this time. It’s a mixture of WS talus and ballast and was laid coarse first, medium next and then fine on top all the time letting it flow where it wanted to go. I did have to coax it into certain spots to make it look more real, but most of it was just left to fall where it wanted to. Standard 50-50 WG/H20 Dawn drop mixture applied with a dropper. I did not spray the whole thing down with wet water. I did not have any problems with the talus balling up, but that stuff seems like it’s made out of a porous plaster-like material that acts like a sponge, so maybe that had something to do with it. Anyways, this process went on without a hitch, except that I destroyed my painted water.
Actually, after viewing this picture later on, I noticed that if I had left the small WS talus stones where they lay in the water would probably look pretty good for a shallow run, but I have committed myself to the deeper water idea and really wanted to see how well it would look, so…
Attachments
I figured that that would happen, so getting to repaint the water area over some of the areas I wasn’t happy about made it all justifiable.
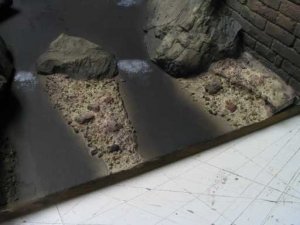
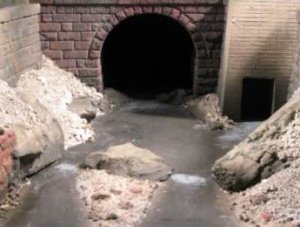
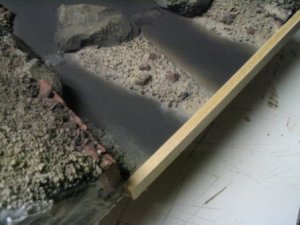
This picture was taken after I had cleaned up the mess and repainted the riverbed. The fill from the abutment to the stone out crops was thin washed and dry brushed with dirt colored paint to help lighten it up and bring out the details. The above pic shows the scene as being very light, but that is just the camera, settings. It was quite a bit darker than that. The pic below is more representative of what it looks like right now, but is a tad out of focus.
This picture was taken after I had cleaned up the mess and repainted the riverbed. The fill from the abutment to the stone out crops was thin washed and dry brushed with dirt colored paint to help lighten it up and bring out the details. The above pic shows the scene as being very light, but that is just the camera, settings. It was quite a bit darker than that. The pic below is more representative of what it looks like right now, but is a tad out of focus.
Attachments
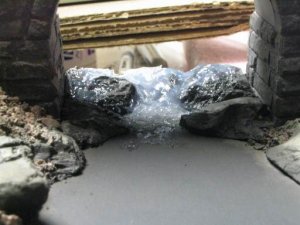
I made the turbulent water out of a blob of clear silicone sealant. I did not want to get too crazy with it, so I steered it through the lower spots in the rock outcroppings and left it alone after I flattened it out a little. I feathered it into the base board and applied a little stippling action to give it that splashy look just before it settles down in the pool.
Attachments
Zedob’s Layout Party
Installment VI
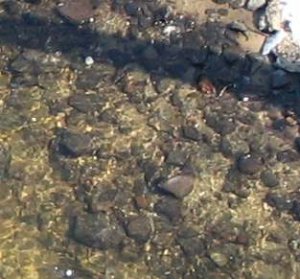
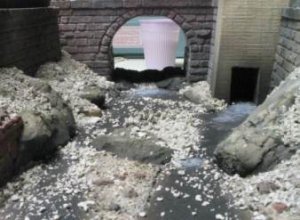
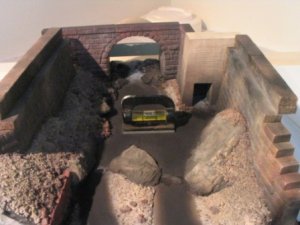
I’ve found that most things that are wet are darker in color, especially if the item has been wet for some time, like a boulder in a stream or a perpetually wet rock outcropping. It is for that reason I painted the lower 1/8 of the rocks that will be in touch with water a darker color.
Check out the pics below. The shot of the bridge and the “wet spot” in the arch is a prime example of the contrast between the wet and dry look. Also notice the effervescence, or the white salty stained areas. As prototypically prominent and as easy enough to model as it is, I’m surprised more modelers don’t add that detail.
Installment VI
I’ve found that most things that are wet are darker in color, especially if the item has been wet for some time, like a boulder in a stream or a perpetually wet rock outcropping. It is for that reason I painted the lower 1/8 of the rocks that will be in touch with water a darker color.
Check out the pics below. The shot of the bridge and the “wet spot” in the arch is a prime example of the contrast between the wet and dry look. Also notice the effervescence, or the white salty stained areas. As prototypically prominent and as easy enough to model as it is, I’m surprised more modelers don’t add that detail.
Attachments

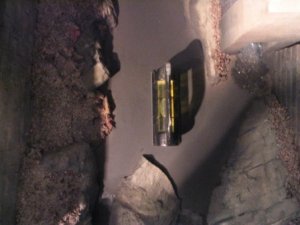

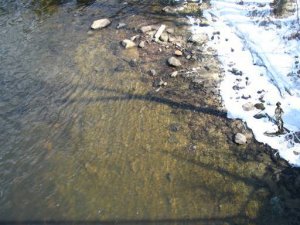
After giving the resin some time to set-up I started to pick and poke it with a stiff piece of manila folder material to generate ripples. The first few tries were fruitless because the resin had not set up enough and the whole mess would level out to glass smooth, but after about 2 hrs and more P&Ping the ripples began to appear. There were a few times when I thought that I had screwed up by over doing it, but I would leave that area alone for a while and my mistake would miraculously disappear.
I planned on using the resin as a base and then applying gloss medium to create final and finer detail that would not be possible with the resin due to it’s wanting to level out even in a real tacky state.
I planned on using the resin as a base and then applying gloss medium to create final and finer detail that would not be possible with the resin due to it’s wanting to level out even in a real tacky state.
Attachments

Zedob, this is looking great!
It seems that we have another top-notch tutorial in the making!:thumb::thumb::thumb:
Ron
It seems that we have another top-notch tutorial in the making!:thumb::thumb::thumb:
Ron
 I like it.:thumb: