Using flex track

nolink5750

New Member
Oct 12, 2007
68
0
6
Anyone have pics of how there track looks at the joiners? It looks like I need to cut off 1 tie at each end of the flex track which leaves a big gap. Do you cut the cut off ties into pieces and just glue it in place?
Anyone have pics????????? Thanks........
 

Rector

New Member
Mar 1, 2007
8
0
1
67
Wainscott, New York
That's a very good question. Without removing the end tie the rail joiner simply won't push on to the rail. As you can tell I am also new to Flex-track. Help, anyone?
 

Gary S.

Senior Member
Oct 13, 2005
1,576
0
36
Texas
Not at home so no pics. But yes, you do have to remove ties from the ends, then get the track in place, either nailed or glued or caulked. For me, I go back later once the glue has dried, and add the extra ties in. Now, be careful about just pushing ties underneath. The joiners sit lower than the bottom of the rails, so you need to do one of two things. The new ties either have to be sanded down, or they need to be cut into 3 pieces, the middle inside the track and the ends on the outside. Then glue them in place.

I started out doing the sanding method, but it was too much work. I use the cutting method now. Once the track is ballasted, you can't even tell.

This would make a good subject for a pictorial tutorial.
 

TruckLover

Mack CH613 & 53' Trailer
Apr 14, 2006
4,073
0
36
34
Rancho Santa Margarita, Cali.
Not at home so no pics. But yes, you do have to remove ties from the ends, then get the track in place, either nailed or glued or caulked. For me, I go back later once the glue has dried, and add the extra ties in. Now, be careful about just pushing ties underneath. The joiners sit lower than the bottom of the rails, so you need to do one of two things. The new ties either have to be sanded down, or they need to be cut into 3 pieces, the middle inside the track and the ends on the outside. Then glue them in place.

I started out doing the sanding method, but it was too much work. I use the cutting method now. Once the track is ballasted, you can't even tell.

This would make a good subject for a pictorial tutorial.

Great Advise Gary :thumb: :thumb: :thumb:
 

Gary S.

Senior Member
Oct 13, 2005
1,576
0
36
Texas
And since you guys are new to flex track, there are some other things to think about.

Track feeders - I prefer to not solder the rail joiners to allow for expansion and contraction of the layout. And since we don't want to rely on "contact pressure" for our electrical continuity, every piece of track needs to be fed with wires from under the layout.

Paint - For realism, the rail sides need to be painted a brown/black/gray/rust color. This can be done with a brush and water based craft paint. It may take two coats. It wouldn't hurt to wipe the rail down with alcohol first, to remove any oils. Oh... paint the rails after the track is glued down permanently.

Ties - Go look at some real tracks, and notice the tie color. Brand new ties are creosote black, older ties will weather to a gray/silvery color. Try to match what you see by painting each and every tie using a variety of shades. Now, don't get too outrageous, the ties need to blend in, not stick out like sore thumbs.

Tie spacing - Flex track comes with exactly spaced ties. This is okay for an immaculate mainline. But to get a more rustic look, you can turn the flex track over, cut out a few ties, maybe one every 6 inches. Then cut out many of the little plastic pieces that connect the rest of the ties together, and then move them around a bit so the spacing is not so uniform. This can also be used to differentiate mainlines from sidings. Mainline has more ties and evenly spaced. Older sidings with little to no maintenance will have less ties and non-uniform spacing. Again, don't get too crazy, you are only seeking a little less uniformity.

And, you don't have to do any of this, but it does help the looks of things.
 

Gary S.

Senior Member
Oct 13, 2005
1,576
0
36
Texas
All of this could be a great picturial tutorial. Hmmm... too bad all my track is done. Well, wait, I don't have everything painted. Maybe this weekend?
 

Nomad

Active Member
Sep 26, 2006
1,570
0
36
72
Elks Plain, Washington
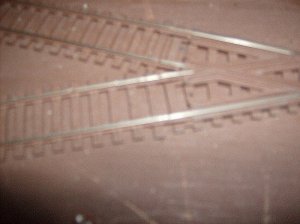
Here is a blurry picture of Atlas c100 flex track and an Atlas crossing on my layout. All I do is cut the tie plate off with a razor knife and carve a littile recess where the rail joiner is, and then cement in place with white glue after the track is in place.

Loren
 

Attachments

  • ties.jpg
    ties.jpg
    121.2 KB · Views: 13

nolink5750

New Member
Oct 12, 2007
68
0
6
Thanks for the info, if you can get some pics that would be great too.
I was fiquring cutting them but I wasn't sure. I like the info also about cutting the reverse side and the uniformity also. Get pics please.:thumb:
 

nolink5750

New Member
Oct 12, 2007
68
0
6
Cool nomad, it is blurry but I get the drift. I'm using a foam base so the notch should be easy. I am so excited, I just got my package from ups. I now have enough track to do my current project. 15'-4" by 22'-4" room. I'm put a 16" shelf at door height. This is the main start of my layout. I'll be taking pics for sure. I'll be asking for a lot of help also.:wave:
 

60103

Pooh Bah
Mar 25, 2002
4,754
0
36
Brampton, Ontario, Canada
Visit site
I use Peco track which has a soft plastic tie. I cut a curved bit out from under the rail including the spikes and tie plate using the pointy X-Acto knife. (A bit of practise and experience required). I do it with the tie still attached to the track.
methods that require putting a new tie under seem to end up with a couple of different-looking ties at a joint that you might prefer not to draw attention to.
Whatever. you don't want to put a tie under that will push up the rail joiner.
 

Gary S.

Senior Member
Oct 13, 2005
1,576
0
36
Texas
One of the pluses of making the tie spacing a little less uniform is that it becomes harder to tell where the flex track connections are. It is difficult to put the "rail joiner" ties in perfect position, plus if you cut the rails to fit the track, the spacing will not be perfect anyway.
 

nolink5750

New Member
Oct 12, 2007
68
0
6
With flex track 1 side is solid while the other side is movible. Does it matter which side is flexing, or does it depend on which way the turn is? I guess it don't matter if it is straight.
 

baldwinjl

Member
Apr 30, 2005
399
0
16
63
I prefer putting the movable side on the outside, the solid side on the inside.
Atlas would disagree. From their website:

How To Use Super-Flex Track

Super-Flex Track has one stationary rail and one that slides, allowing it to bend easily. When bending the Flex Track into the desired shape, you must keep in mind that the sliding rail must always be on the inside of the curve (closest to the center of your layout plan).

Once you are sure the sliding rail is facing the right way, tack the track loosely (in case you need to move it later) to your tabletop, then clip the excess rail, making it even with the stationary rail.


Doing it their way you never pull the track out of the ties, and the max distance between ties is the tangent distance.

Jeff
 

Gary S.

Senior Member
Oct 13, 2005
1,576
0
36
Texas
I tried it Atlas' way and decided I like the opposite. I agree that putting the fixed rail on the outside would prevent the other rail from sliding back into the ties. However, I still prefer the look of doing the opposite.

Reasons: 1) I like the increased tie spacing on the outside rail rather than the decreased tie spacing on the inside rail. 2) It just seemed to work better for me.

To prevent the rail from pulling back from some of the ties, you simply cut off more ties. Form the track into approximate position, then you can determine how much of the inside rail to cut off, along with how many ties to cut out.

As for Atlas' suggestion, you have to keep in mind these are also the guys who make turn-outs with hinged points held on by little brass tabs bent at a 90 degree angle, and use too small plastic nubbins on the other end at the point throw-bar.:eek:

:twisted:
 

b28_82

Member
Jan 25, 2004
419
0
16
Midwest City, OK
www.geocities.com
I prefer to do it with the movable rail on the inside because then all i need to do it cut the excess rail off. And as for tie spacing I personally haven't noticed a significant spacing difference between when it's curved and when it's not curved. But i guess "to each their own"

On a side note I've been using some flex track made in the 70s where both sides are somewhat stiff and you "mold" it to the way you want it. At first i didn't like it right after using the new atlas track but I figured out how to make it work for me. As for the track its shinohara code 70 flex track. I'll have pictures soon of my progress on my layout as soon as i'm finished spiking it down.
 

baldwinjl

Member
Apr 30, 2005
399
0
16
63
I tried it Atlas' way and decided I like the opposite. I agree that putting the fixed rail on the outside would prevent the other rail from sliding back into the ties. However, I still prefer the look of doing the opposite.

Reasons: 1) I like the increased tie spacing on the outside rail rather than the decreased tie spacing on the inside rail. 2) It just seemed to work better for me.

To prevent the rail from pulling back from some of the ties, you simply cut off more ties. Form the track into approximate position, then you can determine how much of the inside rail to cut off, along with how many ties to cut out.

As for Atlas' suggestion, you have to keep in mind these are also the guys who make turn-outs with hinged points held on by little brass tabs bent at a 90 degree angle, and use too small plastic nubbins on the other end at the point throw-bar.:eek:

:twisted:

Perfectly valid reasons! I just thought I'd point out Atlas' opinion. Bt if there is nothing else true in this hobby, it's that there is aways more than one right way!

Jeff
 

Gary S.

Senior Member
Oct 13, 2005
1,576
0
36
Texas
Jeff, you are correct, and different ways to do things is what makes the hobby so fun. I just couldn't help getting in the dig on Atlas turn-outs. Yes, I have 30+ of them on my layout, and they work, but not completely pleased with them.