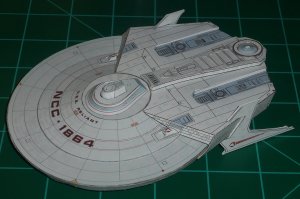
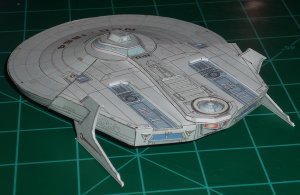
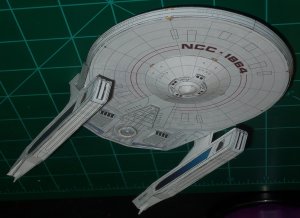
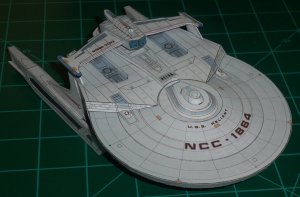
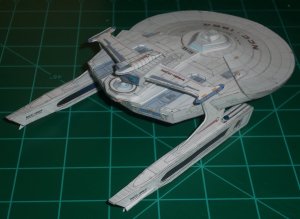
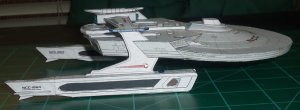
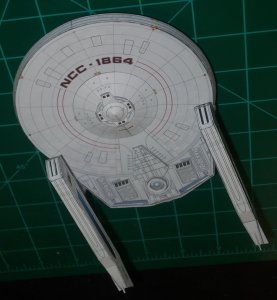
U.S.S. Reliant - NCC-1864

bgt01

Exemplary Confidant
Jan 26, 2012
576
843
93
Ohio
Saucer Top

If you know anything about me from previous posts, it's that I like starships. And, since I love to have more projects going at one time than I can finish, I decided to finally launch the Reliant build that's been on the desk awhile.

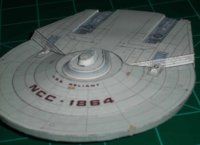
This is my build of Makino's Reliant. It's similar to the Enterprise I built some time ago. It's a nice model with nice art, but the finished versions I've seen all look really flat and boxy. So I'm making every effort to detail mine out and give her a little more character. I also remade all the hull markings in Illustrator for better accuracy and added anything that was missing. Also, to keep it in scale with my Rawen models I'm building this at 76% its original size.

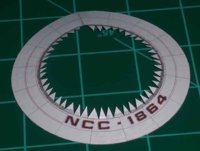
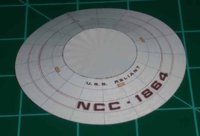
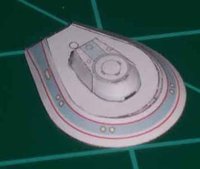
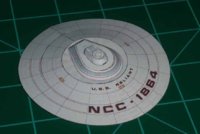
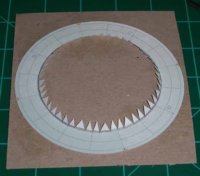
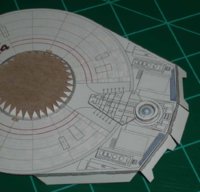
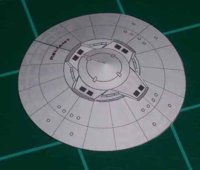
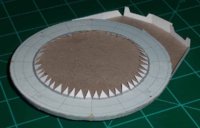
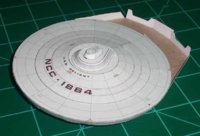
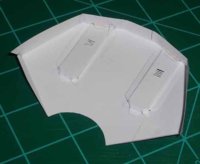
First up is the saucer section. As is my preferred style, I cut off the outer tabs that come on the model and cut new tabs at the inner edges in "Rawen style." I like this because it gives a better gluing area, works just as well as gluing new tabs from behind and saves time. I used a silver Sharpie on the tabs to hide any potential gaps. I placed the lower ring flat on the table and dropped the upper ring into place, then used my hands to gently nudge it until the deflector grids lined up as best as possible.

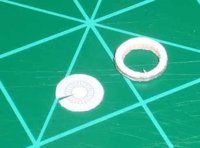
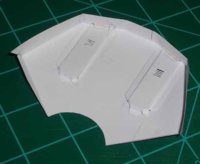
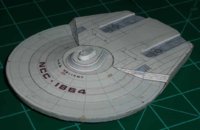
The upper saucer ring is curled with a wooden dial rod and glued from behind at the joint. Then the top base for the bridge goes on. For Deck 2 of the bridge module, I cut off the front triangle tabs but kept the ones at the rear. I curled the outer skin and glued it in place on one side. I pushed the "roof" up and glued the other side of the outer skin at the rear to make sure was no gap at the rear on either side. That looks terrible and I can't stand it. I pushed down the "roof" flat and glued it from behind using paper strips. Then the bridge module was built and glued to Deck 2, which then went on the saucer ring.
 

Attachments

  • A_1.JPG
    A_1.JPG
    76.5 KB · Views: 32
  • A_2.JPG
    A_2.JPG
    70 KB · Views: 30
  • A_3.JPG
    A_3.JPG
    49.6 KB · Views: 27
  • A_4.JPG
    A_4.JPG
    52.4 KB · Views: 26
  • A_5.JPG
    A_5.JPG
    56.9 KB · Views: 28
  • A_6.JPG
    A_6.JPG
    81.5 KB · Views: 27

bgt01

Exemplary Confidant
Jan 26, 2012
576
843
93
Ohio
Saucer Bottom and Hull

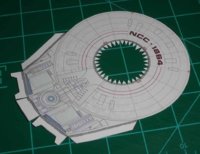
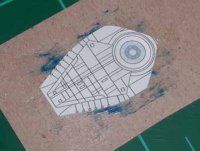
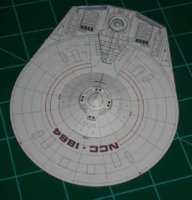
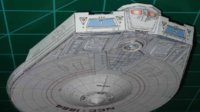
I broke up the flatness of the bottom as best I could by printing out extra parts and adding raised details where possible, trying to mimic the studio model. I recessed the blue grill areas at the rear, which were tricky because they are so close to the trim/fold line. One thing I really wanted to jazz up was the blue impulse crystal area and make it more like the model. I recessed the crystal area as a start.

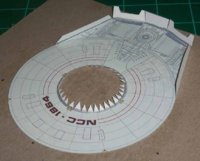
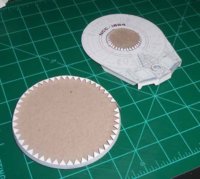
I really wanted to make the model straight and keep the saucer as flat as possible. I've gotten better at saucers, but they still always have a wave or a gap that drives me nuts. This time I decided to try using chipboard. Again, I cut new tabs for the saucer bottom and edge colored them silver. I glued the whole bottom and the top outer saucer ring to 1mm chipboard, being careful not to glue the tabs down. This gives a strong, flat base that is perfect for me.

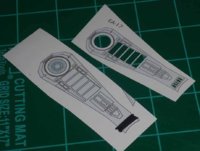
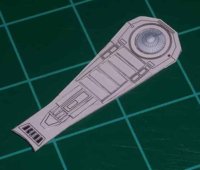
After that, I decided the impulse crystal section still needed more detail. I glued a spare to 1mm chipboard to raise the whole quasi-diamond section. I glued another spare to two 1mm pieces, since it's the tallest area, and cut out the ring around the crystal. I cut a section out of the spare crystal, curled it with a toothpick and glued it from behind to make a dome like the model has. The final ring is a little rough but it works, I edge colored it with silver Sharpie and glued the whole thing on. It looks much more like the model.

After that I assembled the lower saucer dome, gluing the ring and sensor dome from behind as previous. With the chipboard keeping everything flat, the lower dome went on beautifully and the deflector grid lined up the best it ever has! I added the rear window/vent areas to finish.
 

Attachments

  • B_1.JPG
    B_1.JPG
    111.3 KB · Views: 29
  • B_2.JPG
    B_2.JPG
    99 KB · Views: 32
  • B_3.JPG
    B_3.JPG
    75.9 KB · Views: 25
  • B_4.JPG
    B_4.JPG
    72 KB · Views: 35
  • B_5.JPG
    B_5.JPG
    74.6 KB · Views: 26
  • B_6.JPG
    B_6.JPG
    63.2 KB · Views: 35
  • B_7.JPG
    B_7.JPG
    109.3 KB · Views: 29
  • B_8.JPG
    B_8.JPG
    66.7 KB · Views: 27
  • B_9.JPG
    B_9.JPG
    106.7 KB · Views: 27

bgt01

Exemplary Confidant
Jan 26, 2012
576
843
93
Ohio
Hull Assembly

Next, I assembled the outer saucer ring. This is another area I've never been happy with on previous builds. I've always used the tabs and they cause gaps and odd fits a lot of the time. I've gotten better with practice, but still it gives me fits! This time I glued the two strips together from behind and recessed the port side airlock to add detail. Because I used the 1mm chipboard on the saucer, I had an edge to glue to. I cut the tabs off the top of the ring and SLOWLY edge glued it to the saucer top. This gave me a very nice, straight and tight fit. I knew the bottom wasn't going to be so easy because it would be a tight fit and it sits inside the hull at the rear. So I cut the tabs off the bottom of the ring only to the point where it inserts into the hull. Those tabs I left on. It took a lot of slow spreading of glue with a sharpened toothpick, but I got it to go and it's the best looking one I've ever done! The RCS thrusters still don't quite line up everywhere, but that's how it goes.
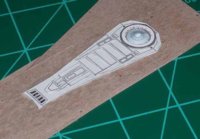
Next I used fine point markers to add the red and green running lights where they were missing throughout the hull. I glued the upper saucer into place and everything lined up really well. Next, I detailed the recessed blue areas in the upper hull using more raised areas and cutting out the grill areas. I also recessed the shuttle bay doors. I really didn't like the flat navigation deflectors on each side of the hull. I printed out extras and cut out the domed areas. I cut a little of the edge of the center of the dome and folded it down, then trimmed it until it sat flat on the base. I edge glued the domes to the base and glued that to the hull. It's not the greatest fit, but it looks much better than the flat versions.
 

Attachments

  • C_1.JPG
    C_1.JPG
    87.4 KB · Views: 30
  • C_2.JPG
    C_2.JPG
    102.6 KB · Views: 31
  • C_3.JPG
    C_3.JPG
    81.8 KB · Views: 31
  • C_4.JPG
    C_4.JPG
    66.3 KB · Views: 26
  • C_5.JPG
    C_5.JPG
    98.6 KB · Views: 29
  • C_6.JPG
    C_6.JPG
    93.5 KB · Views: 26
  • C_4.JPG
    C_4.JPG
    66.3 KB · Views: 32

bgt01

Exemplary Confidant
Jan 26, 2012
576
843
93
Ohio
Hull Assembly

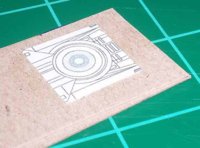
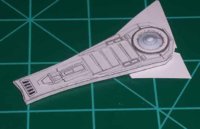
The upper impulse crystal area got the detail treatment also. I raised and recessed sections similar to the model. I glued the cutout piece to a second uncut piece to create the recessed areas and keep a flat bottom. I put a black Sharpie mark on the bottom piece at the front so the I wouldn't have to worry about lining up the little window sections. I made another domed impulse crystal and a raised ring just like the bottom one and glued it in place. This entire area is really tall on the model, so I glued it to two 1mm pieces of chipboard and trimmed it out. Because this is on top and very prominent, I wanted the sides to look better than just silver Sharpie. I cut strips of scrap hull and glued them around the edge. I glued another scrap piece of hull to the bottom because it sticks out over the rear. All in all, not too shabby!
 

Attachments

  • D_1.JPG
    D_1.JPG
    101.7 KB · Views: 23
  • D_2.JPG
    D_2.JPG
    73.3 KB · Views: 29
  • D_3.JPG
    D_3.JPG
    80.7 KB · Views: 22
  • D_4.JPG
    D_4.JPG
    74 KB · Views: 29
  • D_5.JPG
    D_5.JPG
    110.3 KB · Views: 26

bgt01

Exemplary Confidant
Jan 26, 2012
576
843
93
Ohio
Torpedo Launcher

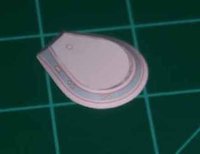
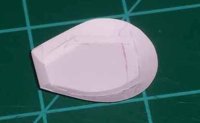
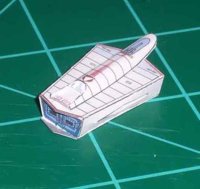
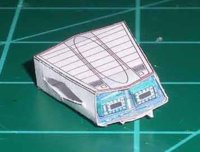
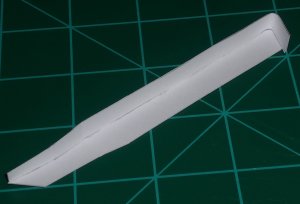
Next up is the torpedo launcher. It's OK as-is except for the top. There's only so much you can do with the domed piece on top. I notched the front area and folded it in to create the flat recess, curled the sides and glued the front area from behind. The rear area sticks up and out and I have no way at present to make it look like the "bulbed" area of the model. I did glue a piece of scrap hull to the bottom so you wouldn't see a hollow area when you look at it from behind.
 

Attachments

  • E_1.JPG
    E_1.JPG
    77.9 KB · Views: 25
  • E_2.JPG
    E_2.JPG
    68.6 KB · Views: 24

micahrogers

Moderator "Where am I, and how did I get here?"
Staff member
Moderator
Jul 12, 2012
3,772
4,639
113
Shannon GA
Looks great so far... I have the new 1/1000th kit of her from Polar lights on order :)
 

Revell-Fan

Co-Administrator
Staff member
Administrator
Moderator
Aug 1, 2009
11,610
12,350
228
Vreden
This thread is not only a build report but also a tutorial! GREAT WORK so far! :)
 

Rhaven Blaack

!!!THE MAN BEHIND THE CURTAIN!!!
Staff member
Administrator
Moderator
Jun 12, 2009
12,516
9,891
228
Oregon
www.deviantart.com
I have always liked the design of the Reliant.
Interestingly, the Reliant was the first Starship that I scratch built when I was 14 (unfortunately, I no longer have it). So I have always wanted to build a kit of this ship.
I have to agree with @Revell-Fan, This is a GREAT TUTORIAL!!!
I will be following this thread closely.
KEEP UP THE GREAT WORK!!!
 

bgt01

Exemplary Confidant
Jan 26, 2012
576
843
93
Ohio
Thanks Fellas! Since part of what I do for a living is write and edit, it's nice to know I'm-a-gettin' my point across.:bookworm: Here is the latest from Starfleet Intelligence:

More Details, Impulse Engine and Torpedo Launcher

I added some more raised detail at the rear of the ship. I took a spare and cut out the tractor beam emitters (triangle areas) by the shuttle bays and glued them on the model. I used a yellow marker to add "lighting" to the emitters and docking lights around the shuttle bays.

The impulse area of the studio model is a boxy, more contained section. I can't really recreate that with this model's design and proportions (plus I'm not that skilled at scratch building):(. I got a little closer by raising up the area behind the impulse drive to push it more toward the rear of the impulse deck overhang. On the studio model this sits flush and wraps around back to the hull, but this engine is too small for that. I didn't want to scale it up because it wouldn't be in proportion to my other models. So, this is my attempt at middle ground.:happy:

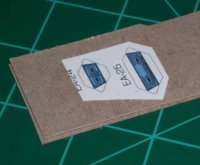
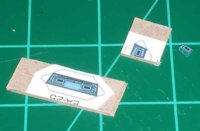
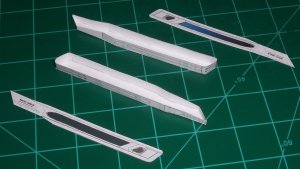
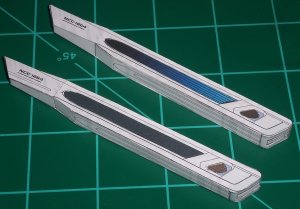
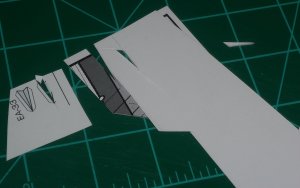
The torpedo launcher needed some detailing at the firing ports. I glued spares to two pieces of 1mm chipboard and cut out the ports. They are VERY SMALL!!!!:eek: Somehow, I managed to not lose them. I wanted to add the vertical divider on the front side of the launcher between the ports, but it was too small and fell apart when I tried to cut it.:banghead: I edge colored the ports with a less than perfect shade of blue (closest I had) and glued them in place.
 

Attachments

  • F_1.JPG
    F_1.JPG
    108.4 KB · Views: 36
  • F_2.JPG
    F_2.JPG
    76.5 KB · Views: 29
  • F_3.JPG
    F_3.JPG
    67.8 KB · Views: 35
  • F_4.JPG
    F_4.JPG
    57.9 KB · Views: 29
  • F_5.JPG
    F_5.JPG
    64.4 KB · Views: 26

bgt01

Exemplary Confidant
Jan 26, 2012
576
843
93
Ohio
Roll Bar

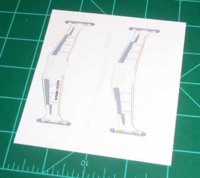
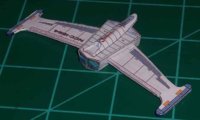
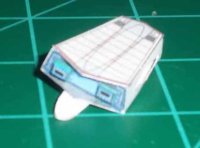
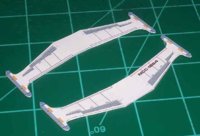
I'd been dreading the Reliant's roll bar. It's like the pylons on the Enterprise and for the life of me I can't figure out how they are supposed to be built. To me, the proportions are off and they just come out twisted they way I build them.:arghh: For Enterprise, I switched to gluing the sides to 67 lb. cover stock, gluing those together and trimming them until they were somewhat flat and straight, but they still aren't very good. The actual model roll bar is very curvy and varies in thickness and this flat version threw me for a loop, but it's vital to Reliant's look that this be "nice" so here's what I came up with.

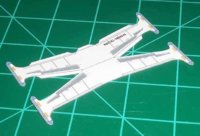
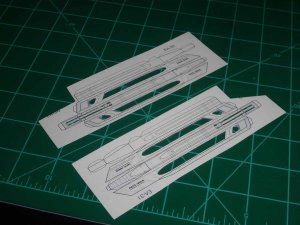
I recessed the blue grill areas like on the model, gluing spares CAREFULLY from behind. They are right by the trim edge so I made a lot of slow cuts with little pressure to keep it from tearing. I cut off the tabs and cut the top and bottom apart. I glued both to white 67 lb. card stock for thickness and strength. That gave me two nice, flat pieces. I glued both together used the natural curl from the glue to approximate the curve or the actual Reliant's roll bar. That left me with a wide, white edge all the way around. I didn't want that, so I cut strips of spare roll bar and glued it around the edge as needed. That, along with some edge coloring with markers, mostly covered up the white. I managed to weasel the bar through the torpedo launcher without crushing it! The finished piece is certainly something I can live with.:rolleyes:
 

Attachments

  • F_6.JPG
    F_6.JPG
    78.6 KB · Views: 38
  • F_7.JPG
    F_7.JPG
    62.8 KB · Views: 34
  • F_8.JPG
    F_8.JPG
    83.3 KB · Views: 30
  • F_9.JPG
    F_9.JPG
    76.8 KB · Views: 39

spaceagent-9

Right Hand Man and Confidant
Moderator
Jul 10, 2013
3,107
3,474
143
62
pheonix
looks great so far!! thanks for this thread, another ship I have been wanting to build!
 

bgt01

Exemplary Confidant
Jan 26, 2012
576
843
93
Ohio
Warp Engines

Makino's warp engines have always been a challenge for me. They have all come out a little warped and I really wanted to avoid that here. And, I wanted to alleviate the boxy look.

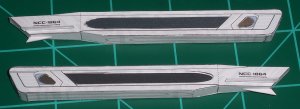
I recessed the warp grills on both sides of the engines and the black areas of the bussard collectors at the front. To keep things straight and simple, I taped engine spares (1 each port and starboard) to chipboard, lined up the cutout parts and taped those so I could lift them up. I sprayed adhesive glue to the cutout parts, laid them on top of the spares and rubbed them flat. That made each engine double thick.

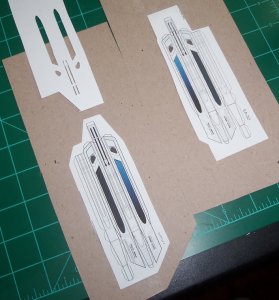
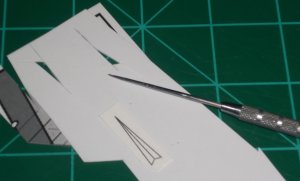
I cut all the sides apart. They wouldn't have folded at double thickness and I figured the previous twisting was from folding the engines. The double thick parts gave me a decent edge which to glue. I did this SLOWLY using Super Glue Gel (for strength) and a sharpened toothpick. I used my metal pick to round the forward edge. Once each side was on I put more Super Glue at the back of the join edge. I assembled one side, top and bottom. The last side was glued on a dab at a time using a new sharpened toothpick and using my fingers and metal pick to manipulate the side into place. This took a long time, but the end result was a MUCH nice warp drive than previous. The recessed areas don't show up well in the pics, but the ad a nice touch to the model.

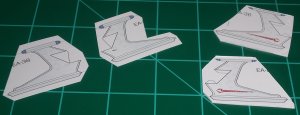
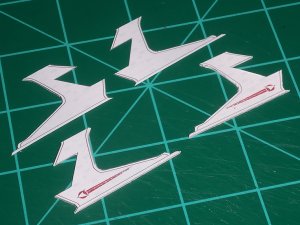
It's a waste of time trying to fold and glue the engine fins that go at the rear. I tape them to white 67lb. card stock, poke the three points of the "triangle" with my metal pick, remove the paper and cut out the part using the three points for reference. The 67lb. paper makes a nice part similar in thickness to the actual model. Since they are so small and fragile, I brush some Super Glue around the edges to strengthen them before Super Gluing them to the engines.

The final touch was to glue blue 12mm Glamour Glitz rhinestones (plasma deflection crystal) at the top front of the engines. All this added a lot of prep and assembly time, but I think it is well worth it and Reliant has some nice engines.
 

Attachments

  • G_1.JPG
    G_1.JPG
    131.6 KB · Views: 39
  • G_2.JPG
    G_2.JPG
    440.8 KB · Views: 25
  • G_3.JPG
    G_3.JPG
    348 KB · Views: 26
  • G_4.JPG
    G_4.JPG
    511.5 KB · Views: 24
  • G_5.JPG
    G_5.JPG
    474.2 KB · Views: 25
  • G_6.JPG
    G_6.JPG
    518.8 KB · Views: 30
  • G_7.JPG
    G_7.JPG
    483 KB · Views: 25
  • G_8.JPG
    G_8.JPG
    316.3 KB · Views: 33

bgt01

Exemplary Confidant
Jan 26, 2012
576
843
93
Ohio
Pylons

I didn't want the pylons to be weak or flexible, so I made some changes. I cut out the parts and glued each side to 67lb. white card stock. I cut them out, removing all the tabs and mounting folds. I glued the fronts and backs together and let dry. The white edge of the card was colored with a silver Sharpie. I dry fit each part, then glued in place using regular Elmer's gel glue. That let me adjust positioning as needed. Once in the final position I applied little bits of Super Glue Gel at the join areas for strength.
 

Attachments

  • H_1.JPG
    H_1.JPG
    383.7 KB · Views: 25
  • H_2.JPG
    H_2.JPG
    394.6 KB · Views: 23
  • H_3.JPG
    H_3.JPG
    638.3 KB · Views: 26
  • H_4.JPG
    H_4.JPG
    679.2 KB · Views: 26

bgt01

Exemplary Confidant
Jan 26, 2012
576
843
93
Ohio
Commissioning Ceremony

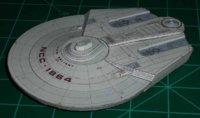
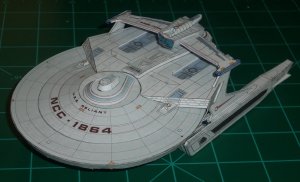
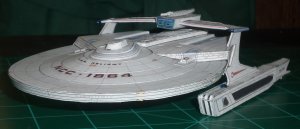
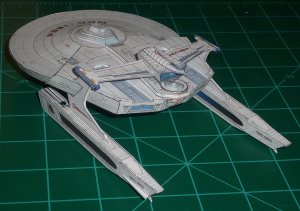
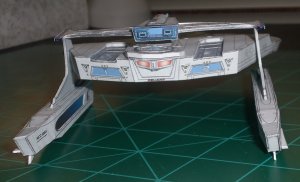
Ladies and Gentlemen, may I present the U.S.S. Reliant. I am very pleased with how she turned out. It took a lot more time than a standard build, but I believe all the detailing adds much needed character to this model. Reliant looks great docked with the rest of the fleet. Anyone building this model with be happy with the results. Thanks to Makino for all the hard work in putting it together for us to have fun with.
 

Attachments

  • I_1.JPG
    I_1.JPG
    589.3 KB · Views: 45
  • I_2.JPG
    I_2.JPG
    599.5 KB · Views: 52
  • I_3.JPG
    I_3.JPG
    575 KB · Views: 52
  • I_4.JPG
    I_4.JPG
    432.9 KB · Views: 53
  • I_5.JPG
    I_5.JPG
    679.1 KB · Views: 44
  • I_6.JPG
    I_6.JPG
    478.4 KB · Views: 45
  • I_7.JPG
    I_7.JPG
    647.4 KB · Views: 50
  • I_8.JPG
    I_8.JPG
    402.3 KB · Views: 52
  • I_9.JPG
    I_9.JPG
    412.9 KB · Views: 45

Rhaven Blaack

!!!THE MAN BEHIND THE CURTAIN!!!
Staff member
Administrator
Moderator
Jun 12, 2009
12,516
9,891
228
Oregon
www.deviantart.com
You did a SPECTACULAR JOB on this build!!!
It looks FANTASTIC!!!
The Reliant was the first Starfleet Starship that I built by scratch.
 

Revell-Fan

Co-Administrator
Staff member
Administrator
Moderator
Aug 1, 2009
11,610
12,350
228
Vreden
Fantastic! Everyone who builds this model should read your thread first! GREAT JOB! :)
 

spaceagent-9

Right Hand Man and Confidant
Moderator
Jul 10, 2013
3,107
3,474
143
62
pheonix
thanks for the build thread!!
looks great all your work is very crisp and clean looking!
I know what you mean about too many projects at once......been trying to get this one built too after years of having it on my build list.
 

zathros

*****SENIOR ADMINISTRATOR*****
Staff member
Administrator
Moderator
Apr 5, 2013
13,498
9,549
228
You know my respect for your work is unparalleled. This is probably one of my favorite Star Trek ships, and you did a fantastic job on designing it. Makino, superb job on the construction of it! :)
 
  • Like
Reactions: vipers7