Train Room Progress
- Thread starter spitfire
- Start date
You are using an out of date browser. It may not display this or other websites correctly.
You should upgrade or use an alternative browser.
You should upgrade or use an alternative browser.
You have been busy Val. Nice to get the background done so you can get into the interesting stuff.
hudsonelectric
Member
Val, if it's not too late, you might consider curving your corners with a large sheet of styrene. Check the US Plastic website for real cheap prices on huge sheets.
Click on: "Sheet/Rod/Shapes" in the blue menu box
Then click on the "Styrene" link.
Click on "High Impact Styrene Sheet"
You don't need very thick plastic and you could probably simply cut out some vertical strips of the masonite to receive the ends of the styrene and create a smooth transition.
Wayne
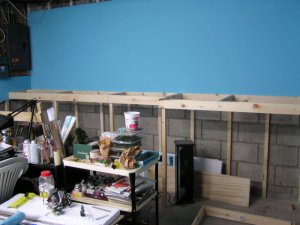
Looking good Val! BTW if I did the math right I can get 96 of my micro layouts into that room without stacking em' 
WoW Val
I wish I had that much room, I could model both CVR branch lines then, not just the Cheltenham to Orangeville line.
You are indeed doing an excellent job with the backdrops. :thumb: :thumb:
I wish I had that much room, I could model both CVR branch lines then, not just the Cheltenham to Orangeville line.
You are indeed doing an excellent job with the backdrops. :thumb: :thumb:
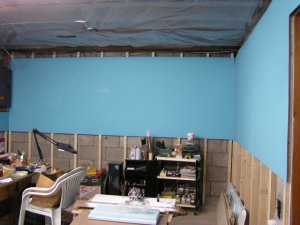
Thanks for all the encouragement everyone!! I think I spent about 8 hours yesterday painting and building. This morning I have only one thing to say - "Oh my aching back!!!!"
Val
Val
One other possibilty for corners Val -
Try 1/4 of a sono-tube (for concrete footings). It is already curved, the insides are pretty smooth, and they are relatively cheap.
Andrew
Try 1/4 of a sono-tube (for concrete footings). It is already curved, the insides are pretty smooth, and they are relatively cheap.
Andrew
hudsonelectric
Member
Hey, Val...
You have me inspired, pal! I have to get another gallon or so of wall paint to finish the rough-faced stone foundation in my RR room. It's already coated with Dry-Lok, but I don't trust it enough to cover it with wall board. If it springs a leak, I need to know about it. The French drains around the house are silted in and, although I have the downspouts emptying out onto the lawn, I still get some trickles after a heavy rain in one of the corners. I'm going to cover up the floor joists with a drop ceiling. I thought about covering them with fiberglass window screen material and then painting the screen, but I dunno. The top of the foundation would still be open and a drop ceiling would butt right up to the top of the foundation wall. Dust is a BEEEEEEG problem in this ol' house....built in 1923. Are you going to have your work bench and storage in the same room? How about sharing a floor plan with us. I could use some pointers as I go along. My layout won't be up against the long wall, but will allow room for an operator to walk all around it and view the layout from any side. Well, so I plan, anyway! I like the idea of attaching the backdrop directly onto the wall studs. Sharp! :thumb:
Russ
You have me inspired, pal! I have to get another gallon or so of wall paint to finish the rough-faced stone foundation in my RR room. It's already coated with Dry-Lok, but I don't trust it enough to cover it with wall board. If it springs a leak, I need to know about it. The French drains around the house are silted in and, although I have the downspouts emptying out onto the lawn, I still get some trickles after a heavy rain in one of the corners. I'm going to cover up the floor joists with a drop ceiling. I thought about covering them with fiberglass window screen material and then painting the screen, but I dunno. The top of the foundation would still be open and a drop ceiling would butt right up to the top of the foundation wall. Dust is a BEEEEEEG problem in this ol' house....built in 1923. Are you going to have your work bench and storage in the same room? How about sharing a floor plan with us. I could use some pointers as I go along. My layout won't be up against the long wall, but will allow room for an operator to walk all around it and view the layout from any side. Well, so I plan, anyway!
I like the idea of attaching the backdrop directly onto the wall studs. Sharp! :thumb: Russ
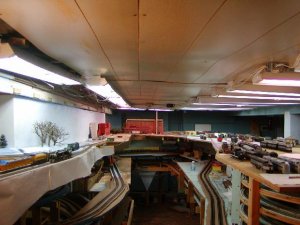
Glad to hear you're inspired Russ!! I had another idea for my train room, which I didn't end up doing but I think it would work really well for your basement. Basically you build a room within the room - 2x4 studs, drywall and attach to floor and ceiling. In your case I would also lay some heavy plastic under the walls to protect from water damage.
The layout when complete will take up the whole room, so I am moving my workbench into another part of the basement. But before I can do that there is about 30 years worth of junk to get rid of!! There will be lots of room for storage under the layout too.
If you look at the trackplan I posted on page 1 of this thread you'll see that at the bottom right there is more space - a L-shape basically with another 10x25 area - currently filled with the above-mentioned junk, plus Christmas decorations, paint, tools, tool table, furnace, water heater, canvas stretchers and about a million books. I just need to clear a little space where it says "hidden staging" on the plan for my work desk, but I'll worry about that later.
Val
F
Fred_M
That's a nice shade of blue Val. Looks like you're reaching critical mass on on the layout and it will soon be well underway. :thumb: Fred
hudsonelectric
Member
Val...
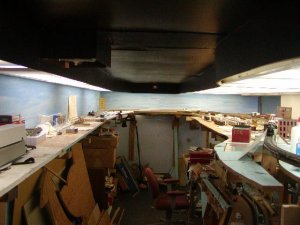
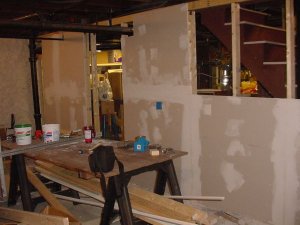
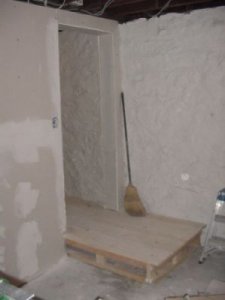
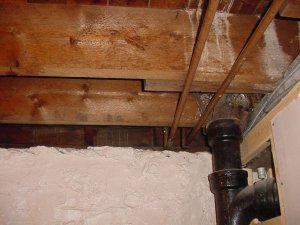
Here's what I've been working on. The sheet rock wall divides the basement in half giving me a room approximately 14' X 25'. The wall is completely sheetrocked with wiring roughed in. In the last view you can see the open sills that need to be closed off. This is best done with a drop ceiling in my case. The dividing wall will be used for my model building bench, storage cabinets, etc. I'll finish painting the walls soom and then have to get all of the spackling done. I have a couple of folding doors to install, the ceiling to put in, wiring to do, floor to paint, cabinets to install....phew! Then I can get to work on my layout...maybe in the Spring!
Russ
Here's what I've been working on. The sheet rock wall divides the basement in half giving me a room approximately 14' X 25'. The wall is completely sheetrocked with wiring roughed in. In the last view you can see the open sills that need to be closed off. This is best done with a drop ceiling in my case. The dividing wall will be used for my model building bench, storage cabinets, etc. I'll finish painting the walls soom and then have to get all of the spackling done. I have a couple of folding doors to install, the ceiling to put in, wiring to do, floor to paint, cabinets to install....phew!
Then I can get to work on my layout...maybe in the Spring!Russ
Attachments
Val,
The room looks......just a bit different....than the last time I saw it!
...But then, progress always looks good :thumb: :thumb: :thumb:
Pete
The room looks......just a bit different....than the last time I saw it!
...But then, progress always looks good :thumb: :thumb: :thumb:
Pete
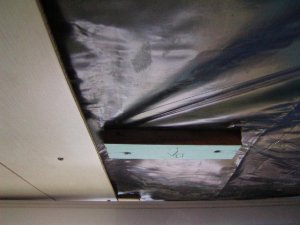
I have a basement where dust falling from the main floors flooring is a real concern as well. I did as Val has done, and installed plastic sheeting. Where pipes carrying water were located, I punched holes in the plastic to allow and future leaks to seep thru rather than accumulate till its weight brought it down on the railroad as a flood. As you'll see in the photo, I then covered the plastic with very cheap paneling. I chose a light color to help bounce back the light. I also attached the paneling so the section under the pipes can be removed without removing the rest. If I see stains on the paneling there, I'll know water is present. At least thats the plan!