TR-1 Hazel Gundam: Final Guide

S

Soaring

Alright, Sadly, I have to stop the guide for today, judging that it's already late at night. I'll get a clear start again tomorrow afternoon!
 
S

Soaring

Log 9- Hazel's Foot

Eh, I thought I had a little more time, so let's keep going...:rolleyes:

Step 5: Glue time!
Now, there are two types of glue...which one should you use? Well, in a situation like this, where small tabs are dominant, I suggest the Loctite Super Glue Gel Control, not the squeeze one. Apply little dabs of glue to each tab. Then, to each corresponding face, attach the tab to it, and you'll end up with an enclosed figure at the end of all of it!
-For more reference, view the attachments
-Or: Use the pepakura file.

You can compare the difference to the foot I did scoring light...
 

Attachments

  • 100_1887.jpg
    100_1887.jpg
    107.8 KB · Views: 7
  • 100_1886.jpg
    100_1886.jpg
    134.2 KB · Views: 7
  • 100_1888.jpg
    100_1888.jpg
    134.8 KB · Views: 7
  • 100_1889.jpg
    100_1889.jpg
    117.1 KB · Views: 3
S

Soaring

Log 9- Hazel's Foot

Step 6: Display, And Put Away
So now, you should have the piece glued, and put it away in your baggy.
 

Attachments

  • 100_1888.jpg
    100_1888.jpg
    134.8 KB · Views: 3
S

Soaring

Log 10- Describin the Ankle

This log is entirely on the description of the ankle of this model.

To start off, on the original model, the ankle is Not at all poseable. In fact, no part of it is poseable. But to me, it seems as if the designer designed it to a point in which you can manually 'import' joints.

For this model now, I hope to log downeverything you need to do for a Poseable ankle. However, there will be no templates for the joints in the ankles. I'll instruct you on how to build the joints yourself, using the X-acto knife, toothpick, needle, Paint.Net and your 'X-Tra' Ink.

What kind of joints will you try to put in?

Well, I hope to apply joints in the ankle that allows forward and backward motion, maybe a little side to side as well.

What shapes will you use for the ankle joints?

Probably, I'll use cylinders, and perhaps we'll have to 'surgically' remove piece of the ankle connection and apply the joint internally...

What types of material will the joints be made of?

To answer that, I really want to keep this model ALL paper.

How do we know if the joints will work?
Well, put this into your mind that I'll be doing everything, making all those mistakes, testing, so that you'll only have to build the correct way.

How strong are the joints?
Actually, they're pretty tough for their paper-ness. You can hold them up i n the air without it falling out. They fit in perfectly, to show you that, I'll make sure to go into full detail pictures when we get there.

Why aren't you starting yet?
Well, I have to finish a few things, but tonight, we'll get there, to "Them" ankles.

-Now, for each log from now on when introducing a new main piece to the model, I'll make sure to add this kinda log. One with description, then questions.-

-Ankle Log Intro: Finished
-Leg Intro:Not done
-Waist Intro: not done
-Chest Intro: Not done
-Arm: Not done
-Head: Not done

Percent of model finished so far: 2%
 
S

Soaring

Log 11- Let's Model! (The Ankle Guards)

Log 11- Let's model! (The Ankle Guards)

Go scroll back up one post to see the description of the Ankle of you haven't been fully informed. We'll start imeediately and focus on the steps.

Step 1: REFER TO FIRST ATTACHMENT.
Let's move onto the ankle pieces. The X-acto knife is pointed torwards it.

Step 2: REFER TO SECOND ATTACHMENT.
Now, cut around the two ankle guards. You should come out with something show i nattachment two. Also, pay close attention when cutting around it, you don't wanna accidentally cut off a piece of the other pieces. You'd surely make this model even more worrying!
 

Attachments

  • 100_1890.jpg
    100_1890.jpg
    104.2 KB · Views: 3
  • 100_1891.jpg
    100_1891.jpg
    109.9 KB · Views: 5
S

Soaring

Log 12-Gasp! More typing to come...

Well, let's get those Hazel piece ready! More of the guide to come as of now!
 
S

Soaring

Log 13- Let's Model (Ankle Guards)

Log 13- Let's Model (Ankle Guards)

Alright! So let's continue on this guide! Now remember, I need someone to work with here, so post your own pictures of your WIP of Hazel Gundam, please!

Judging that you finished steps 1 and 2, lets do steps 3 and 4 in this log.

Will there be any joint implants in the ankle guards?

Sadly, no. I'll have to investigate sign1 and see if there is rotation around the ankle guards. If there are, I'll update this piece into a 4th section where you can build the joints *Cylinders* For it.

Step 3: SCORING!
NOTE! REFER TO THE ATTACHMENT!
Alright, I've decided to bold this entire paragraph to emphasis what YOU MUST DO for this part. So for scoring, grab your X-acto knife, preferably, and score the lines, HARD AND FAST. If you don't know what I mean, let's ask :excited1:<-----him.
What does score hard and fast mean?
:excited1:-"In my opinion, that means to score hard, or better known as, score with applying heavy force. What does heavy force look like? Well, if you LOOK AT THE FIRST ATTACHMENT, you'll see what I mean. There should be an ident which can be easily seen left in the lines of the mountain/valley/tabs. Now scoring fast....I think that means to score as quick as you can, without a ruler, or with a ruler. Scoring fast would be the opposite of taking your time, and in a sense, is a way of expressing lazyness from the Author."

Lazyness? Aww Excited man, that's harsh....
So let's continue.
To sum it up, score all lines.

STEP 4: Cut out Ankle Guards.

Let's cut this step into two parts.

Semi steps:
1- Cut around the piece. Make sure to not run into anyother piece!
2- Cut the entire piece out, use the outlines as cutting guides.

Check the next log for the Glueing and Finishing!
 

Attachments

  • 100_1891.jpg
    100_1891.jpg
    109.9 KB · Views: 7
  • 100_1892.jpg
    100_1892.jpg
    105.9 KB · Views: 3
S

Soaring

Gasp! I didn't notice that I psoted the same pictures :O

To sum it up:
Step 1:Find the ankle pieces
Step 2:Cut around the ankles
Step 3: Score
Step 4: Cut'

Step 4 is shown in below.
 

Attachments

  • 100_1893.jpg
    100_1893.jpg
    131 KB · Views: 3
S

Soaring

Log 14-Let's Model! (Ankle Guards)

Log 14-Let's Model! (Ankle Guards)
Semi Step: We're not yet a the semi step, but I guess we'll define it NOW.
Alright, here's a semi step, which goes in between the 5th and 6th step. This'll probably form into the 6th step and make the total steps bump up to 8...

*Thanks Excited Guy for remindng me about the number change.

So what is the semi step? Well, let's ask :excited1:<---This guy!

So tell us, "What is the Semi Step?"

:excited1:- "Well Soaring and all you other viewers, there's a step vital to the production of this model. And to correct you, this is would be the 5th step, and add the total steps to 8! Why? Well, take a look..Also, to correct you again, this semi step would be the 6th step. I'll say it agian, in bold, this Log is the 6th step. The next log will be the 5th step, ironically...Anyways, time to answer the question about the Semi Step. In my description, the semi step is pre shaping. Why preshape? Well, you obviously want to know where to glue your tabs, so in preshaping you...
-Fold
-Form piece as if you applied glue, but do not apply any adhesive product.
-To view an example of a preshaped piece, see the Attachment."

Thank you Excited Guy, for another definition.
To sum it up, here are the new revised steps.
Step 1:Find the ankle pieces
Step 2:Cut around the ankles
Step 3: Score
Step 4: Cut'
Step 5: Fold,
Step 6: Pre shape
Step 7: Glue
Step 8: Put away
 

Attachments

  • 100_1894.jpg
    100_1894.jpg
    118.6 KB · Views: 3
S

Soaring

Not exactly a log, but a reminder. Get your Hazel pieces out, and we'll continue with this guide in a few minutes!
 
S

Soaring

Log 15- A Disaster

Sigh, water hit my models, and now I lost my reference kit. This is going to make this guide alot harder to write......I'll start typing tonight...
 
S

Soaring

Log 16- Let's Model! -Finish the Ankle Guards

Log 16- Let's Model! -Finish the Ankle Guards

After a while of not typing on this thing ( Yeah, I was lazy), I'm ready to start up again. And I hope you are too! So why not, let's start!
Let's start off where we left off, in preshaping, Log 14. After Preshaping and Folding, the next step is glueing! Let's ask :excited1: <----This guy, a little bit about glueing.

:excited1:- " Well Soaring, Glueing is when you begin actually making your model/ piece, into a solid piece/model. This perhaps may be the hardest step, since - "Placement is everything" -"

What are your tips on glueing, and which ones should we use at certain times?

:excited1:- " Hmm. In glueing, the type of glue depends on how your model will end up, I guess. I highly Recommend Loctite Glue GEL Control for all your needs, since the excess glue doesn't leak, and, the gel that is squeezed out of the tube stays in place. I do not recommend something like...Well, any liquid glues that do not state that they won't leave any residue, which may create darkspots in the areas in which you glued. Now in times, talking about LOCTITE, tabs that are small, and need more accuracy should be handled carefully, and glued with the GEL CONTROL SQUEEZE BOTTLE. However, one mode larger, and mdeuim tabs, I suggest that LOCTITE Squeeze Tube." -

Alright, now we know abit about glueing, so let's get started!

Step 7: GLUE
Now to glue this ankle, it's pretty self explanitory. All you have to do, like the rest of the pieces, is glue each tab to it's corresponding sides. If you still can't figure out where to glue everything, go back to log 14 and view the PRESHAPED piece. Again, If you are not sure in what to glue, go back to log 14 and view the PRESHAPED piece.

The Attachment below should give you an idea on how the final product is created. Now for this entire two pieces, I suggest using the Loctite Squeeze Bottle, rather than the Squeeze Tube. However, this entire piece will be encased, so WATCH WEAR YOU APPLY YOUR GLUE, AND DON'T LET IT TOUCH YOUR HAND.

A pattern you should follow, is when glueing this, Start off from where the angles of the ankle guard are at its largest, then work your way down to the last angle.
 

Attachments

  • 100_1895.jpg
    100_1895.jpg
    106.7 KB · Views: 4
S

Soaring

Log 17- FINISH THAT ANKLE GUARD!

Log 17- FINISH THAT ANKLE GUARD!

ARE YOU READY? ARE YOU SURE! No, no, ok...Anyways, we'll have to go on without you...

Ok, so you've done the complicated steps, and the basic steps to these guards, let's END THE MADNESS.

In the attachments are the finished pieces. What do I want you to do with them? Show your mother, father, relatives, immediate and or extended family members. Heck, post some pictures of it here! Then, I want you to put it in your bag, where it'll be safe, warm, and protected from evil liquids...
 

Attachments

  • 100_1896.jpg
    100_1896.jpg
    139.4 KB · Views: 8
  • 100_1897.jpg
    100_1897.jpg
    131.1 KB · Views: 4
  • 100_1898.jpg
    100_1898.jpg
    121.4 KB · Views: 3
S

Soaring

Log 18: Lets Model! Joining the Ankle Guards

Log 18: Lets Model! Joining the Ankle Guards

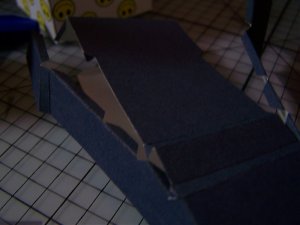
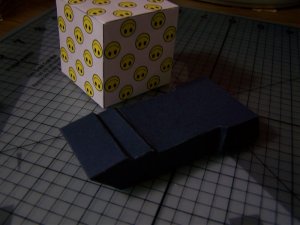
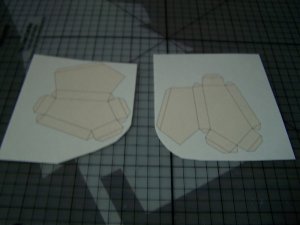
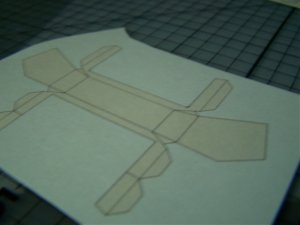
So, we've done the foot, we've done two ankle guards. Now, what allows the ankle guards to connect. Well, you have a spiffy piece in there, so you'd better get out your Foot sheet and locate the ANKLE CONNECTOR! Or whatever it is :/ Let's get somemore information on this piece, bring it on Mr. Excited!

Now, what is this piece, in this model. What's it's purpose. And what are its flaws?

:excited1: - "Well Soaring, and all you good people, this piece connects the ankle guards together. Amazing huh? Well, lets move on to the next question. Flaws? Hmm, Seeing you've modeled this before, how about you tell it to us Soaring?" -

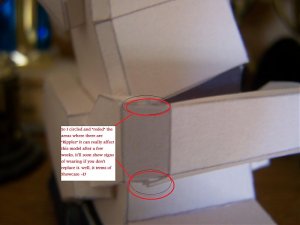
Fine, if you wanna be the lazy type...
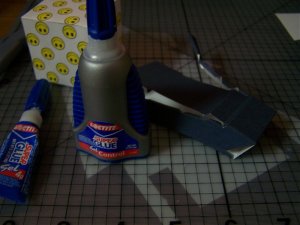
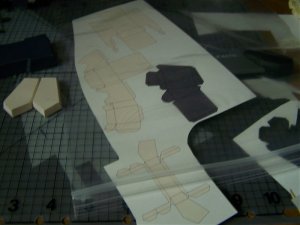
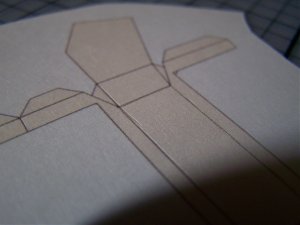
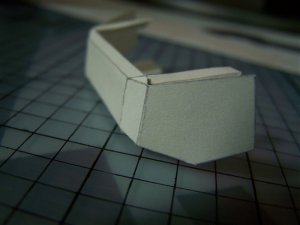
This piece is great and all, however, it does have flaws. This is not to insult this piece, or the designer, but I'm just warning you before you accidentally do what I did. First of all, when you have to GLUE the ankle Guards to this connector piece, you have to use the outlines of the piece. You'll see what I mean when we get to Attaching. To correct this, we'll need an extra sheet of cardstock, a ruler, glue, and a cutting utensil. Again, we'll have a more in depth look on this in the Log where we Attach things. To end this lecture, the connectore has as well, one more flaw. Not exactly a flaw, but! This will probably, and when I say probably, I mean 98% chance that you will stumble upon the scoring bit. When scoring this model, you'll notice where the piece thins. It happens on all four sides, at an angle near the tabs. Again, we'll go more indepth later. But, when scoring this, do it LIGHTLY. Or else you will surely get something you WILL not like. Then, when glueing, you can't just put it over the tab and viola, you actually have to STRECTH it out, then place it over.

Anyways, let's get on with our lives and begin Step 1.
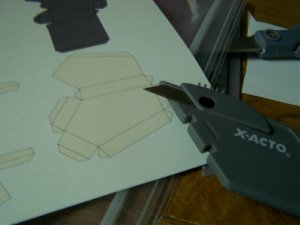
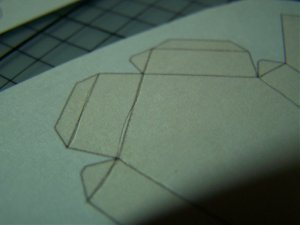
STEP 1: Let's cut out the piece.
Now what do I mean when I said that? Well, you have to cut AROUND the piece, not using the outlines. Just a quick rotation cut, I'm sure you can do it in 30 seconds, to 15 seconds tops.
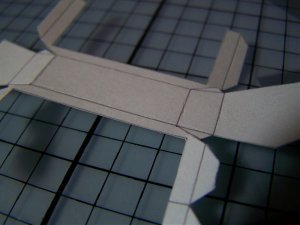
Step 2: SCORING!
Now, when you score, you have to really pay attention on this model.
Score hard, but you really have to pay attention to what you score. If you miss a scoring line, or go off it, you'll create unwanted creases, and you surely don't want that to mess you up, eh? Didn't think so. Do you see, if you concentrate hard enough, the lines that are scored the hardest? Well, score them THAT HARD enough to show those lines.

Great! Good job! Next log will be the next Steps, keep yourself posted!
 

Attachments

  • 100_1905.jpg
    100_1905.jpg
    98.5 KB · Views: 3
  • 100_1906.jpg
    100_1906.jpg
    113 KB · Views: 7
S

Soaring

Log 19- Lets Model! Making the Connector

Log 19- Lets Model! Making the Connector

Alright, step 1 and 2 finished, let's keep moving along!

Step 3:CUTTING!

So, we don't really need ANY descriptions for this part. All you have to do is cut the piece out from its holder. Easy huh? Well, I suggest you steer clear of where the piece thins, it'll make those creases I warned you about if you don't. Oh yeah, use a scissor here, please.

So, again, cut around the outlines, and you'll have no problems. Oh yeah, make sure to cut between the tabs and side pieces in order for folding.
 

Attachments

  • 100_1908.jpg
    100_1908.jpg
    126.5 KB · Views: 3
S

Soaring

Log 20- Let's Model! Ankle Connection

Log 20- Let's Model! Ankle Connection

Alright, next part may be difficult.

Step 4/5: Folding and Preshaping.

In an effort to save time, I've decided to combine the two steps as of now. So, after you've cut out your piece, it's now time to Fold. Apply pressur to the scored lines until it folds. Now, ONE VERY IMPORTANT THING I'D LIKE TO NOTE. If you notice in the middle of this connection, it's where you scored. Two paralell lines running aside from each other. When bending this, DO NOT BEND FROM THE SIDES, or else you'll get a crease at the very thin part of the connection. Instead, using your index and thumb, bend the scored line in the middle, and slowly make your way to the sides, before you hit the thinning spot. When you reach the stoppingpoint, take our hands off it, and push softly on the edges - Thinning part-.

TAKE YOUR TIME, OR ELSE YOULL FORM UNWANTED INDENTS.
 

Attachments

  • 100_1909.jpg
    100_1909.jpg
    111 KB · Views: 8
S

Soaring

Log 21- Let's Start Over

Log 21- Let's Start Over

First I'd like to put up this guy -->:woot1:For another post from another person. Thanks Lex!

Second, When I say, Let's Start Over, I do not, certainly, mean that. That would be outrageous! That would be obscure! No, I mean lets start over the ankle connection. Why? Well, I tried everything to stop those indents from appearing while cutting, I spent the ENTIRE Weekend trying to fix that problem. Sadly, there is no "cure" for that piece, but we can Modify it. I'm really not that proud of modifying, but hey, if it helps the kit, we'd better try. So Card modeler enthusiasts, please forgive me for the lack of inconvienence (Or however you spell that). This is not very good to do, but there is no other way I can contact the designer. so, to make sure you don't waste ink, open it up through Designer, and move the piece to a blak page. Again, I AM VERY SORRY. Log of how to modify this piece, coming in 5 minutes.
 
S

Soaring

Log 22- Vacation!

Well, sorry I didn't update the guide, but I had a really busy weekend. You know, with Easter...and the Easter Vigil...and Easter Mass, and Birthdays :)

So for Monday through Friday I'll see whatever I can get done. So, can you all, get your ankle connections out. Relocate it to a different page on pepakur designer, then print it twice. Time to get down, dirty, and revise!
 
S

Soaring

Log 23- Ankle Connection -Revision-

Log 23- Ankle Connection -Revision-

Introduction to REVISION!

NOTE: ONLY DO THIS PART OF THE GUIDE IF YOU REALLY LIKE DISPLAYING YOUR MODELS AND LOVE CLOSE PROFILE SHOTS.
IF NOT, CONTINUE FROM LOG 18-20 THEN JUST FINISH IT OFF BY GLUEING.


Alright, so last time I didn't update the guide, as I said in the last 2 or some posts. Back at Log 18, we began the Ankle Connection. However, after trying it SO MANY TIMES, I couldn't get that little ripple out of the surface of the connection. Why does it matter? Well, let's ask.... :excited1:<---Him.

So tell us Mr.Excited, Why does it matter if there's ripples in this piece?

:excited1:- Well, it depends. WHAT THE HECK DO YOU MEAN BY RIPPLES?

Soaring: You know, the ...you know.....

:excited1:- No, we don't know..Care to show a picture?

Soaring: Fine, it's the first attachment.

:excited1:- Great, now we can get somewhere!
Alright to inform you all what a ripple on this piece looks like, it'll be forming where the piece of the connectore THINS. You can locate it yourself on the picture, it's marked. Anyways, this is only important if you care really much about display and detail. So, if you really want to make your Gundam so perfect, FOLLOW THIS PORTION OF THE LOG. If not, read logs 18-20, complete them yourself, and finish it off by glueing.

Soaring- well, I like pretty things :mrgreen: So I'll make this part of the guide where it explains how to correct this error.

STAY TUNED!
 

Attachments

  • 100_1959.jpg
    100_1959.jpg
    107.6 KB · Views: 14