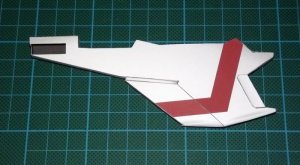
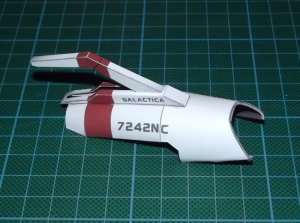
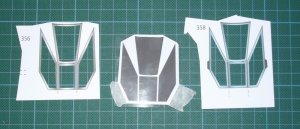
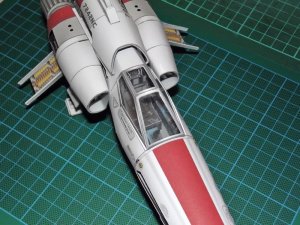
The UHU02 Colonial Viper appreciation thread

Revell-Fan

Co-Administrator
Staff member
Administrator
Moderator
Aug 1, 2009
11,595
12,338
228
Vreden
Now come the wings.

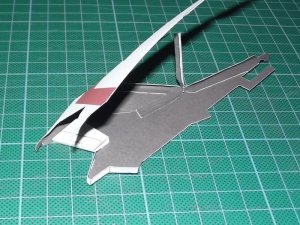
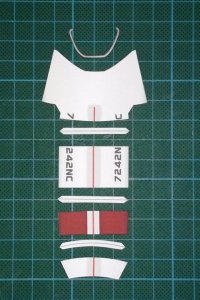
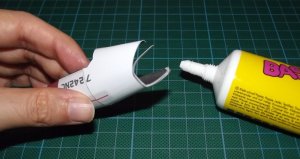
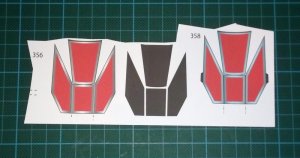
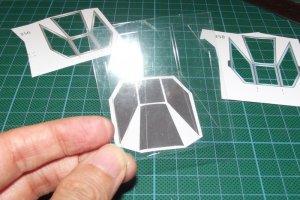
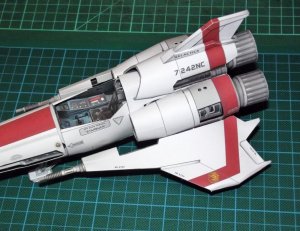
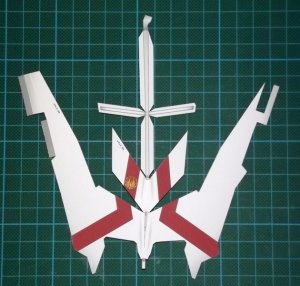
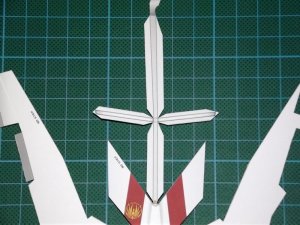
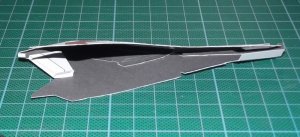
The main wing part is cut out and pre-shaped. The part is a bit fragile (but not much) because of that thin cross in the middle. There are some flaps which I cut to shape. I noticed that this procedure was not necessary but it didn't do any harm either.

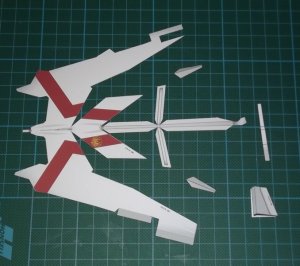
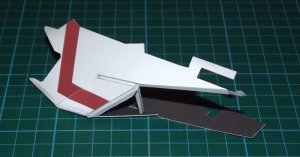
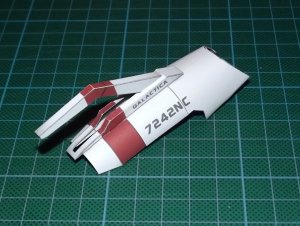
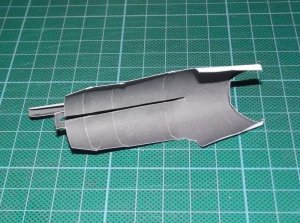
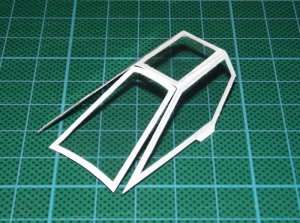
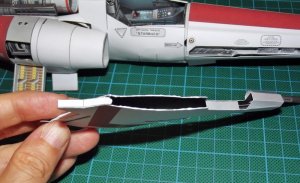
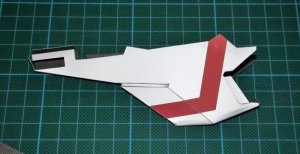
The unfold is extremely complex; I suggest to assemble one area at a time. First glue the upper and lower wing parts together using the glue tabs parts 330 & 331.

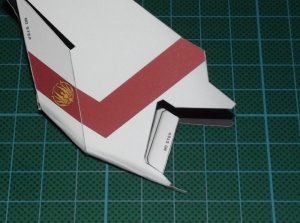
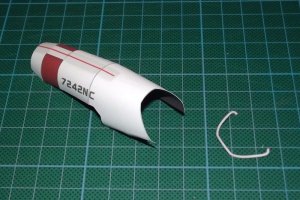
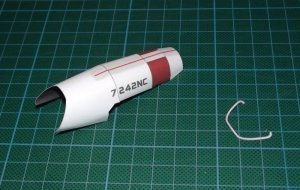
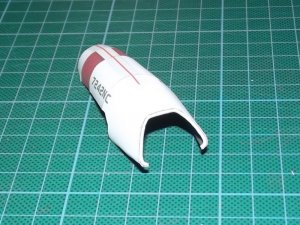
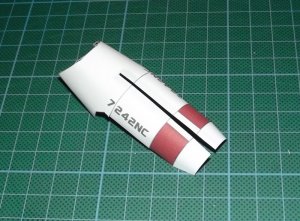
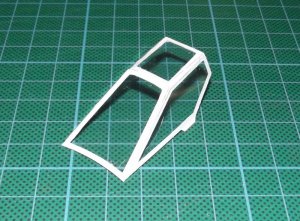
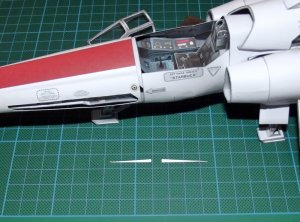
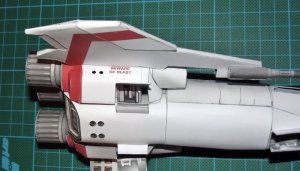
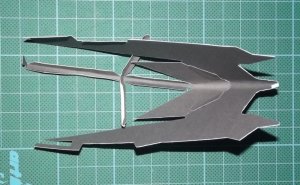
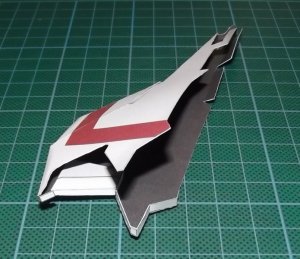
Then glue 332 in place and attach the "NO STEP" box.

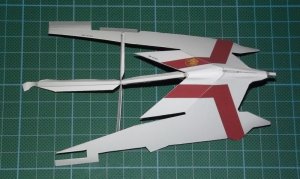
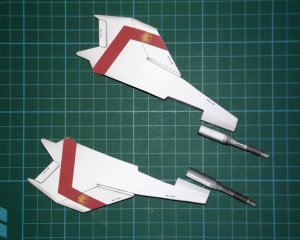
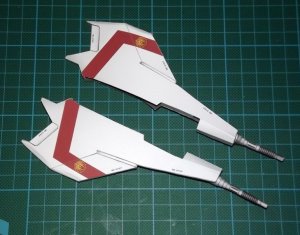
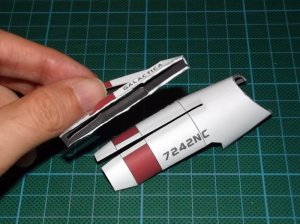
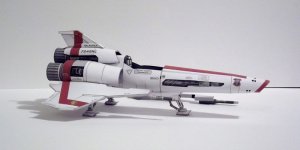
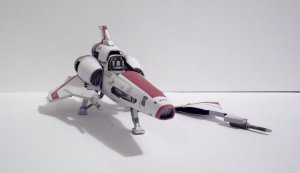
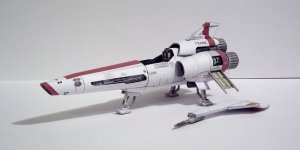
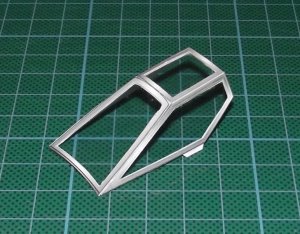
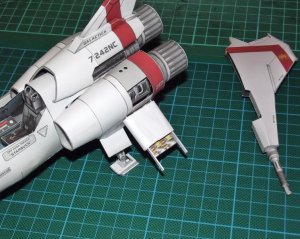
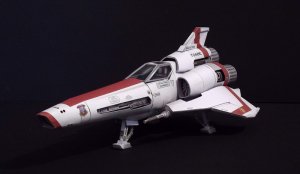
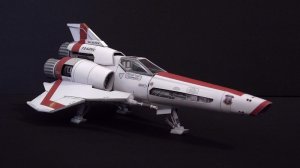
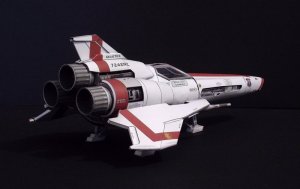
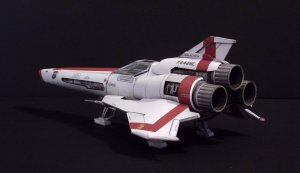
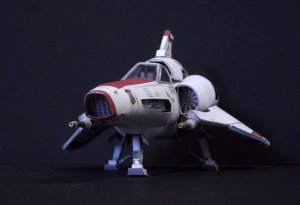
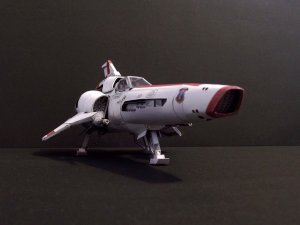
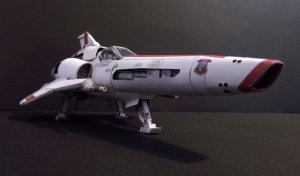
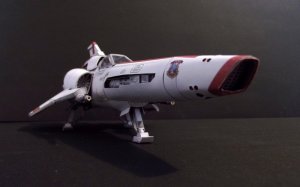
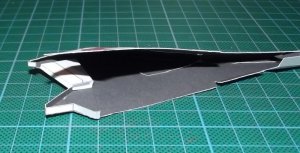
Final assembly should be a piece of cake. :thumb:
 

Attachments

  • DSCF4360.JPG
    DSCF4360.JPG
    127.9 KB · Views: 18
  • DSCF4361.JPG
    DSCF4361.JPG
    153.4 KB · Views: 25
  • DSCF4381.JPG
    DSCF4381.JPG
    156.4 KB · Views: 20
  • DSCF4382.JPG
    DSCF4382.JPG
    118.3 KB · Views: 18
  • DSCF4385.JPG
    DSCF4385.JPG
    112.5 KB · Views: 18
  • DSCF4386.JPG
    DSCF4386.JPG
    119.8 KB · Views: 23
  • DSCF4387.JPG
    DSCF4387.JPG
    114 KB · Views: 20
  • DSCF4389.JPG
    DSCF4389.JPG
    162.3 KB · Views: 28
  • DSCF4390.JPG
    DSCF4390.JPG
    136 KB · Views: 20
  • DSCF4391.JPG
    DSCF4391.JPG
    123.9 KB · Views: 26

Revell-Fan

Co-Administrator
Staff member
Administrator
Moderator
Aug 1, 2009
11,595
12,338
228
Vreden
The finished right wing and assembly of the left one.

As you can see I have used the alternative wing template featuring the Phoenix symbol.
 

Attachments

  • DSCF4392.JPG
    DSCF4392.JPG
    114.2 KB · Views: 25
  • DSCF4393.JPG
    DSCF4393.JPG
    111.9 KB · Views: 16
  • DSCF4394.JPG
    DSCF4394.JPG
    128.3 KB · Views: 16
  • DSCF4395.JPG
    DSCF4395.JPG
    125.7 KB · Views: 18
  • DSCF4396.JPG
    DSCF4396.JPG
    160.4 KB · Views: 19
  • DSCF4397.JPG
    DSCF4397.JPG
    105 KB · Views: 24
  • DSCF4398.JPG
    DSCF4398.JPG
    124.2 KB · Views: 23
  • DSCF4400.JPG
    DSCF4400.JPG
    193.7 KB · Views: 22
  • DSCF4414.JPG
    DSCF4414.JPG
    146.3 KB · Views: 16
  • DSCF4415.JPG
    DSCF4415.JPG
    147.6 KB · Views: 25

Revell-Fan

Co-Administrator
Staff member
Administrator
Moderator
Aug 1, 2009
11,595
12,338
228
Vreden
The high engine cover assembly is very straight forward and easy. UHU02 was so kind and gave us some glue tabs. :thumb:

Attaching the outer rim part is somewhat tricky; I recommend starting from the middle and then proceeding with the sides.

After joining the single elements the red strip is cut out to make way for the fin. The fin frame is attached and the high engine cover is finished.
 

Attachments

  • DSCF4401.JPG
    DSCF4401.JPG
    97.5 KB · Views: 19
  • DSCF4402.JPG
    DSCF4402.JPG
    142.4 KB · Views: 22
  • DSCF4403.JPG
    DSCF4403.JPG
    134.8 KB · Views: 29
  • DSCF4404.JPG
    DSCF4404.JPG
    112.2 KB · Views: 16
  • DSCF4405.JPG
    DSCF4405.JPG
    175.3 KB · Views: 21
  • DSCF4407.JPG
    DSCF4407.JPG
    163.6 KB · Views: 25
  • DSCF4408.JPG
    DSCF4408.JPG
    141.5 KB · Views: 17
  • DSCF4410.JPG
    DSCF4410.JPG
    140.1 KB · Views: 25
  • DSCF4411.JPG
    DSCF4411.JPG
    149 KB · Views: 21
  • DSCF4412.JPG
    DSCF4412.JPG
    180.3 KB · Views: 24

Revell-Fan

Co-Administrator
Staff member
Administrator
Moderator
Aug 1, 2009
11,595
12,338
228
Vreden
You are welcome, RB! :thumb:

Well, the canopy is the next (and final) part of assembly - but not the final part of the build! :twisted:

I haven't attached the wings to the side engine covers yet because I'll need at least one wing detached from my plane for the upcoming diorama. And no, this won't be a repair bay dio! I have something else in mind. I won't tell you too much but it's gonna be epic..! :cool:
 

Attachments

  • DSCF4413.JPG
    DSCF4413.JPG
    107.9 KB · Views: 31
  • DSCF4423.JPG
    DSCF4423.JPG
    86.3 KB · Views: 32
  • DSCF4424.JPG
    DSCF4424.JPG
    88.3 KB · Views: 33
  • DSCF4425.JPG
    DSCF4425.JPG
    86.8 KB · Views: 32

Revell-Fan

Co-Administrator
Staff member
Administrator
Moderator
Aug 1, 2009
11,595
12,338
228
Vreden
Thank you all for your comments!

Just a quick note: Viper #3 is ready! Pictures will follow tomorrow.
 

micahrogers

Moderator "Where am I, and how did I get here?"
Staff member
Moderator
Jul 12, 2012
3,773
4,643
113
Shannon GA
Looks great R-F , love the "old trick" you used on the gun muzzels.
 

Revell-Fan

Co-Administrator
Staff member
Administrator
Moderator
Aug 1, 2009
11,595
12,338
228
Vreden
+++ German sitrep +++

Well then, here is the latest set of pics of Viper 3:

As you know the canopy was the last part to be assembled. I cut out the frame pieces and taped the black stencil behind a piece of clear sheet. I traced the lines and cut out the template. Then I pre-shaped the inner frame and glued the canopy "glass" to it. Be careful, apply glue sparingly and onyl to the frame itself. This makes sure that the clear parts are not ruined during glueing.

Finally the outer frame was attached and the canopy was put in place.

However, it was clearly evident that it didn't fit! :crash:
 

Attachments

  • DSCF4426.JPG
    DSCF4426.JPG
    113.7 KB · Views: 23
  • DSCF4429.JPG
    DSCF4429.JPG
    155.8 KB · Views: 26
  • DSCF4433.JPG
    DSCF4433.JPG
    177.9 KB · Views: 26
  • DSCF4436.JPG
    DSCF4436.JPG
    187.5 KB · Views: 21
  • DSCF4439.JPG
    DSCF4439.JPG
    162.3 KB · Views: 20
  • DSCF4440.JPG
    DSCF4440.JPG
    179.8 KB · Views: 20
  • DSCF4441.JPG
    DSCF4441.JPG
    126.3 KB · Views: 27

Revell-Fan

Co-Administrator
Staff member
Administrator
Moderator
Aug 1, 2009
11,595
12,338
228
Vreden
I was left with a 2 mm wide gap on both sides. I was shocked and had two options: Making a new canopy or filling up the gaps.

I chose the latter and used some scrap paper to cut out two triangles and put them in place.

NOW I was happy! :thumb:
 

Attachments

  • DSCF4442.JPG
    DSCF4442.JPG
    162.4 KB · Views: 27
  • DSCF4443.JPG
    DSCF4443.JPG
    137 KB · Views: 27
  • DSCF4444.JPG
    DSCF4444.JPG
    189.1 KB · Views: 28

Revell-Fan

Co-Administrator
Staff member
Administrator
Moderator
Aug 1, 2009
11,595
12,338
228
Vreden
Last thing I did on the plane was attaching the wings.

The right one was glued to the engine skin as intended by the master. The left one wasn't attached permanently because it has to stay removable because of the diorama.

I cut a piece of scrap paper to shape, formed a tube and pushed it over the magazine case (or whatever this is called :mrgreen:). I made it thick enough so that it was able to hold the wing in place (more or less). Then I pushed the wing over it.
 

Attachments

  • DSCF4445.JPG
    DSCF4445.JPG
    140.9 KB · Views: 29
  • DSCF4446.JPG
    DSCF4446.JPG
    120.4 KB · Views: 27
  • DSCF4447.JPG
    DSCF4447.JPG
    141.5 KB · Views: 27
  • DSCF4449.JPG
    DSCF4449.JPG
    172.8 KB · Views: 24
  • DSCF4450.JPG
    DSCF4450.JPG
    167.4 KB · Views: 24

Revell-Fan

Co-Administrator
Staff member
Administrator
Moderator
Aug 1, 2009
11,595
12,338
228
Vreden
FINISHED! :mrgreen::mrgreen::mrgreen:
 

Attachments

  • DSCF4453.JPG
    DSCF4453.JPG
    88 KB · Views: 29
  • DSCF4454.JPG
    DSCF4454.JPG
    87.4 KB · Views: 30
  • DSCF4457.JPG
    DSCF4457.JPG
    95.8 KB · Views: 32
  • DSCF4458.JPG
    DSCF4458.JPG
    91.7 KB · Views: 29
  • DSCF4460.JPG
    DSCF4460.JPG
    87.2 KB · Views: 31
  • DSCF4463.JPG
    DSCF4463.JPG
    94.4 KB · Views: 32
  • DSCF4464.JPG
    DSCF4464.JPG
    96.1 KB · Views: 28
  • DSCF4466.JPG
    DSCF4466.JPG
    95.8 KB · Views: 27
  • DSCF4468.JPG
    DSCF4468.JPG
    109.3 KB · Views: 31
  • DSCF4469.JPG
    DSCF4469.JPG
    91.9 KB · Views: 28

Revell-Fan

Co-Administrator
Staff member
Administrator
Moderator
Aug 1, 2009
11,595
12,338
228
Vreden
inw.gif
inw.gif
inw.gif


My deepest respect to UHU02 and his ingenious design. It was a pleasure to build this plane!

:thumb::thumb::thumb:
 

Attachments

  • DSCF4471.JPG
    DSCF4471.JPG
    89.8 KB · Views: 22
  • DSCF4473.JPG
    DSCF4473.JPG
    100.8 KB · Views: 22
  • DSCF4474.JPG
    DSCF4474.JPG
    112 KB · Views: 18
  • DSCF4475.JPG
    DSCF4475.JPG
    78.2 KB · Views: 26
  • DSCF4477.JPG
    DSCF4477.JPG
    80.1 KB · Views: 23

Revell-Fan

Co-Administrator
Staff member
Administrator
Moderator
Aug 1, 2009
11,595
12,338
228
Vreden
OK class, that's all for today. I hope you enjoyed this trip with me! More is to come, so stay tuned.


HOWEVER, I think I have to apologize to all of you because I wasn't quite honest about the true size of the Viper I built. I guess a picture is worth more than a thousand words, so here she is next to a Penny...

DSCF4482.JPG

sign1sign1sign1
 
Last edited:
  • Love
Reactions: Awry_Chaos

Rhaven Blaack

!!!THE MAN BEHIND THE CURTAIN!!!
Staff member
Administrator
Moderator
Jun 12, 2009
12,494
9,858
228
Oregon
www.deviantart.com
@RF: You have done a OUT(FRAKKING)STANDIN JOB on this model!!!:thumb::thumb:
It would have been better if you would have used a CUBIT instead of a penny.
OH! That's right I won all of your cubits at pyramid. Then I guess a penny will have to do.sign1sign1sign1