

The UHU02 Colonial Viper appreciation thread
- Thread starter Revell-Fan
- Start date
You are using an out of date browser. It may not display this or other websites correctly.
You should upgrade or use an alternative browser.
You should upgrade or use an alternative browser.
Don't worry, I think we all got the message right! :thumb:Sorry..I never wanted to forget anybody in this tread but your absolutely right Rhaven Blaack.
For all those who have the courage and the patience to do this incredible build..............and at that size.............will do a FRAKING good job.
An million :thumb: for all of you !
Thank you very much in the name of all participants!

Another Scorpion Shipyards progress report
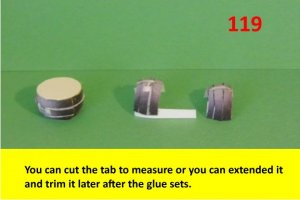
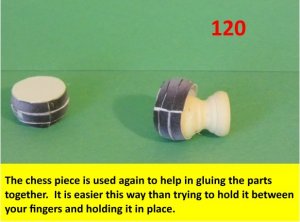
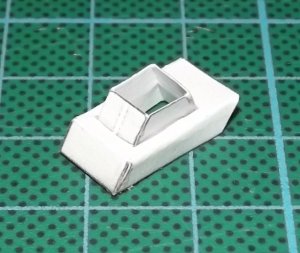
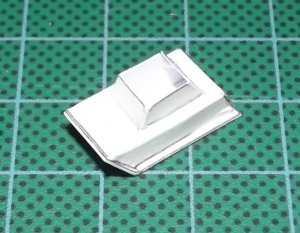
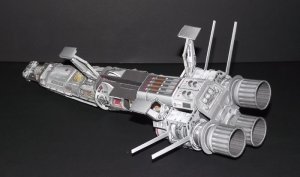
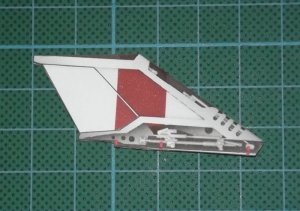
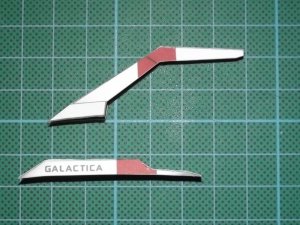
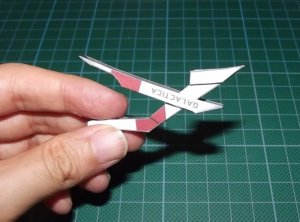
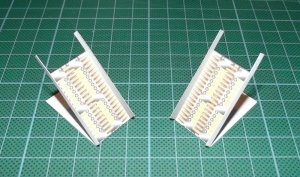
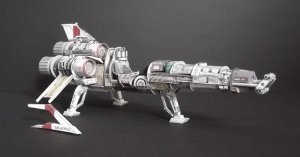
Here is the final component to the plane (as a whole). The cockpit canopy.
As you can see, I did put clear plastic in it.

The canopy is assembled.
Since I did put clear plastic in the canopy, I used some of the paper putty to fill in the gaps.


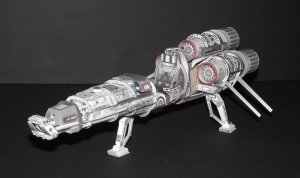
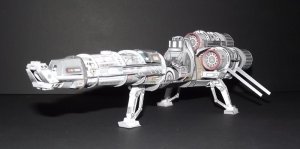
Here are all of the finished components of the plane.


Now all I have to build is the diorama itself (and all of the components for it), which I will include in this thread as well.
Please stay tuned to your local CBSC for further updates and progress as it happens.
Thank you for watching.
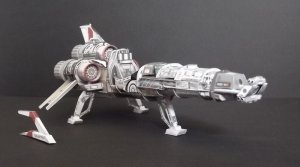
Here is the final component to the plane (as a whole). The cockpit canopy.
As you can see, I did put clear plastic in it.
The canopy is assembled.
Since I did put clear plastic in the canopy, I used some of the paper putty to fill in the gaps.
Here are all of the finished components of the plane.
Now all I have to build is the diorama itself (and all of the components for it), which I will include in this thread as well.
Please stay tuned to your local CBSC for further updates and progress as it happens.
Thank you for watching.
bounce7bounce7bounce7
RB, you have outdone yourself! BIG KUDOS FOR A FINE JOB WELL DONE!
balloon6balloon6balloon6
You have proven that even people with BIG hands are able to build this fantastic model.
And since your Viper is the first in the row, I give you this:
:wave7::wave7:
RB, you have outdone yourself! BIG KUDOS FOR A FINE JOB WELL DONE!
balloon6balloon6balloon6
You have proven that even people with BIG hands are able to build this fantastic model.
And since your Viper is the first in the row, I give you this:
:goldcup: (*BLING!*)
:wave7::wave7:
RF: Thank you!!!
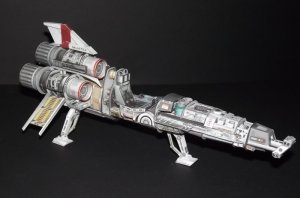
It was quite an interesting challenge (to say the least). I am surprised at how fast everything went together. In a sense, I am a bit disappointed that I actually finished it. I was really enjoying the build (even though, I used the wrong size card stock).
Well like I said earlier, it is on to the diorama itself (and all of the little components that go with it).
SO WHO IS NEXT TO FINISH???
You are disappointed because your (main) build is complete? Well, there is an easy way to overcome this dilemma: Start all over again and make another Viper - this time using the correct paper!
sign1sign1sign1
I still need to tweak some parts of the hangar and will send you the parts for it asap. This way you will not only present a splendid addition to your model but the first test-build of the bay which then will be released for the other fans to enjoy .
.
sign1sign1sign1
I still need to tweak some parts of the hangar and will send you the parts for it asap. This way you will not only present a splendid addition to your model but the first test-build of the bay which then will be released for the other fans to enjoy
.silveroxides Viper
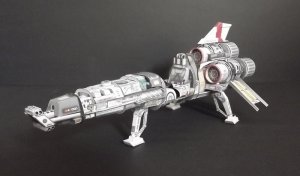
Rhaven, One down and now for the sister Viper fully dressed. Disregard the interior with the exception of the cockpit.
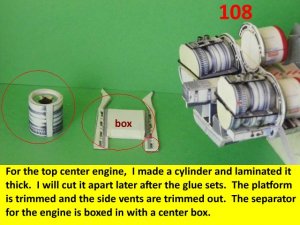
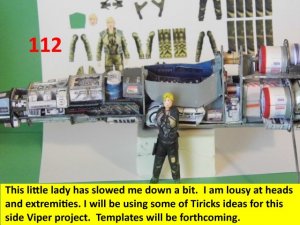
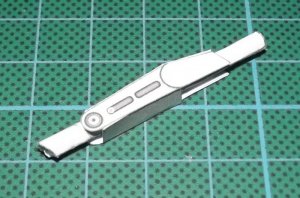
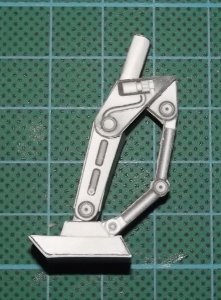
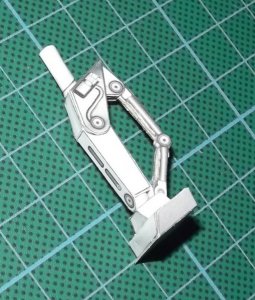
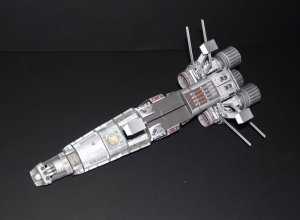
As for me, I am trudging along and had a short slow down making an addition to the Viper. This is my first sculpture paper hybrid and the templates are done. I will do a build thread with the next figure and post it for every-ones benefit. At the moment I am working on the arms. As for the viper itself, the rear engines will receive its complement of wire. tubing and greebles. I should be back soon with more. Enjoy and see you all next posting.:thumb:
Rhaven, One down and now for the sister Viper fully dressed. Disregard the interior with the exception of the cockpit.
As for me, I am trudging along and had a short slow down making an addition to the Viper. This is my first sculpture paper hybrid and the templates are done. I will do a build thread with the next figure and post it for every-ones benefit. At the moment I am working on the arms. As for the viper itself, the rear engines will receive its complement of wire. tubing and greebles. I should be back soon with more. Enjoy and see you all next posting.:thumb:
Attachments

silveroxides Viper
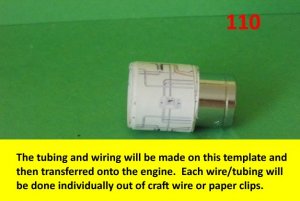
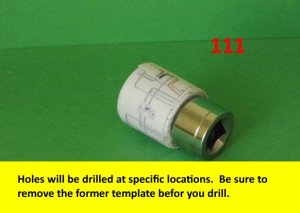
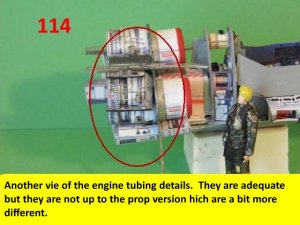
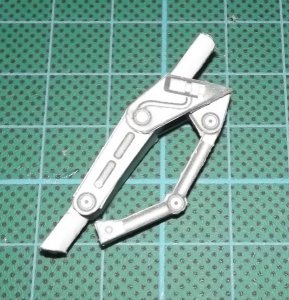
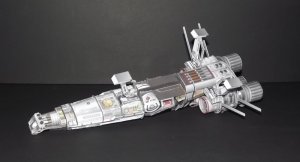
One Viper is finished in the appreciation thread and I am still trudging along. I have a few more details and techniques to do on this Viper. The figure will also be added to the build and while I am not very good in the head construction, I will have to use Tiricks technique for the meantime. As mentioned earlier, I did not use the printed tubing but did use it as a reference to hand make the tubing.pipes out of wire. Enjoy and see you all later with more stuff from my goodies box.:thumb:
One Viper is finished in the appreciation thread and I am still trudging along. I have a few more details and techniques to do on this Viper. The figure will also be added to the build and while I am not very good in the head construction, I will have to use Tiricks technique for the meantime. As mentioned earlier, I did not use the printed tubing but did use it as a reference to hand make the tubing.pipes out of wire. Enjoy and see you all later with more stuff from my goodies box.:thumb:
Attachments


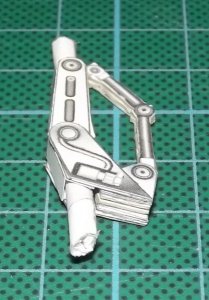
The engines look GREAT!!!
I like to added detail with using the wire for the tubing.
Your Starbuck figure looks REALLY GOOD!
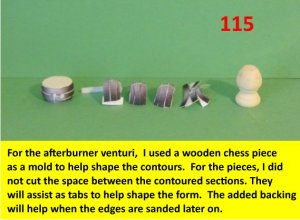
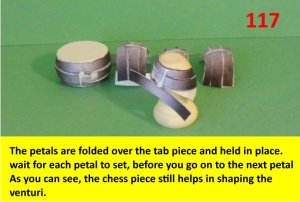
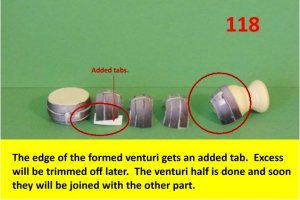
The way you made the after burners is a GREAT IDEA! It looks like it will keep everything nice, smooth, and contoured to the right shape.
I like to added detail with using the wire for the tubing.
Your Starbuck figure looks REALLY GOOD!
The way you made the after burners is a GREAT IDEA! It looks like it will keep everything nice, smooth, and contoured to the right shape.
A bit late, but CONGRATULATIONS, RB, for completing the main build:thumb::thumb::thumb::thumb:
As we are both working at the original scale, I understand what you have been through with your build...... Nice work RB!!:thumb::thumb::thumb:
R-F, your build is coming on fantastically. At the enlarged scale, the build is clean and crisp. Nice! REALLY NICE!:thumb::thumb::thumb:
AgO2, well, what can I say? You have taken UHU's original design and taken it to another level. Your detailing and greebling is outstanding.:thumb::thumb::thumb:
I see you are a bit like me, when it comes to using household objects as formers/mandrels. My kitchen seems to be my biggest supply... :mrgreen:
I am still way behind, but as we said, it is not a race.
I hope to post some Dunglish updates soon......
+++ German sitrep +++
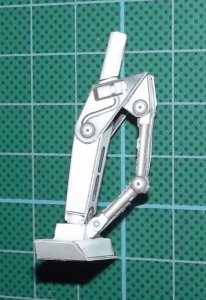
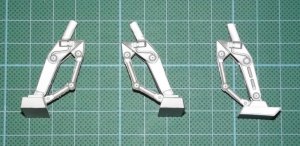
Now then, I had to insert two layers of cardboard to align the front landing gear. Like RB I reinforced the central tube. I inserted a wooden rod. A test-fit showed that the rod's diameter was smaller than the tube's diameter, it had to be increased a bit. To do so I glued a piece of thin paper around the rod.
Then I pre-shaped the tube: I applied some spittle to the back of the part and rolled it up around another rod. The spittle makes the part flexible and prevents it from wrinkling during the forming. However, this has to be done carefully; the part must not get wet. After forming the part is put aside for a minute to dry. Then I glued it around the first rod. Finally everything was cut to shape and inserted.
Attachments


@RF: That is FAN(FRAKKING)TASTIC!!!
Even at the scale that you are making this at, everything looks PERFECT!!!
@Dan: Thank you for the kind words. As for your build, take your time and ENJOY!!!
Even at the scale that you are making this at, everything looks PERFECT!!!
@Dan: Thank you for the kind words. As for your build, take your time and ENJOY!!!
jawdropjawdropjawdrop
R-F, my god, I think even UHU02 would bow to that.:mrgreen:
Stunning!:thumb::thumb::thumb::thumb:
R-F, my god, I think even UHU02 would bow to that.:mrgreen:
Stunning!:thumb::thumb::thumb::thumb:
Thank you all very much. But I only obey the plans and instructions by master UHU... ops:
The next step will show if the skin fits... A very delicate procedure, I'm very excited. CU!
ops:The next step will show if the skin fits... A very delicate procedure, I'm very excited. CU!