

The Gorge is growing
- Thread starter Collyn
- Start date
You are using an out of date browser. It may not display this or other websites correctly.
You should upgrade or use an alternative browser.
You should upgrade or use an alternative browser.
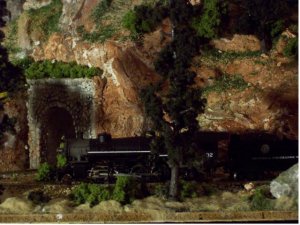
Here is an interesting pic i found of your gorge, with an old UP steam in it.
Got it from the Union Pacific website.

Got it from the Union Pacific website.
thats a neat picture. it amazing that you can see the people, or whatever on top of the bridge. If you look toword the back you can see the hanging bridge
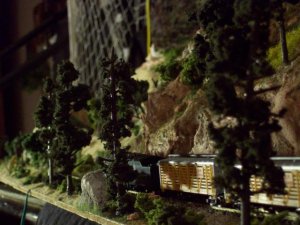
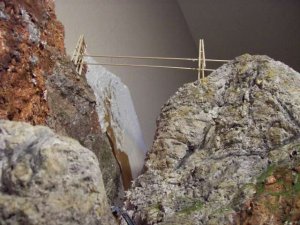
I worked on the bridge and rock face on the gorge today and yesterday. For the bridge I used ready mad plastic I beams. The one side I had to drill holes in the plaster to put the I beams in but the other side I have yet to plaster so i will plaster those in later and the bridge will staighten out
Attachments
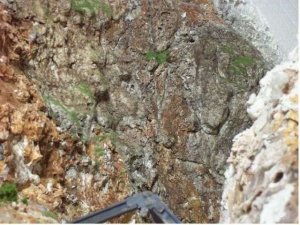
For the rock faces first I put a layer of rough sculptamold. The I painted that a redish color. New I went ove severl places with a second coat and stapmed It with a mold spryed with lots of non stick spray to give it a rock like texture. The next step was to carve crack lines then paint/stain those portions various gray, brown colors. so now I have several colors and textures. The last step was to fill some molds with sculptamold, very important as it is stickyer, and lighter than normal plaster, and stick the mold onto different, random places, I took the molds off after 5 to 10 mins depents on the thickness and blended the sculptamoald this gives a three dimensional quality and lastly I stained that and added vegitation. For now I only have the one picture and It is not very good so I will have to get some more. The left side is finised and the right is not. that picture does not show any texture , diffinantly need another.
Attachments
I just thought about it I didn't know up ran through at that timeIllus said:Here is an interesting pic i found of your gorge, with an old UP steam in it.
Got it from the Union Pacific website.
 ops:
ops:Collyn said:I just thought about it I didn't know up ran through at that time
I don't know the date or authenticity of the pic. I was on the Union Pacific website looking for a good pic of an M10000 when I came across that pic in the History section under Photos. I remembered your intrest in that gorge and figured I would post it.:thumb:
Very nice work Collyn. I'm impressed by the way you modeled the gorge and by the pic of the real one . I was born in what's nicknamed the "flat Country " ( Belgium ) so I'm impressed by any mountain, hill or even molehill.
Something is not clear to me about your mountain building technique: "New I went ove sever places with a secon coat and stapmed It with a mold spryedwith lots of non stick spray to give it a rock like texture".
Are you using a Woodland scenics rock mold ? 1 mold contain several rock cavities separated by flat space then you must have some flat space on the gorge if you stamp the rock on the fresh sculptamold.
Could you please be kind enough to expand that information ?
Another "interesting" point is the violent climate during the construction of that railroad line.
In Belgium, nothing like that happened because since the beginning there was only 1 owner: the Belgian government so there wasn't any competition.
I have several rock molds 2 molds that are a single big face from woodland scenics one that is the several smaller molds and one that I made from laytex and a real piece of granite from by backyard. I first overfill the molds up with the sculptamold, then I just stick them to the side, they usually stay up, I use the mold I made a little differently Since It is thinner with no edges I hot glue It to the surface then fill it up, it works great for curved sections. Hope that helps.
Chessie6459
Gauge Oldtimer
I still am not sure about that front corner. I want to be able to expand if need be the engine house to me is plain, but I already have it. the quarry would be more interesting but I don't know how I would go about it, the real quarry owns the lines through the gorge, rrrr rock and rail rail road. look at page one to see the picture of where I am talking about.
new pics
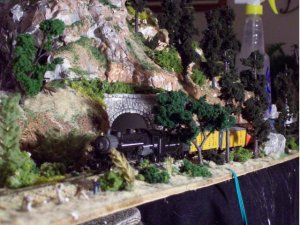
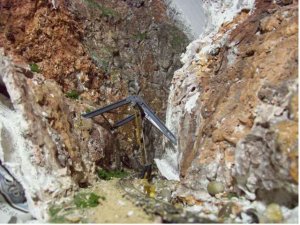
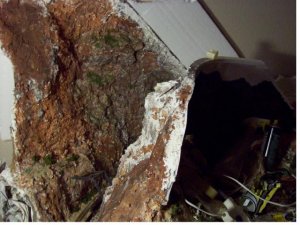
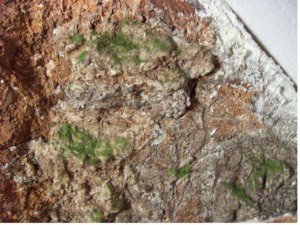
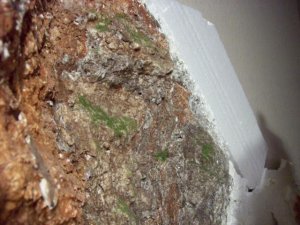
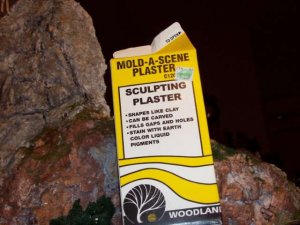
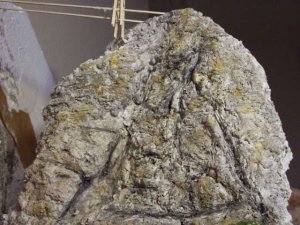
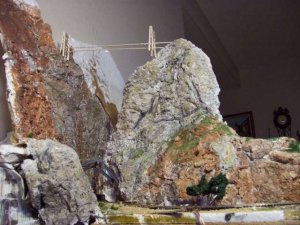
More rock work on the gorge, different tecnique this time this area is all compleatly hand carved. There is so much more detail with this technique but it takes a long time and you must have good access to the spot in which you are working. This was not suited to the other spots plus the detail would not have been seen. I ran out of sculptamold and the last several times I have gone to the LHS they have not had it. So, instead I got the paper mache they sell in little bricks (1 lb). Then I added some plaster ( 4 lbs). It turns out that is alot of paper mache to plaster but it was hard to tell in that compressed brick. I found several advantages, I had much much longer working time, it is just now compleatly dry 2 days later. It still held its shape after I was done carving, it drys mostly in an hour but it still feels soft for a while. Also, it is gray to start with. It "worked" much better. I also bought but havent used yet this sculting plaster, never seen it before now. I aso stuc a failed attemt at a bridge on top to show where it is going to go. In the pictures the rocks look blotchy, it's a camera issue not a painting one.
More rock work on the gorge, different tecnique this time this area is all compleatly hand carved. There is so much more detail with this technique but it takes a long time and you must have good access to the spot in which you are working. This was not suited to the other spots plus the detail would not have been seen. I ran out of sculptamold and the last several times I have gone to the LHS they have not had it. So, instead I got the paper mache they sell in little bricks (1 lb). Then I added some plaster ( 4 lbs). It turns out that is alot of paper mache to plaster but it was hard to tell in that compressed brick. I found several advantages, I had much much longer working time, it is just now compleatly dry 2 days later. It still held its shape after I was done carving, it drys mostly in an hour but it still feels soft for a while. Also, it is gray to start with. It "worked" much better. I also bought but havent used yet this sculting plaster, never seen it before now. I aso stuc a failed attemt at a bridge on top to show where it is going to go. In the pictures the rocks look blotchy, it's a camera issue not a painting one.
Attachments
Looking great...it's amazing how 'pixilation' works...that process by which our eyes see things that aren't there, like faces & shapes in the clouds. When I look at your rockwork the same thing happens. My eyes begin to see various shapes and faces. Perhaps this is a sign of success?
Looks great, either way. Good luck with that front corner.
Galen
Looks great, either way. Good luck with that front corner.
Galen
been i while. I never said how the mold a scene works. It is very strange. It is kind of like building with sand at first, difficult and alot falls away. but then it started to get better as it was worked. It really wasn't good for what i am doing but for some applications it could work. It is already brown so painting is hard i think i am going to paint the whole thing white so i gan stain it like i have the rest of my rocks. I give it a c-. Sculptamold much better. not much better than plaster