Hi Everyone,
Since I do like to add as many details to my models as I can but often times lack the patience, skill and talents that many folks who have been card modeling for a long time seem to be able to whip right out. I have to look for other means to be able to do a credible job. Sure, I'd like to be able to cut out a set of two or three row railings to die for in 1/200 scale and slap them down on the deck edge, but that ain't never gonna be me and quite frankly, at 60 years of age, my eyes, hands and such just won't cooperate in any manner that would even come close in scales three times as large.
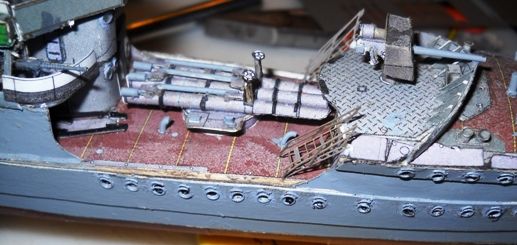
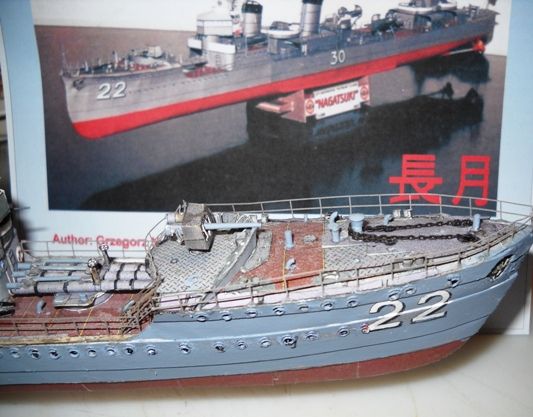
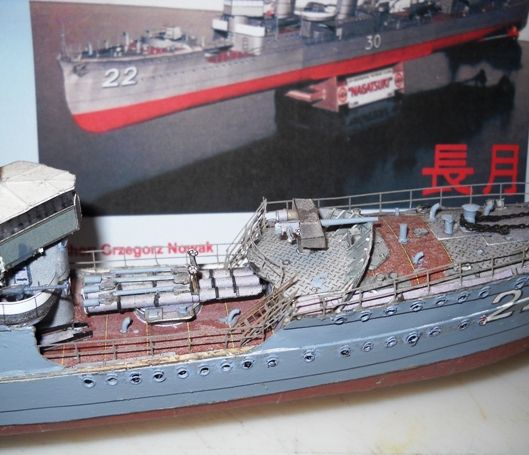
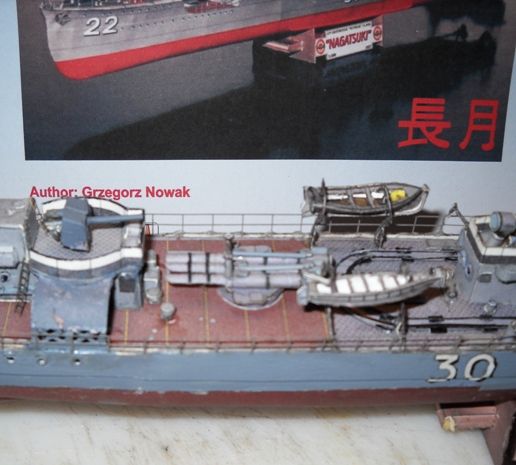
Luckily for me and others who share my lack of talents for these tiny details manufacturers of the kits who sell them to us also produce a whole plethora of parts that we can utilize, admittedly, for a price, to fill our need for these things. Just like our styrene enthusiastic brethern who use brass Photo Etch parts, there are some companys who work in our scales. But for those who would like to keep to the same basic material of card or paper we can also find them in those materials as well and at a much friendlier price than brass too. I recently had to score some things to go on my IJN Nagatsuki, railings, ladders and ladderways. While some folks can do wonders with thread and super glue as well as card to produce these same items, I find it much more satisfying to just go pick up what I need, install them and go on to the next one. It keeps my sanity somewhat intact not to mention saves more of my hair on top of my pate as well.
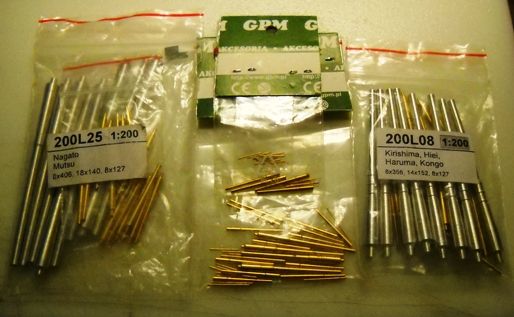
I picked these up, they are made by GPM, Answer and a few others also make them as well, from an Internet vendor, a little work with a search box will allow you to do the same. At any rate, here are the goodies that arrived in my mail box today, just in time for me to start working on them on my one day off this week. :thumb:
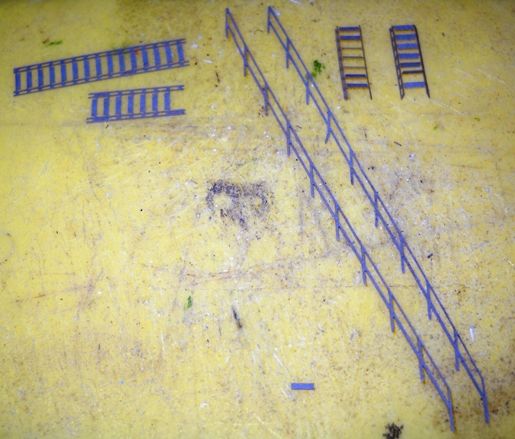
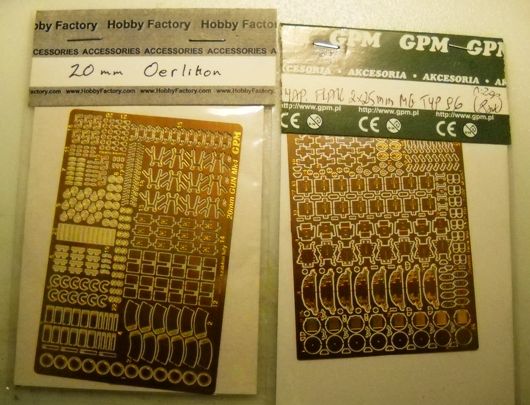
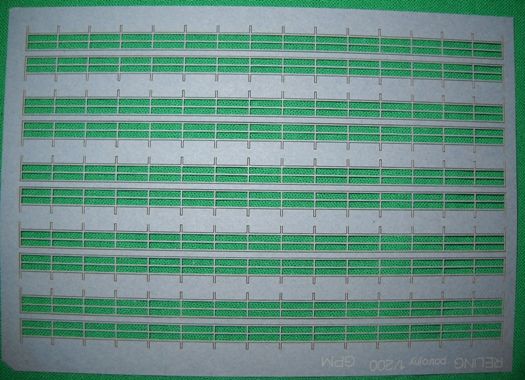
Three row railing:
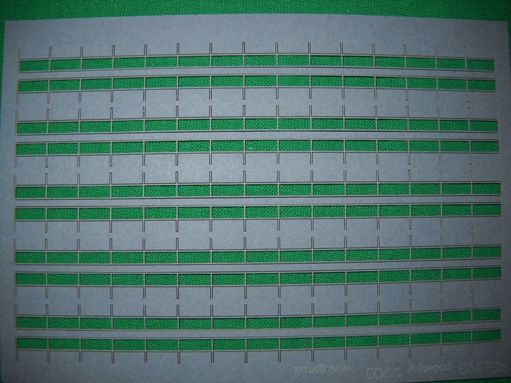
Two row railing:
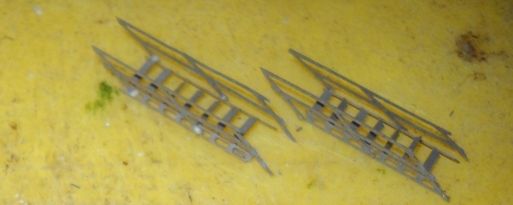
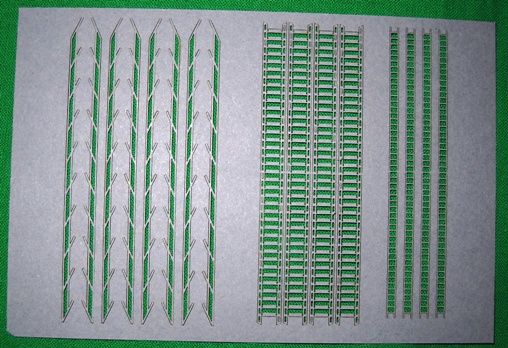
And a combination of ladders and ladderways:
I will be adding to this, showing how I go about using them, building up some of the parts like the ladderways as well as even more parts of various types, to give you an idea of what is available out there.
Since I do like to add as many details to my models as I can but often times lack the patience, skill and talents that many folks who have been card modeling for a long time seem to be able to whip right out. I have to look for other means to be able to do a credible job. Sure, I'd like to be able to cut out a set of two or three row railings to die for in 1/200 scale and slap them down on the deck edge, but that ain't never gonna be me and quite frankly, at 60 years of age, my eyes, hands and such just won't cooperate in any manner that would even come close in scales three times as large.
Luckily for me and others who share my lack of talents for these tiny details manufacturers of the kits who sell them to us also produce a whole plethora of parts that we can utilize, admittedly, for a price, to fill our need for these things. Just like our styrene enthusiastic brethern who use brass Photo Etch parts, there are some companys who work in our scales. But for those who would like to keep to the same basic material of card or paper we can also find them in those materials as well and at a much friendlier price than brass too. I recently had to score some things to go on my IJN Nagatsuki, railings, ladders and ladderways. While some folks can do wonders with thread and super glue as well as card to produce these same items, I find it much more satisfying to just go pick up what I need, install them and go on to the next one. It keeps my sanity somewhat intact not to mention saves more of my hair on top of my pate as well.
I picked these up, they are made by GPM, Answer and a few others also make them as well, from an Internet vendor, a little work with a search box will allow you to do the same. At any rate, here are the goodies that arrived in my mail box today, just in time for me to start working on them on my one day off this week. :thumb:
Three row railing:
Two row railing:
And a combination of ladders and ladderways:
I will be adding to this, showing how I go about using them, building up some of the parts like the ladderways as well as even more parts of various types, to give you an idea of what is available out there.
")