I had an American Flyer S gauge set over 21 years ago...I built an oval on 4x8 plywood, with a few turnouts....and a very cool mountain. My highschool budy had an HO set. Well, that was fun back then but I have not done much since. Now after looking at some Model Railroader magazines and a visit to the train shop I see some things are the same, and many are new... mainly DCC.
Best that I can tell, I need to get my benchwork done and track plans complete before I do anything else (and a budget!!). I wanted to start simple, but wanted to run what I think are simple ideas by you all first.
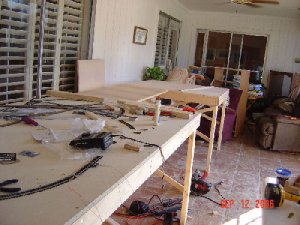
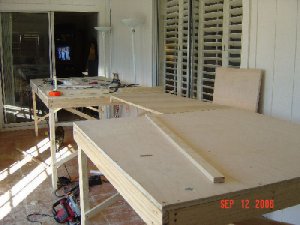
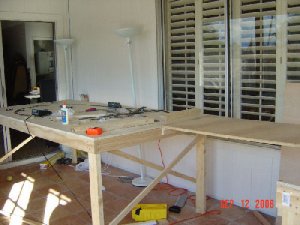
I wanted to just get 2 utility tables (since I own one now)... and 2 sheets of plywood, and put the plywood on the tables. I wanted to build a simple frame under the plywood with 2x4s. I am debating building legs for this frame, but for now, I just wanted to put the frame/plywood on the tables.
I wanted to make an L with tables, with each piece of plywood forming the L. I will then base my track plan on that frame.
one question I have as far as track planning goes.. if I want to do some kind of inclined grade... do you have to build a grade incline out of plywood strips? or can you use foam and glue the track to the foam? I have seen in the magazines these 1/4" plywood cutouts via a jigsaw put on some sort of risers to base the grade on, but just wondered if other methods exist?
The DCC/Transformer world is daunting... should I start with a transformer and make the train go around until I learn other cool things like switches, and controls?
Do you need to have the entire track built before you do scenery? or can you add/subtract over the years as you see fit? I have a basic track plan in mind, but as I learn DCC and other dos and donts, I can see this taking a while but I really like to build scenery.
Please excuse any newbie-ness I might have...this is my first post on a train forum...Im usually on a computer networking forum! hehe
Best that I can tell, I need to get my benchwork done and track plans complete before I do anything else (and a budget!!). I wanted to start simple, but wanted to run what I think are simple ideas by you all first.
I wanted to just get 2 utility tables (since I own one now)... and 2 sheets of plywood, and put the plywood on the tables. I wanted to build a simple frame under the plywood with 2x4s. I am debating building legs for this frame, but for now, I just wanted to put the frame/plywood on the tables.
I wanted to make an L with tables, with each piece of plywood forming the L. I will then base my track plan on that frame.
one question I have as far as track planning goes.. if I want to do some kind of inclined grade... do you have to build a grade incline out of plywood strips? or can you use foam and glue the track to the foam? I have seen in the magazines these 1/4" plywood cutouts via a jigsaw put on some sort of risers to base the grade on, but just wondered if other methods exist?
The DCC/Transformer world is daunting... should I start with a transformer and make the train go around until I learn other cool things like switches, and controls?
Do you need to have the entire track built before you do scenery? or can you add/subtract over the years as you see fit? I have a basic track plan in mind, but as I learn DCC and other dos and donts, I can see this taking a while but I really like to build scenery.
Please excuse any newbie-ness I might have...this is my first post on a train forum...Im usually on a computer networking forum! hehe
 Hi VulcanCCIT, and welcome to the Gauge.