Star Trek DS9:- Operation Return Diorama - 'micro' build log

zathros

*****SENIOR ADMINISTRATOR*****
Staff member
Administrator
Moderator
Apr 5, 2013
13,499
9,551
228
I think we are going to need a "Love" button. This is awesome. There just isn't enough DS9 stuff out there. you are doing a fantastic job. The scale lends itself to the model. :)
 
  • Like
Reactions: linweseregon

linweseregon

Senior Member
Nov 23, 2013
269
505
123
Scotland
@spaceagent-9 Jings! :shamefullyembarrased: I'd be honoured to supply pics :D. I uploaded one to my flickr page, but it looks like it can't be downloaded! :facepalm: You could mibbe try my facebook album:- https://www.facebook.com/linweseregon/photos If you go to full screen mode you'll get the large version.

@Revell-Fan I'm usually posting here at 3 or 4am and in a rush with being dog-tired, hence misreading your query :facepalm:;). I eventually printed this one as supplied. I initially took his guess at the scale as accurate and shrunk the pattern, but I think his guess of 1:5000 should be closer to the 1:8000 that I'm using for everything else since the shrunk version would have measured 4" in diameter. Printing the design as given results in a station just over 7" in diameter - perfect for my needs :D.
Jeez! That sketchup model would give me brain damage if I tried to unfold it! lol I don't envy you and I can see why you paused!
You're spot on about a red LED in the reactor. I seriously considered putting LEDs inside for the reactor and for all the windows. Unfortunately, there would be too much leakage where there were alignment problems and I thought that masking the insides would be just too much bother than it was worth. Adding a lining would also make it really hard to find room for the bulbs :(.

@zathros Thank-you very much :D

So... The promenade was attached and I cut the parts for the reactor plus a few strips for detailing on the promenade:-
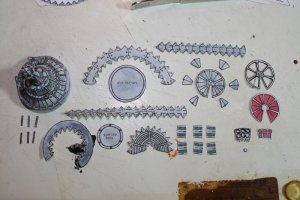
17.JPG
This gave a central column which looks like this:-
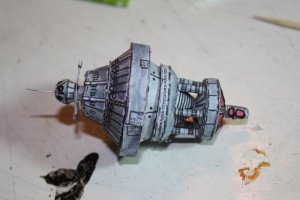
18.JPG
The small cylinders around the circumference weren't long enough to reach the dots marked on the parts and I had to move them inwards a wee bit to make a connection. If I had to do it again I would remove the tabs on the cones to shorten the gap. It was a bit of a squeeze to get the column into it's final position so it's a lovely, tight fit. The result is:-
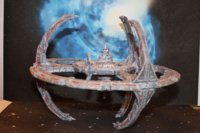
20.jpg
I've made a start on the three Akira class ships. The saucer is only 1" across so it wasn't worth the effort of adding names and registry numbers - they're unreadable at this size.
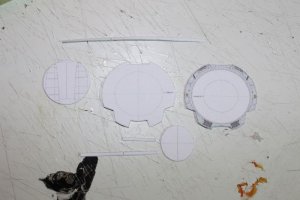
19.JPG
 

linweseregon

Senior Member
Nov 23, 2013
269
505
123
Scotland
With the contouring parts attached, it was time to cut the pieces for the underside of the saucer and the deflector dish mount:-
22.JPG
I'll need to invent a new word for this - "fiddly" doesn't come close! I used very thin paper strips to connect the rear curves then curled everything round a toothpick. The housing for the deflector dish required something smaller so I used a darning needle to shape it. First I tried connecting one side of strips to the deflector panel - don't try this at home kids! ;) It was a stunning failure :facepalm:. Instead I found that connecting both ends of a single strip, working from the smallest to the largest, gives a much better result. Fortunately I'll be blowing the crap out of one of these so it doesn't matter too much if one turns out looking like a dog's dinner ;).
 

linweseregon

Senior Member
Nov 23, 2013
269
505
123
Scotland
@kirby stewart Thank-you very much :D

The undersides of all three ships fitted really well! I really expected one of them to be a total mess, but the gap was reduced when it was attached. The next stage was adding the contouring sections and bridge to the upper half of the hull:-
23.JPG
I used the blunted end of a toothpick to shape the lower section of the bridge, and the other, not so blunt, end for the miniscule upper piece. With these connected I cut the parts for the nacelle struts and weapons pod:-
24.JPG
I've omitted a few of the thinner edging pieces here 'n' there as they're kinda redundant at this size. And I forgot to mention - this is Zosho's design.
 
Last edited:

linweseregon

Senior Member
Nov 23, 2013
269
505
123
Scotland
I ditched the edges on the nacelle struts - they made 'big', chunky boxes which were totally out of proportion at this scale. Instead I just stuck the opposite faces to each other for a double thickness. That just leaves the nacelles to be built and attached:-
25.JPG
 

spaceagent-9

Right Hand Man and Confidant
Moderator
Jul 10, 2013
3,104
3,473
143
62
pheonix
I completely love it!!! and now I understand this model I have wanted to build for a while. Thank You so much for all this effort, you are really planting seeds that will flourish for all those who are following your threads.
 
  • Like
Reactions: linweseregon

Rhaven Blaack

!!!THE MAN BEHIND THE CURTAIN!!!
Staff member
Administrator
Moderator
Jun 12, 2009
12,494
9,858
228
Oregon
www.deviantart.com
It still amazes me to watch people like yourself make these models at the scale that you do.
Your skills are improving with each model you make, and this one shows such.

KEEP UP THE GREAT WORK!!!
 
  • Like
Reactions: linweseregon

linweseregon

Senior Member
Nov 23, 2013
269
505
123
Scotland
@Ron Caudillo Many thanks :D

@spaceagent-9 Thank-you Jim :shamefullyembarrased:. Lining the nacelle struts is a bit awkward, but dry fitting them first gives a good idea of the angles they should take. The angle is much more pronounced than in any diagram I've seen or on my Eaglemoss version.

@Rhaven Blaack Thank-you Rhaven :D. I photograph the best one of the three - there are a few errors in the other two, especially no. 3 - but it's getting blown up so I'm not that bothered ;).

I thought that the bussard collectors would be really hard to build this size, but they were surprisingly easy. As always the cutting had to be precise - tiny mistakes translate into metres when the camera zooms in ;). I connected the nacelles and then noticed a wee pile of parts I'd forgotten about:-
26.JPG
With those pieces attached I have three Akiras at just over 1 1/2" (40mm) in length:-
27.JPG
The bulb on the underside (which contains the deflector) seems a bit deep, but I can always squash it a wee bit if I get too bothered by this ;).