some pictures of my layout

Viperious

New Member
Oct 8, 2012
19
0
1
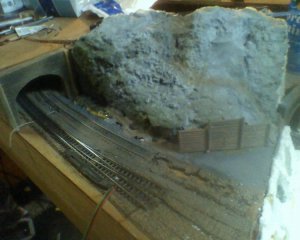
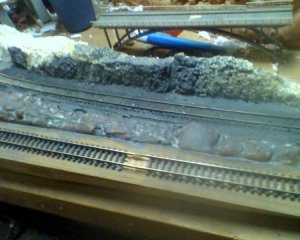
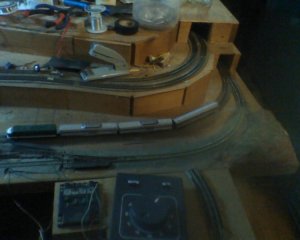
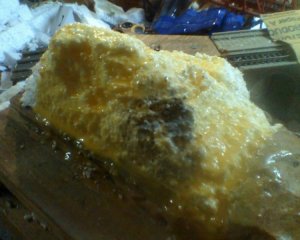
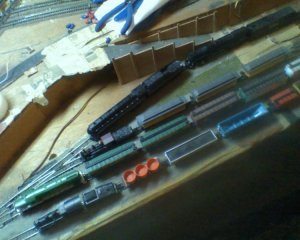
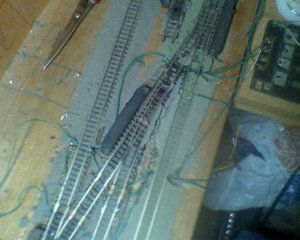
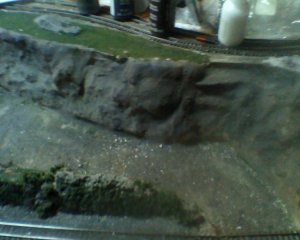
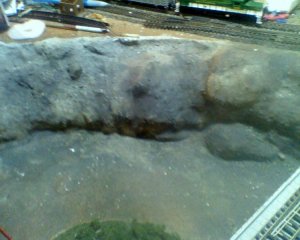
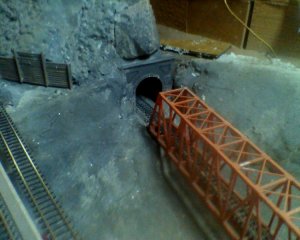
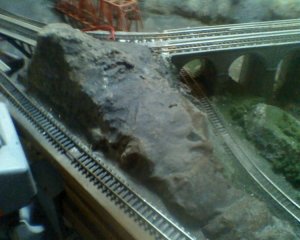
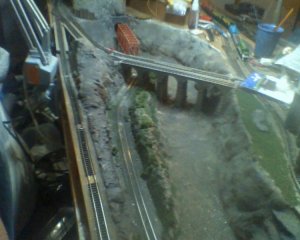
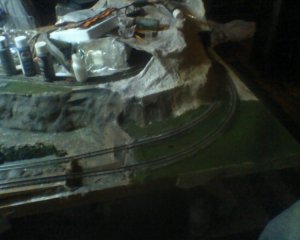
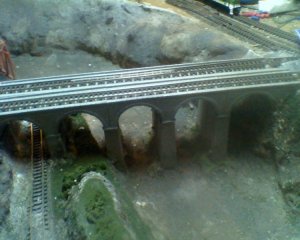
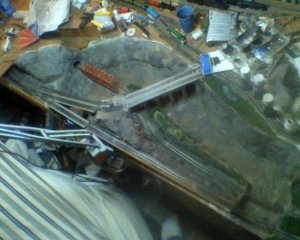
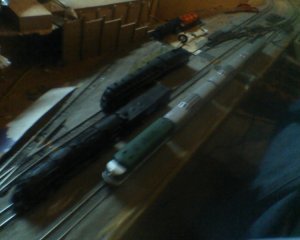
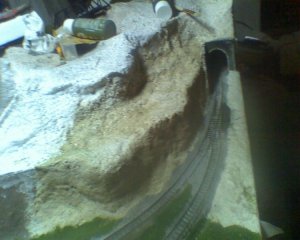
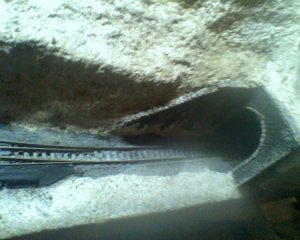
here are a few pictures of the layout I am working on...just thought you guys might like to see it :) the first picture, is actually of the very first mountain I have ever made...the second picture is of the track down along the valley where the main line goes across the river...the third is of the tunnel network at East end of the layout...and the 4th one is of the mountain that my fiance actually made...we just use styrofoam and wood glue as a coating so the foam doesn't melt and spray on a medium gray paint and go from there...the 5th picture is trying to show the railyard, for anyone who wanted to know (from my previous thread about how to wire it) and the last picture is the other end of the layout...the main line comes out of the yard directly into the tunnel going underneath the mountain and there was a mountain over that double loop, but it got smashed up some...my brother started this about 30 years ago, and I just pulled it out of the garage recently and started working...so what does everyone think? I'm looking for some ideas and such to help me along, this is my first train layout and Im learning everything still so...please critisize, comment, whatever...any feedback will help :)
 

Attachments

  • 1017121900a.jpg
    1017121900a.jpg
    134.5 KB · Views: 69
  • 1017121901a.jpg
    1017121901a.jpg
    159.4 KB · Views: 59
  • 1017121914a.jpg
    1017121914a.jpg
    104.4 KB · Views: 65
  • 1017121915a.jpg
    1017121915a.jpg
    136.1 KB · Views: 59
  • 1017121918a.jpg
    1017121918a.jpg
    147 KB · Views: 55
  • 1017121919a.jpg
    1017121919a.jpg
    136.2 KB · Views: 64
Z

Zathros

That's a nice looking layout, I can see why you would like to get it wired up! :)
 

Viperious

New Member
Oct 8, 2012
19
0
1
thank you very much :) My brother started this layout about 30 years ago, and I just started working on it. I had to pull the big mountain (it was in the double loop section I showed with the buildings) and redid a lot of the track...my first goal is to get all of the tracks operational...gotta have somewhere to run the trains while you are working HAHAHA!!! right now I am working on the river banks and such, and I finally decided what I want to do with the other end of it. There WAS a ramp leading to the top of the hill that I had to break off of it, and that left the perfect tunnel for a mine...my first thought is that the town I want to put on it can be on top of the hill and a mine runs underneath, with a smaller hill than what was on it before on the other side and a lumber mill...do you guys know of any good lumber mill and mining kits I could fit onto it? I don't want it to be too busy...at a local hobby shop there used to be a mining kit that had a mine shaft opening and some of the really old mining cars with one of the flat decked electric trams, that I wanted for it so bad, but unfortunately once I got the money to get it they sold out of it and stopped N-Scale altogether...
 

Viperious

New Member
Oct 8, 2012
19
0
1
I got a lot done this week...tomorrow I plan on posting more pictures if I get around to it...I have everything in the river done except for water...and maybe a bit more green around the edges...I have to find another arch bridge somewhere, or just get 3 new ones...went to a train show today and got a J-Class for $10, brought it home and it runs...ended up with that instead of finding a decent bridge...also got a lot of the mountain done and got some ideas for the other end of the layout...got some new plaster mix...and I hate it >.< paid $11 for something I can't seem to get to mold in right until its mostly dry and almost impossible to work with...but oh well...it is working for now...I also need 3 more tunnel portals...I think I may just wait and either get a whole new set so they match or stalk ebay for a bit...my fiance is going to hopefully be painting the stone arch bridge in the center now that I have it all molded in and everything...got a speedboat to throw in when its all done now too...but looking for 2 or 3 more...

and thank you very much trainiac...it is pretty fun to work on...and now that I got all the connectors I need for the track...well...lets see how well I can get it to run ^_^
 

Doctor G

Well-Known Member
Sep 1, 2008
1,415
298
78
Clarksville, Tennessee
Congratulations!!

Hi ,

Looking good on your first mountain. A neat paper mache like product called Sculptamold (also called celluclay) is great for blending and smoothing over terrain on mountains. It drys hard but light and can be painted and drilled to accept ground cover and trees.

Looking forward to seeing more of your modeling.

Doc Tom
 
Z

Zathros

I thrills me to see the community come together and help a new member. It is Zealot at it's best! :)
 

Viperious

New Member
Oct 8, 2012
19
0
1
I'm terribly sorry, I have been insanely busy lately and haven't gotten the chance to post any new pictures of it. I have gotten a lot done though. Have 2 loops working good and have one disassembled slightly working on terrain...I'm taking pictures for everyone to see. I finished the riverbed and am looking for either another matching arch bridge or 3 new matching ones...I can't really attach them permanently until I get the 3rd one unfortunately. But...enough explanations here...time to get busy on pictures for you guys.
 

Viperious

New Member
Oct 8, 2012
19
0
1
more pictures

hope these all upload correctly
 

Attachments

  • 1102122006a.jpg
    1102122006a.jpg
    152 KB · Views: 35
  • 1102122008a.jpg
    1102122008a.jpg
    124.9 KB · Views: 27
  • 1102122008b.jpg
    1102122008b.jpg
    159.5 KB · Views: 34
  • 1102122008c.jpg
    1102122008c.jpg
    153.6 KB · Views: 32
  • 1102122009a.jpg
    1102122009a.jpg
    152 KB · Views: 38
  • 1102122009b.jpg
    1102122009b.jpg
    144.7 KB · Views: 34

Viperious

New Member
Oct 8, 2012
19
0
1
and here are the restsign1
 

Attachments

  • 1102122009c.jpg
    1102122009c.jpg
    110.5 KB · Views: 31
  • 1102122009d.jpg
    1102122009d.jpg
    160.5 KB · Views: 24
  • 1102122010a.jpg
    1102122010a.jpg
    159.8 KB · Views: 35
  • 1102122010b.jpg
    1102122010b.jpg
    100.4 KB · Views: 33
  • 1102122011b.jpg
    1102122011b.jpg
    145.4 KB · Views: 32
  • 1102122012a.jpg
    1102122012a.jpg
    155.4 KB · Views: 30

Viperious

New Member
Oct 8, 2012
19
0
1
1. the very first picture is of the wiring I have done...I just isolated all of the rails and connected each one the way I wanted it to be connected, and in some places I just had to run 2 or 3 connections, which will be no problem hiding when I get to that part...
2. next picture is the east end of the river before it turns and heads out of the layout...I just used plaster cloth over the old foam, which made the boulders stand out nicely and then a little wal mart spray bottle and some extra plaster...
3. after that is the riverbed and wall on the other side of the stone arch bridge...
4. I have the tunnel portal snuggled into a small crevice now where it should be and the steel bridge is in place, though I would like to find a gray one or a new orange one...I actually think the orange gives a little bit of character to it...
5. the fifth picture is actually the picture of the mountain I had covered in wood glue at the top...what do you guys think? My fiance did that, and I am proud of her for learning to do all this with me and doing a really good job
6. the sixth picture is kind of a whole view of the riverbed...the tough part was where all the steel arch bridge are...they are so dang hard to attach and mold in to look good...I just have them sitting in right now before I really start working on them...and by the way if you haven't noticed, I managed to save the big stone arch bridge that I was worried about. I really like that part.
7. the first picture on the new post is where I am working right now...I ran out of plaster cloth half way through it, but thats the basic shape. I need to put some supports inside again. Some of them fell out when I was building it around the tunnel. The tape I finally cut out because it keeps falling down and stopping the trains.
8. Ahhh here is the stone arch..it was a pain to mold in, but I love the look of it. I need to get some more of the smooth plaster to work on it with and a little bit more plaster cloth, but for the most part it is almost done.
9. and this is the aerial view of the whole river bed...how does it look guys? it has taken a lot of work but has come a long LONG way...
10. This is in the train yard with a few my big engines. The big one next to the Northern is my new J-Class...I actually talked a guy into giving me that for $12 at a train show...I cleaned it up a bit and she runs like a charm.
11. the tan part is the new plaster I have been shaping the mountain side there with...I hate this stuff and first chance I get I will be going over the face with some of the smooth plaster so I can get a better rock look...its good at building up and filling large areas, but not for the finer parts...I have 2/3rds of this part finished...I still have to put the slope on the top of it all, but I have used a lot working with track ballast too...since it is rough, I find it works pretty darn good as ballast and it shapes into the track really well. I also have another part to go up on the larger part of the mountain, but I was trying something and ran out of plaster cloth, so I had to smooth it out to keep my windows in place for track access...I used the plaster to hold it in place instead of glue for now to see if it works...
12. This is the tunnel portal against the mountain. I thought about trying to add a wall on the other side of it but there isn't enough room, so I left it like it is. I think it is working fairly well so far though...

one thing I am looking for is something I can use for water...I want to be able to mix it with a bit of olive/brown paint to simulate muddy-ish water, and I am looking for a few neat looking little N-Scale boats to put in the water....just little fishing boats and a speedboat or 2...I am making a few buoys around the bridge...I have never done a large area of water like this before...it needs to be about an inch to an inch and a half thick...and when it dries not be tacky like some things because there is still a lot of dusty things to be done...I want to finish a section at a time, and the river is the largest section and I have almost finished it...
 

Viperious

New Member
Oct 8, 2012
19
0
1
actually I have been very surprised at how easy stuff has been...I was worried that it would turn out bad since I didn't know any good techniques for painting and everything...the hardest part so far was the track...once you have the track down it is smooth sailing it seems so far...my only problem is keeping a hold of plaster and grass and stuff for the terrain because I have been using extreme amounts of the stuff...instead of forming mountains like a shell, I have formed it all using solid plaster in places...and I got the wrong stuff so that was bad too...it's not necessarily the effort I have decided so much as the passion you put into it...what it means to you...find something special :) mine? I'm building it with my fiance, it's special in that way and we want it to look good...so we are trying harder because of that. And we are having fun while we are at it. I feel like a preacher while I am saying this, but thats just how I feel about it...I hope you have as much fun with your layout