Scenic & Relaxed update: not much but...

Palmisano

New Member
Apr 2, 2006
29
0
6
50
Cincinnati, Ohio
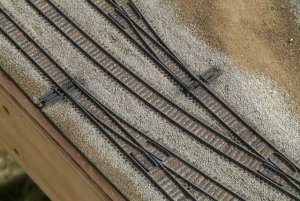
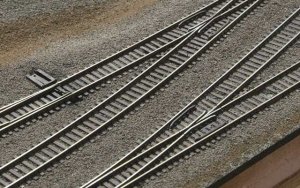
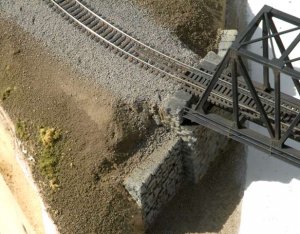
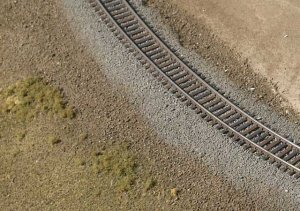
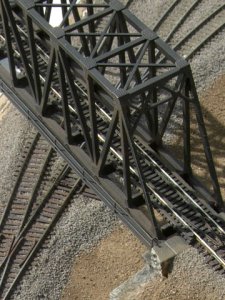
It's been a year since I posted photos of my slowly progressing 3X6 foot railroad. I've been in school and just too busy. But I finally got the track ballasted and a first layer of ground cover going. I just did a couple of feet of track a week. I really took my time since I have to live with it now. Everything in my life I have to rush so I guess I'm doing the opposite with this.

This isn't much of an update but more will come this spring. I used woodland scenics fine gray ballast which looks the most like the tracks here in the Cincinnati midwest region. The trask has not been weathered yet and some of the sidings will be obliterated by dirt and other debris later. I also don't have any switch stands yet. They will be purely cosmetic because the turnouts are actuated from below with Humpyard mechanical levers.

Little baby steps...
 

Attachments

  • 01.jpg
    01.jpg
    63.7 KB · Views: 322
  • 02.jpg
    02.jpg
    64.6 KB · Views: 318
  • 03.jpg
    03.jpg
    63.4 KB · Views: 320
  • 04.jpg
    04.jpg
    64.9 KB · Views: 320
  • 05.jpg
    05.jpg
    64.6 KB · Views: 350

Gary S.

Senior Member
Oct 13, 2005
1,576
0
36
Texas
That looks really nice. I hope my ballasting turns out that good. Did you use the standard ballast techniques?
 

Ironhead

New Member
Feb 6, 2007
19
0
1
59
Looks great, P, especially the ballast. I love this track plan, it's got some nice sweeping lines for such a modest size.
 
N

nachoman

that is some of the best N scale track I have ever seen...

kevin
 

umtrr-author

Member
Dec 19, 2003
275
0
16
Visit site
Very nice work!

Nothing wrong with "baby steps" although I think they're a lot better than that. Any progress, however small, keeps things going and interest up...
 

Nazgul

Active Member
Jan 22, 2006
992
0
36
63
Ohio
great job!!!
I really like the varied shades of color on the ties:thumb: , however....EVERYTHING looks absolutely top notch:thumb: :thumb: :thumb: . You are taking your time and it shows:)
Keep it up:) :thumb:
 

Racerdb

New Member
Jul 22, 2006
6
0
1
63
How about a wider angle?

As another S&R in progress guy, I've been waiting for your update! Couldn't really tell from your photo's how you are handling the landscaping, building placement, The Mountains, etc....

Would you mind posting a wider view of the layout? Nice job with the ballast. Looks great!!

I'll be updating soon....I'm still placing the structures and rock molds, figuring out the creek.....

Dave
 

Palmisano

New Member
Apr 2, 2006
29
0
6
50
Cincinnati, Ohio
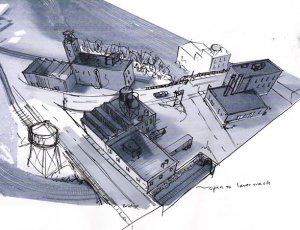
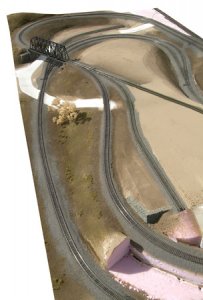
I am working on more photos of a wider angle showing more of the layout. But until then, here is a quick sketch of some of my ideas for one side of the layout along with a wider shot. Not much is done yet with the scenery. Mostly dirt and ballast and a little texture so far.

This layout was originally designed to be more scenic, but I'm going the opposite way and making at least this side of it very dense and industrial. I've always thought highly detailed buildings and streets were much more interesting that endless trees of mountains. Anyway, the other side i'm going to keep more "Relaxed"

The difficulty with this particular plan is how to scenic the closely spaced tracks of differing levels on the right side. Most people cover them up with a hill. I'm going to also cover them up but with an industrial area instead. So there are going to be some interesting highway overpasses and retaining walls. I can't wait till I have a little more time to work on it.
 

Attachments

  • Sketch.jpg
    Sketch.jpg
    64.4 KB · Views: 126
  • Overview.jpg
    Overview.jpg
    63.9 KB · Views: 160

CCT70

Member
Jun 25, 2003
519
0
16
Are you *sure* you want to weather that track? It looks FANTASTIC, some of the best track I've ever seen, and I thought it originally was HO Scale.

It looks REALLY REALLY REALLY good.
 

Palmisano

New Member
Apr 2, 2006
29
0
6
50
Cincinnati, Ohio
Thank you everyone for all you kind words. Some people where wondering what ballasting technique I used.

I pretty much did the standard process whith a couple of key differences. I used woodland scenics fine grey ballast. I spread the area between the ties first. I use a one inch wide flat bottomed watercolor brush to spread it initialy. Then I run my finger down the ties really smushing it down into the voids. After making sure every last little speck is off the ties and rails, I glued it doen with the standard method.

The key thing here is to use a better spray bottle for the wet water and glue. The normal misters completely blow away the fine ballast like a hurricane. I found that the smaller atomizers that spray nose spray or perfume are best. They produce an incredibly fine mist that does not disturb the ballast I just spent hours manicuring. So firt I misted with wet water which was about a half cup of water and a few drops of liquid dish soap. You'll know if there's too much soap because you'll get bubbles on the track!

The key here is to spray from high above the track (about 2 feet) so that the ultra fine mist from the atomizer gently floats down onto the ballast like mist basically. If you do it right, it won't disturb the ballast at all. After really soaking it, then apply the regular glue with an eyedropper like normal. I used woodland scenics scenery cement. It's already diluted to the perfect consistancy. The other key is to release the dropper really close to the track so as not to make craters and dents . It's really easy to mess up unsecured N scale ballast!.

As for the shoulders, I spread a coat of glue on the roadbed with a small brush before laying down the first layer. This keeps that first layer from sliding down the slope. I let this dry first. Then I came back and filled the shoulders up to the desired track level. The first layer gives it some tooth to adhear to.

Arranging the ballast shoulders simply takes alot of time. I used the large flat brush to tamp it down to the shape I wanted, then came back with a smaller square brush to brush excess away from the tie plates and rails. Finally, I used a flat roller or any round cylander would work to actuall roll the ballast flat, starting at the ties and rolling down to the ditch. This makes the profile flatter than I could get with the brush.

Man, that was long-winded. But the biggest thing that worked for me was simply taking my time. I went really really slowly and carefully only doing a couple feet each session. It finally got done. Oh yeah, before ballasting, it was painted with Floquil Rail Brown. After ballasting was done I went back and hand painted each tie with different browns. The sides of the rails were painted with Polly S NATO tri-brown.

Anyway, I just experimented and found a technique that seems to work. It's definitely not the fast way, but who needs fast.
 

CraigN

New Member
May 18, 2006
16
0
1
62
You do fantastic work!
The weathered rail and different colored ties really sets it off!!
I just hope that I can do as good a job when the time comes.
Craig
 

Ironhead

New Member
Feb 6, 2007
19
0
1
59
Anyway, I just experimented and found a technique that seems to work. It's definitely not the fast way, but who needs fast.
This is what I love about this hobby. People are willing to take their time and experiment a little, and share the techniques that are successful. You are the world class chef sharing your recipes so that others can enjoy the food! Well done, P, it looks great, and I will be using your techniques!
 

joesho

Member
Apr 29, 2006
307
0
16
33
surrey bc canada
This layout was originally designed to be more scenic, but I'm going the opposite way and making at least this side of it very dense and industrial. I've always thought highly detailed buildings and streets were much more interesting that endless trees of mountains. Anyway, the other side i'm going to keep more "Relaxed"

i totally agree about that,and btw THATS ABSOLUTLEY AWSOME AWE INSPIRING trackwork