Peter von Danzig

M

modelperry

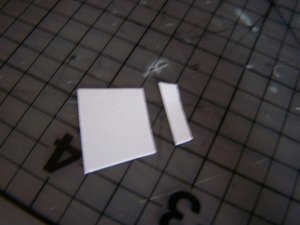
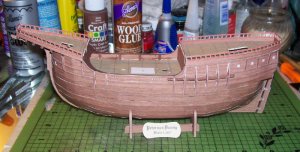
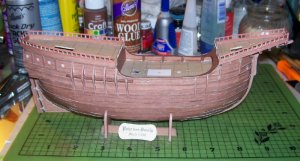
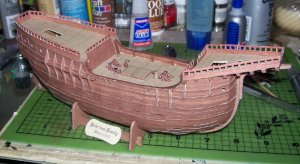
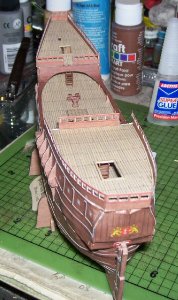
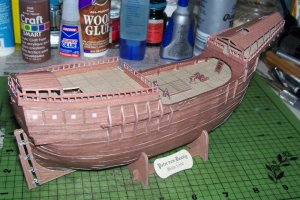
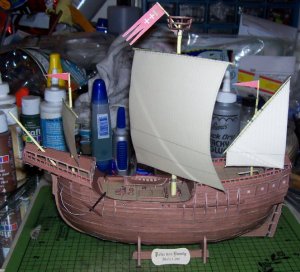
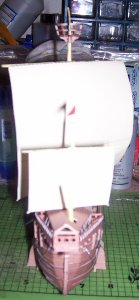
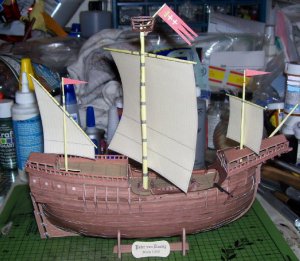
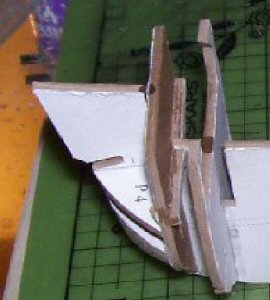
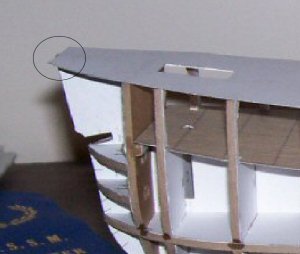
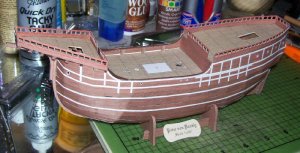
The trouble at the stern comes from the central former shape at the back. It needs shortened and reshaped so that pieces 3, 4, 5 & 20 can all connect properly and allow the hull planking at their junction to avoid trimming. The only issue outstanding then would be proper placement of the rudder slot to allow the rudder and piece 5 to fit properly with respect to the keel. I can't fix this mess now without starting over (which I am not going to do) so I will just live with it and chalk it up as a learning exercise.

greg
 

Attachments

  • danzig trouble 1.jpg
    danzig trouble 1.jpg
    112.1 KB · Views: 5
  • danzig trouble 2.jpg
    danzig trouble 2.jpg
    116.3 KB · Views: 7
M

modelperry

Here are some photos of some additional progress on the decks. No real issues with these parts.

Enjoy.

Greg
 

Attachments

  • danzig aft deck 1.jpg
    danzig aft deck 1.jpg
    147 KB · Views: 12
  • danzig aft deck 2.jpg
    danzig aft deck 2.jpg
    138.2 KB · Views: 9
S

Soaring

Looking pretty spiffy so far!Here's an idea to fix your problem if the shortened piece ever happens again in the future, you don't need to trim anything off, more as to just add a little tip to that piece. Just extend that piece that doesnt fit by adding more onto it. If that makes practically no sense, here's some pictures :/

In the picture, the bigger piece portrays 321's post with the second picture circled.
The smaller piece is scratchbuilt meant to be pasted onto the larger piece to "Extend It".

Can't wait to see more! Loving the rails ;)
 

Attachments

  • 100_2416.jpg
    100_2416.jpg
    105.9 KB · Views: 9
B

Bionic Modeler

Wow, those are some seriously thick formers. You're goind to need a finger transplant after this.

I found that using sheet metal cutters (the kind that are dedicated left and right) will cut that stuff like butter. Saves the hands. I just use the "right" (red handled) and they work for everything.
 
M

modelperry

Thank you for your words of wisdom. I will keep them in mind for the future.

I made some progress, but not very much, this weekend. Here are some photos.

The next group of parts for this built has two that are printed backwards, which means I get to make some from scratch from the reserve material. More on this next time.

Greg
 

Attachments

  • danzig side parts 1.jpg
    danzig side parts 1.jpg
    137.2 KB · Views: 7
  • danzig side parts 2.jpg
    danzig side parts 2.jpg
    132.8 KB · Views: 11
S

Soaring

Looks fantastic so far, but hey, we're here for ya, if you need help, I'm sure we'll toss around some suggestions :) Can't wait for more!
 
M

modelperry

Well, I was gonna show you some pics of part 59 where some of the elements were printed backwards, but both pictures were out of focus.:eek:ops:Anyway, this was an easy fix since there is plenty of wood grain reserve supplied with the kit.

Greg
 
M

modelperry

I've been quit busy since my last post. Sorry for the lack of updates. This one should help me catch up.

Since last time I built the four step ladders, the masts and sails, and the small barrels.

The ladders were much easier than I thought. I actually enjoyed building them. The masts were NOT fun. they were rolled into tubes from normal weight paper. The double tapered cross beams were the worst. I had to stick a piece of styrene rod in the bow piece so it wouldn't collapse when I threaded it through the deck and hull.

The barrel components were easy, however as I sit here I think I messed them up. I think there should have been two barrels and I made four 1/2 barrels. :eek:ops: They're already glued to the deck. Oh well.

I have decided that I will NOT do the rigging. Huh-uh. No way. Not interested.

Greg
 

Attachments

  • danzig deck details1.jpg
    danzig deck details1.jpg
    140.2 KB · Views: 11
  • danzig deck details2.jpg
    danzig deck details2.jpg
    115.1 KB · Views: 6
  • danzig deck details3.jpg
    danzig deck details3.jpg
    178.8 KB · Views: 10
  • danzig sail 1.jpg
    danzig sail 1.jpg
    163.2 KB · Views: 8
  • danzig sail 2.jpg
    danzig sail 2.jpg
    171.5 KB · Views: 6
  • danzig barrels 1.jpg
    danzig barrels 1.jpg
    91.8 KB · Views: 9
M

modelperry

The end has arrived! announce1

Here are some shots of the finished project. (finished as far as I'm concerned)

Some parting words:

Since this was thrown in as a bonus in a papermodelstore order, I was more apt to use it as an experiment with thick formers, hull planking, overall ship building, etc. I did not know if it would turn out and decided that if the build failed, everyone in this forum would have a chance to learn from my mistakes and any issues with the kit itself.

This was definitely a departure from what I usually like to build (land based stuff :twisted:). I am okay with the results, mistakes and all.

Enjoy these final photos.

Greg
 

Attachments

  • danzig finish 1.jpg
    danzig finish 1.jpg
    156.1 KB · Views: 11
  • danzig finish 2.jpg
    danzig finish 2.jpg
    74.9 KB · Views: 10
  • danzig finish 3.jpg
    danzig finish 3.jpg
    162 KB · Views: 9
  • danzig finish 4.jpg
    danzig finish 4.jpg
    74.6 KB · Views: 12

cjwalas

Member
Nov 28, 2006
74
0
16
70
Santa Barbara, Ca.
Congratulations, Greg. It looks like a fine job. I know you're not going to do the rigging, (believe me I understand completely), but it sure would finish the model off nicely.
Overall, what would you say was the single most challenging aspect of the kit?
Chris
 
M

modelperry

Thanks all for the encouragement and compliments, I am my own worst critic sometimes.

The most challenging part was the fit of the stern pieces. This is because I didn't know there was going to be so much of an issue until it was too late.

One or two more diagrams of this area to show how it all is supposed to fit together would have helped me.

If not for the stern fit issues, I might have been more inclined to try the rigging, but at this point, other new projects are calling my name louder than this ship's rigging is. Also some of the rigging pulleys and attachment pieces are laminated onto 2mm card and my fingers are just not interested in trying to cut them out.

Greg