Our Layout (Info and pics to share as goes up)

grandpacoyote

Member
Aug 8, 2005
107
0
16
56
Denton, Texas
mysite.verizon.net
MilesWestern said:
Love the Art Deco Touches! :thumb: Did anyone mention that your paint scheme is VERY 30-40's as well? :cool: Very good work! I cannot wait to see what the future holds for your layout! :thumb:

Miles;

Thank you sir. Yes the colors were picked out to blend in, hopefully with the scenery and to give it a slight early fifties feel and the OL did a great job picking out the face plates for the plugs and switches all very Art Deco, she also found the lamp. It's great to have a wife that is as interested an excited in this whole thing as I am, I am one lucky old dog. :D

Thank you for your praise, it always means a lot coming from fellow modelers.

Peace.

Coyote
 

Santa Fe Jack

Member
Jul 20, 2006
253
0
16
63
Lost Almost, New Mexico
Coyote -
I just now got around to following this thread. Nice work! I really think you'll like the foam. I have one suggestion, though it is probably too late, and that is that you should simply leave out the 1/4" birch plywood under the foam. The foam is stable enough that the plywood is not needed for support, and may just get in the way as you install turnout motors, wiring, and such. I made a 6-ft x 10-ft slab of foam from three layers of laminated 1" sheets, and the whole thing is rigid enough to move around with no benchwork at all!

Of course, given that the plywood is there now, you can cut out bits of it as needed.

- Your neighbor to the west, John in New Mexico
 

grandpacoyote

Member
Aug 8, 2005
107
0
16
56
Denton, Texas
mysite.verizon.net
Santa Fe Jack said:
Coyote -
I just now got around to following this thread. Nice work! I really think you'll like the foam. I have one suggestion, though it is probably too late, and that is that you should simply leave out the 1/4" birch plywood under the foam. The foam is stable enough that the plywood is not needed for support, and may just get in the way as you install turnout motors, wiring, and such. I made a 6-ft x 10-ft slab of foam from three layers of laminated 1" sheets, and the whole thing is rigid enough to move around with no bench work at all!

Of course, given that the plywood is there now, you can cut out bits of it as needed.

- Your neighbor to the west, John in New Mexico

John,

Thanks for the info, yes I'm afraid it is a little late now to remove the 1/4" birch... I originally added it for stabilization and support of tortoise machines. Hopefully it wont prove to be a problem, but I am enjoying the support it is giving me when laying down the foam to get a good even level.

Thanks again for your advice and compliment. :)

Peace.

Coyote
 

grandpacoyote

Member
Aug 8, 2005
107
0
16
56
Denton, Texas
mysite.verizon.net
joesho said:
what kind of layout is it going to be,winderness,or a industrial city with brick buildings or lots of craftsman kits?

Joesho,

The plan is for a small Northern Arizona town (Piedmont), a typical small western town in the 50's with some of the tourist glitz of sitting alongside Route 66 - a goodish stretch of desert scenery with a dash wash (Dead River) and then a section of county road area with some industries (Cement Plant and Oil Fields).

Over all I hope to capture some combination of both a Railfan and Operations layout.

Peace.

Coyote
 

grandpacoyote

Member
Aug 8, 2005
107
0
16
56
Denton, Texas
mysite.verizon.net
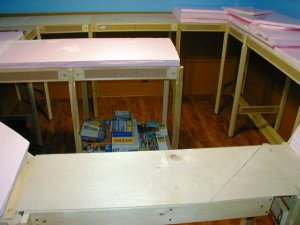
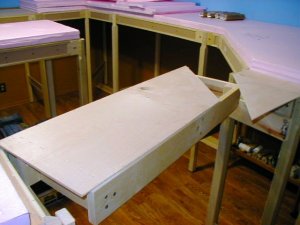
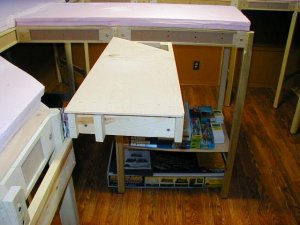
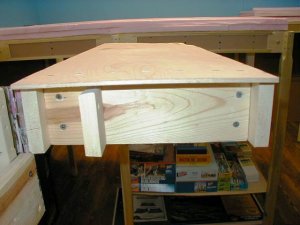
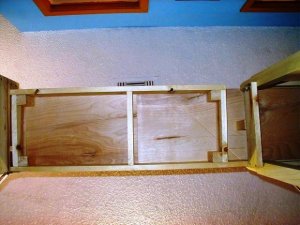
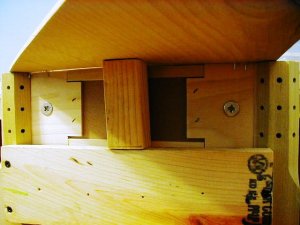
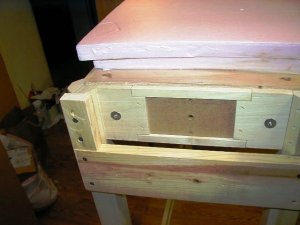
Swing Gate 1/07/07

Hello again Gang;

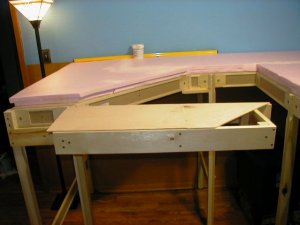
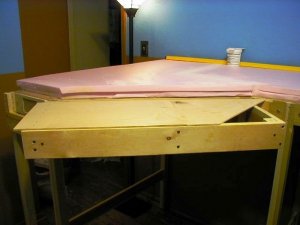
Well I got a wild hair last night and I decided to try and make the swing gate for the layout on my own - so I dug up some scrap lumber (from when I tried to test build a piece of bench work back near the beginning of last year), salvaged up a good hinge of of one of the closet doors I took down from the Train room, checked my measurements and set to work.

I first had to clean and ready the hinge to make sure it was in good working order since it was an original Hinge from when the house was built about 30 years ago. I cleaned and fixed it up, lacking any good graphite lubricant I improvised and used a freshly sharpened pencil to line the inside of the pivot and the pin.

Then I took the old test piece of bench work apart and cut all the pieces to size, lacking proper power tools I used a small hand saw to do this.

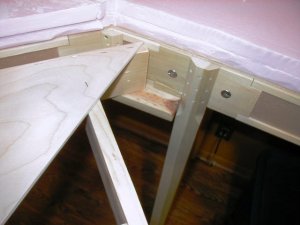
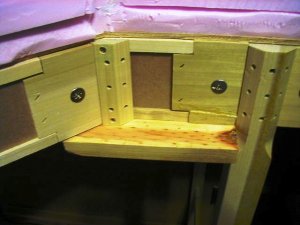
Leveled the whole thing out, screwed it all together and hung it up after making and screwing in "docking station" shelves to the bench work for the gate to sit n when closed and when open.

It all seemed to come out pretty well and I admit that even though it's probably not the best, prettiest or most professional job, but I'm pretty proud of it.

Tell me what you all think - this is my first attempt at something like this and any advice is helpful and gratefully accepted.
smile.gif


I apologize in advance for there being so many pics - Enjoy

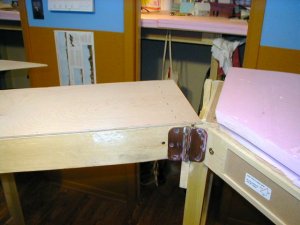
View attachment 33931
Viewed from the outside

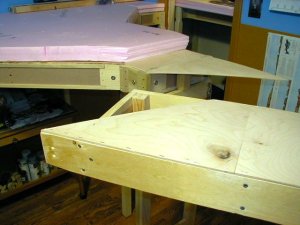
View attachment 33932
Viewed from the outside

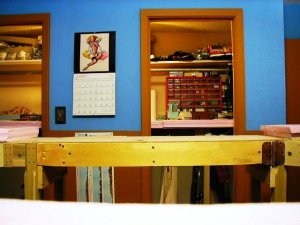
View attachment 33933
End on view- viewing the inner end

View attachment 33934
End on view- viewing the inner end

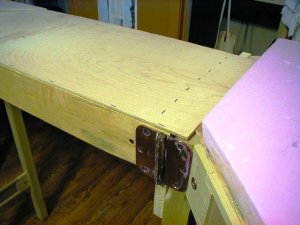
View attachment 33935
Gate completely open
 

Attachments

  • Gate 001.jpg
    Gate 001.jpg
    49.6 KB · Views: 815
  • Gate 002.jpg
    Gate 002.jpg
    49.6 KB · Views: 802
  • Gate 003.jpg
    Gate 003.jpg
    53.3 KB · Views: 796
  • Gate 004.jpg
    Gate 004.jpg
    49.5 KB · Views: 801
  • Gate 005.jpg
    Gate 005.jpg
    43.2 KB · Views: 797

grandpacoyote

Member
Aug 8, 2005
107
0
16
56
Denton, Texas
mysite.verizon.net

Attachments

  • Gate 006.jpg
    Gate 006.jpg
    42.9 KB · Views: 801
  • Gate 007.jpg
    Gate 007.jpg
    46 KB · Views: 793
  • Gate 008.jpg
    Gate 008.jpg
    49.8 KB · Views: 792
  • Gate 009.jpg
    Gate 009.jpg
    48.5 KB · Views: 791
  • Gate 010.jpg
    Gate 010.jpg
    53.5 KB · Views: 788

grandpacoyote

Member
Aug 8, 2005
107
0
16
56
Denton, Texas
mysite.verizon.net

Attachments

  • Gate 011.jpg
    Gate 011.jpg
    48.9 KB · Views: 802
  • Gate 012.jpg
    Gate 012.jpg
    58.4 KB · Views: 786
  • Gate 013.jpg
    Gate 013.jpg
    67 KB · Views: 783
  • Gate 014.jpg
    Gate 014.jpg
    52.7 KB · Views: 784
  • Gate 015.jpg
    Gate 015.jpg
    50.1 KB · Views: 779

Russ Bellinis

Active Member
Feb 13, 2003
4,501
0
36
78
Lakewood, Ca.
Visit site
That gate looks great. Don't forget to put in a swicth to kill the sections of the layout on either side of the gate when it is opened. I just looked at it again and noticed that the support ofr the small triangle section seems to be part of tge gate. I think it would work more reliably with frame under the triangle section and having the extra framing cut out of the gate. You may also want to round off the point on the piece sticking out so that you don't leave a "stabber" in the way.
 

grandpacoyote

Member
Aug 8, 2005
107
0
16
56
Denton, Texas
mysite.verizon.net
Russ Bellinis said:
That gate looks great. Don't forget to put in a swicth to kill the sections of the layout on either side of the gate when it is opened. I just looked at it again and noticed that the support ofr the small triangle section seems to be part of tge gate. I think it would work more reliably with frame under the triangle section and having the extra framing cut out of the gate. You may also want to round off the point on the piece sticking out so that you don't leave a "stabber" in the way.

Russ,

Good advice, thank you. If I can get my hands on some more lumber I may redo and put your advice into play, it makes a lot of sense... Yeah I found out I needed to round off the "Stabber" the hard way already :curse:

Thanks again, your comments are always insightful and useful.

Peace.

Coyote
 

cnw1961

Member
Jan 7, 2006
846
0
16
65
Germany
The swing gate is a great idea, don’t know if I would have thought of that solution :thumb: . If the rest of your layout turns out to be as good as your benchwork, it will be absolutely awesome.
 

Runs With Bears

New Member
Dec 23, 2006
38
0
6
32
Massachusetts
Man this stuff is amazing! I cant wait to see the final result after all this nice planning. I can tell already this is gonna one of those legendary layouts. The gate looks pretty sweet too. If i ever am able to get an around the room layout it think ill definately have to put one of those in.

Best of luck in the creation of your layout and i hope to see some more great work! :thumb:
 

Ralph

Remember...it's for fun!
Jun 18, 2002
5,134
0
36
64
St. Paul, MN
Visit site
Very nice photos of the swing gate which I think will be of great help to folks who wish to add one! Had I seen these pictures a few years ago I probably would have designed the layout differently and included such a gate!
Ralph
 

grandpacoyote

Member
Aug 8, 2005
107
0
16
56
Denton, Texas
mysite.verizon.net
Kurt, Runs with Bears, Cedarcreekrr, Miles and Ralph;


Gentlemen thank you all! Your kind praise leaves me deeply touched.

It really wasn't that big of a deal and I have almost no carpentry experience so I have to honesty say to any and all of those of you thinking about or wishing to make such a gate - Give it a try!

If I can do it you can too! :thumb:

Peace.

Coyote
 

Russ Bellinis

Active Member
Feb 13, 2003
4,501
0
36
78
Lakewood, Ca.
Visit site
Just one little thing to consider for anyone making a swing gate. The angle doesn't have to be very extreme at the end which leaves a "stabber" point sticking out. If the outside edge is only 1 inch difference from the inside edge, the gate will work fine. You just need enough angle so the 2 peices "mesh" as they come together without leaving an excessive gap or having interference.
 

grandpacoyote

Member
Aug 8, 2005
107
0
16
56
Denton, Texas
mysite.verizon.net
Russ Bellinis said:
Just one little thing to consider for anyone making a swing gate. The angle doesn't have to be very extreme at the end which leaves a "stabber" point sticking out. If the outside edge is only 1 inch difference from the inside edge, the gate will work fine. You just need enough angle so the 2 peices "mesh" as they come together without leaving an excessive gap or having interference.

Russ,

Great point and one that I for one will be making note of.. I'm considering doing a re-build on the gate with slightly better materials and -much- less of an angle... you are 100% correct (as usual) about the "stabber" my arm is still healing and it's been puled up pronto, hence the considered re-build.

Thanks as always for the patient and sagely advice sir.

Peace.

Coyote
 

don pedro

New Member
Dec 19, 2006
4
0
1
79
mianne benchwork

could you possibly keep me updated on your approach to risers and scenery to your solid top? I just placed an order yesterday with tim foley. 18'6"X 13' "0" SCALE. I will in turn reciprocate. train room is about 3 weeks away from completion. I'm very interested on hills, ravines, rivers, ponds, and mountains including tunnels..............don pedro