From Trash to Cash
Thoughts on free lanced modules
Kyle Engelmann 2007
Thoughts on free lanced modules
Kyle Engelmann 2007
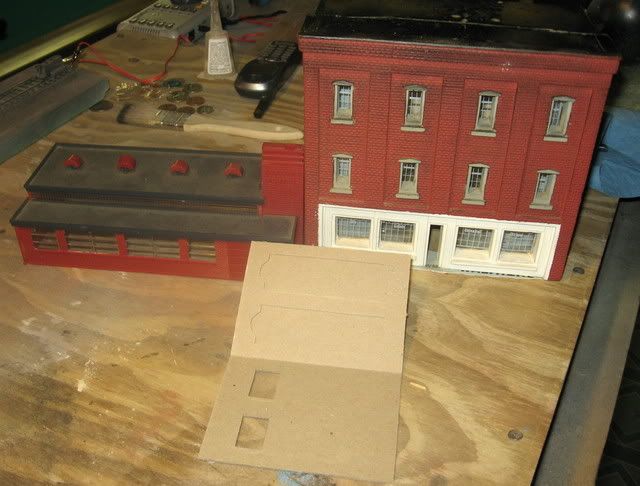
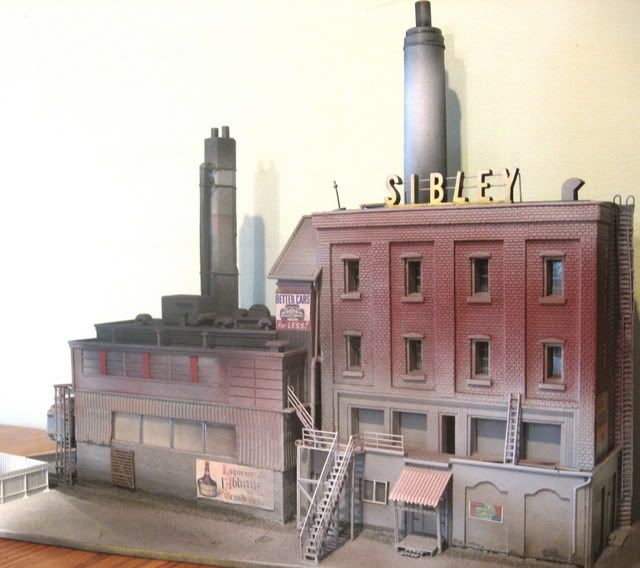
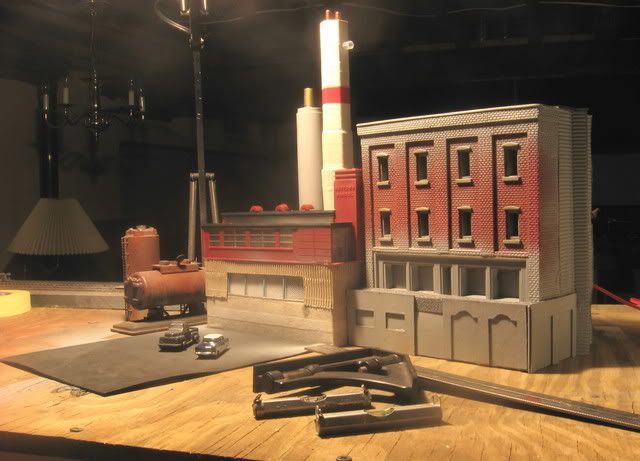
The purpose of this project is to create a rust-belt structure out of two buildings that were train show cast-offs. When doing this type of kit bashing, your best prototype is your imagination. I began by setting the two old buildings on the layout. One was a three story, village storefront job with nice masonry. Someone had crudely added a cereal box to the back with a heavy bead of glue. The other was a nice, unpainted high school with lots of glass.
CLICK ON ANY IMAGE IN THIS REPORT TO SEE IT LARGER
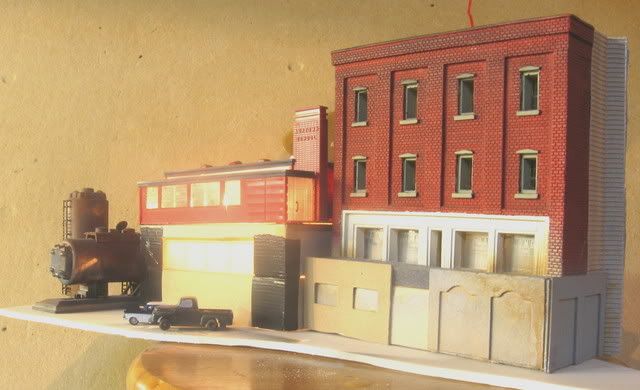
After positioning the pair many ways on the layout, I took a few test photos to find the configuration that worked best. This planning stage is most important for me. Placing the buildings on various boxes gave me some ideas as to the elevation. I decided to raise the school up two stories and the background building up a story and a half.

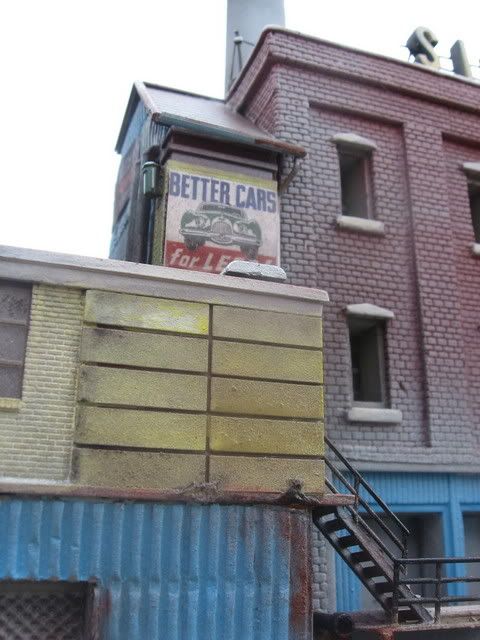
A resourceful modeler is always on the lookout for objects that will pass for scale. I asked the doctor for some cards they ship microscope slides in. I knew I could apply them somewhere. They should work nicely for first floor, exterior walls on this project. I used foam for some of the construction. I like the texture of foam.
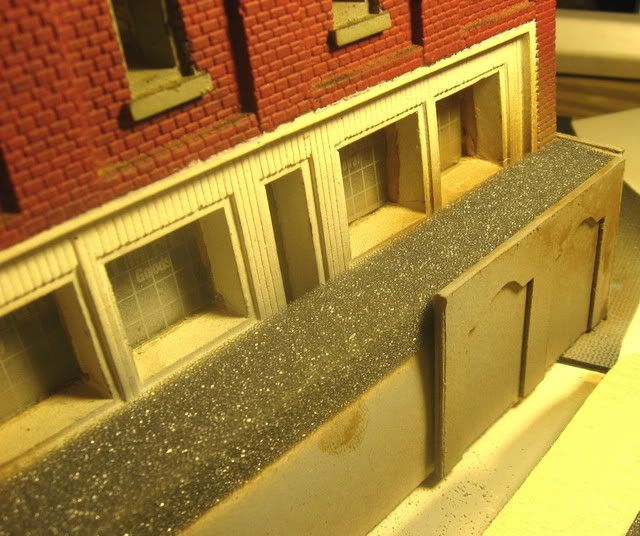
A key element in this project was the piece needed to lock the buildings together.
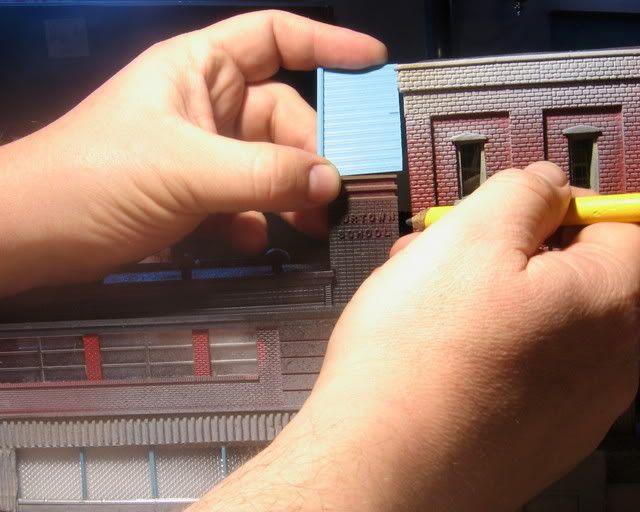
This corridor or conveyor shaft, or whatever it was going to be, had to tie in just right. I decided on a vertical elevator shaft with a diagonal roof. This is where the fun starts. I had to cut a mortise in the styrene material chosen for a roof (leftover Pike Stuff) and I couldn’t find a HO sized coping saw to do the job.
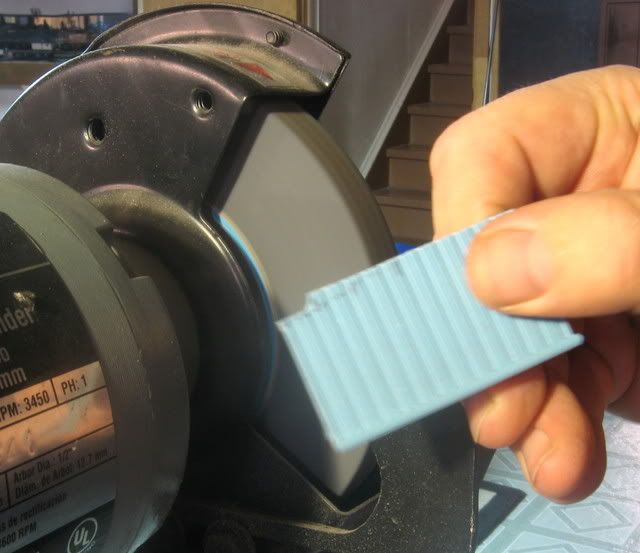
The bench grinder coped rather well, I thought.

I usually put lights in my buildings early on in their evolution. This project was no exception. I suppose it would be a little harder to wire them when they were all assembled, and besides, seeing how the piece will look lit may influence construction and paint decisions. I get a lot of light from a single bulb by painting the interior silver and putting sections of defusion panels for light fixtures in-between floors.
Next I primed it. It is not difficult to achieve a nice paint job if you first consider light and the properties of paint. By spraying the piece with various shades of primer first, many satisfactory results can be realized.
A shell of flat, even, oil based primer provides the perfect surface for brushing on more colorful coats of acrylics and enamels. In addition, the colors of the primers I use; white, light gray, dark gray and rusty metal all overlap and blend nicely. As paint droplets are atomized by the spraying, very good highlights can be gained quickly and randomly. Keep your nozzles clean! With a good base coat on, I started painting some colors.
I use both oil and water based paints. How we color the concrete reveals some properties of paint. As I painted over the light gray “concrete” with a tan, oil based wash; the gray pigment is dissolved again and blends with the tan. If I used a WATER based wash; the gray would not dissolve, but show through as it has denser pigment. A very light misting of primer after painting colors on will result in other effects. One note on water based washes. Spray the area where wash is to be applied with some rubbing alcohol first. This will break up surface tension and prevent the wash from beading. The alcohol also has a bleaching effect that can look quite realistic on some surfaces. If the area you are weathering gets too bleached, don’t panic, a light coat of Testor’s Dullcoat will put things right.
Although most of the elements of this Sibley building were visualized early on, a few things got modified. I tried out the smokestacks many ways. One always seemed too big. I ended up replacing the flue with a much smaller one, and then it seemed ok. Most of the materials for projects like this are already lying around the workbench. I lucked out finding a telescoping post from an old badminton set. It had a hexagon cross section and makes perfect smokestacks. Foundations for this project were cardboard boxes cut to size. Anything finely corrugated can make a convincing exterior wall. Lately I’ve incorporated sections of diffusion panels from light fixtures for windows and, to give the impression of more exaust piping, I even glued a length of an old wiper blade to one of the chimneys!
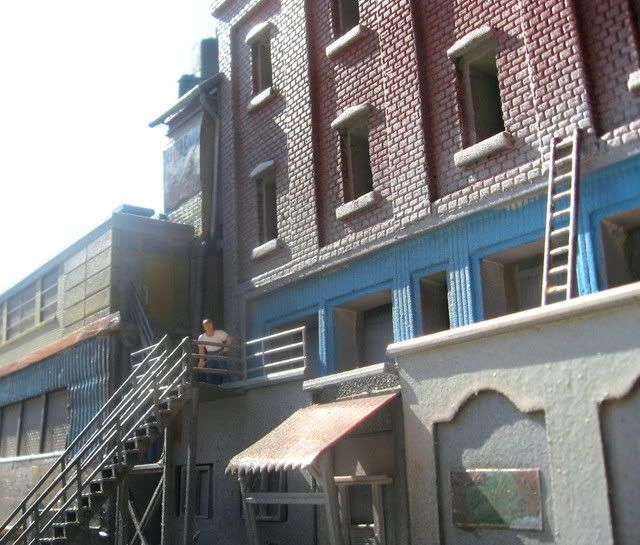
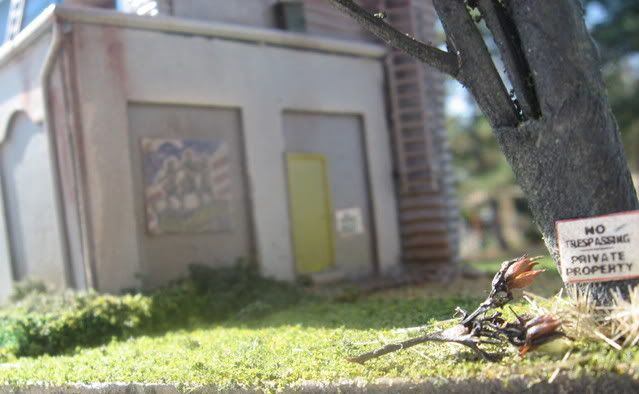
The roof details and piping are from Cornerstone, and the stairs and fences are from Central Valley, I downloaded some of the signage off the Internet, and once the signs were in place I gave them a coat of glossy lacquer. I sometimes give other things, like awnings, autos and wet spots a coat of gloss, too.

Well, she still needs landscaping, a loading dock, some figures and other details. Don’t be tempted to hurry the landscaping. Remember, a module is a complete piece of artwork. It is sad to see a nice structure that someone really spent some time on, perched on some board with a little ground foam sprinkled on. In fact, I’d say how you anchor the structures to the landscape is a most important part of this whole process.

I sprayed some pipe cleaners with hairspray and rolling them around in Woodland Scenic ground foam to make hedge rows and shrubs. It seemed this piece needed a large tree. To make a towering oak, I use dried flower tops. Try taping two or even three stems together to make the trunk. Masking tape for coves has the perfect texture for tree bark. Returning to my trusty can of spray primer I gave the whole tree a coat of dark gray. When the top was so heavy with paint it began to bead, I rolled it around in Woodland Scenic blended turf. Here’s a helpful tip. Wear a rubber glove over the hand the holds the tree for this.
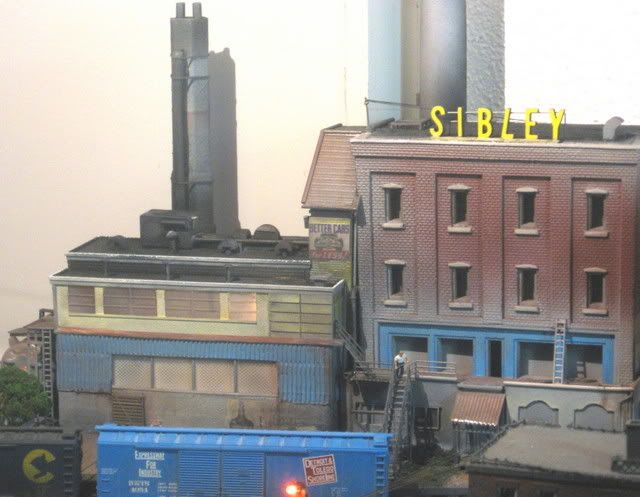
The loading dock deck is made by gluing strips of wood to a piece of Gator Board. Clamp it and let the glue dry overnight. After a coat of gray wash and some fine sanding, the deck is ready. The boards on this deck are not to scale but still work, somehow. Maybe the grain in the wood gives the impression of individual boards. As you can see, I don’t get too hung up with scale and prototypical perfection. I would hope that the information provided here would inspire modelers to expand their use of artistic license, and define their own modeling style. I’d say the Sibley buildings are about ready to go on the layout. Track clearance is assured because I covered the corner of the layout where the new structure was to set with newsprint and took a rubbing of the track. I used this template to transfer the shape of the footprint to the Masonite base of the module.

I like the way this project came out. I have done well selling pieces like this in the past, but I think I’ll keep this one for a while.
")