NCC-1701-D bridge beta build

Status
Not open for further replies.
P

paulhbell

I told Andrew that I would do this for him.

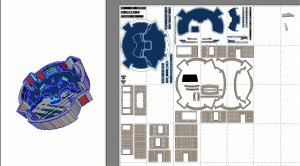
First a discription of the pages, they look good, and it looks like he has put a lot of time into them. The scale look's good, it works out to approx 290mm x 270mm, nice size. Not to big. It should make a nice model.

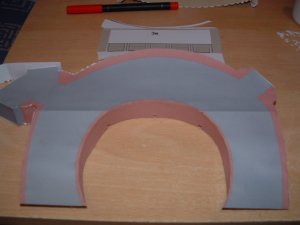
I had cut out both floor parts and glued them to 200 gsm card. Printed page 120gsm plus 200gsm backing making 320 gsm 'equals' far to thick. It was like hardboard from a diy store. So I have re-printed the pages on 160 gsm card.

I have now cut the back raised floor and side walls for it. Now gluing them together. Photos are on the way, next post.
 
P

paulhbell

First pics

First photo of the build, rear raised platform. No problems with the build up to now. The only other thing I want to say is, TABS, TABS, TABS. There are hundreds of them.:mrgreen:

DSCF0101.JPG
 
Last edited by a moderator:

Master-Bruce

Active Member
Aug 15, 2007
1,012
12
38
WOW! Great photo Paul, I'll be watching this like a hawk.

I'll actually get to see a model of mine go together. Even if it is a beta!

So cool!
 
P

paulhbell

Rear.

Has any of the other beta builders noticed that a couple of bend lines are missing on parts 2c and 2d. Not really a problem though. I thought it was my printer, so I reprinted them at better quality, still not there.

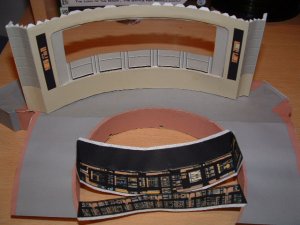
The rear platform comes together fairly easy, there are a couple of points that I not really happy with. It looks ok though and the side and back walls may hide the bits I don't like. This is a fault of mine and not the parts.

The rear wall has come together quite well. The wall front face is 3 levels deep, the first is the wall, then the grey area in the middle is set back and has approx 2mm walls all round (not really visible in the photo). The last level is the screens, which I've not attached yet.

More tomorrow.

DSCF0103.JPG
 
Last edited by a moderator:

Master-Bruce

Active Member
Aug 15, 2007
1,012
12
38
Paul, you're doing a great job on this! The rear and side walls fix straight to the sides and rear of the ramp, so any mistakes or rough texturing (around the outside wall of the ramp) is conceled.

Looking great, I'm so pleased! Don't hesitate to let me know of possible improvements.
 
P

paulhbell

The only problem I've had is my own fault. I've printed about 5 different floors now. I have got 'bleed through' of the ink when I join the 2 floor sheets together, I have tried different thickness papers and still it happened. I am going to try a different glue. I have never had this problem before and I've built over 100 paper/card models. I have changed glue to another brand lately, so I hope it is just that. It is visible in the second photo, top right hand side, near the turbolift door.

I did try using glossy photo paper for the floor and there was no bleed through, but a glossy floor was not good.

More updates later tonight.
 

Master-Bruce

Active Member
Aug 15, 2007
1,012
12
38
Sorry to hear that Paul. I caught the marks but dismissed it as a trick on the eye or something.
 
P

paulhbell

Hi andrew. I've sorted the base now and finished the back and one side wall. I've glued both walls on. No real problems yet. This model is not for beginners, I would suggest builders of this model take their time.

Sorry no photos today. I've just got in from hospital, nearly chopped my ear off at work. Nasty places engineering machine shops. I wonder if anyone would like to make a model of a very bloddy ear. Bad day, so I'm not doing a lot tonight. Just thought I would have a look around the web before going to bed.

Hopefully, back on with the build tomorrow.
 

Master-Bruce

Active Member
Aug 15, 2007
1,012
12
38
It's cool buddy. Nurse your ear!! I almost cut two of my fingers off about a month ago!! Hence me designing models again now as opposed to building them, can't do too much with my hand for a while.

Glad to hear it's going together OK. Didn't think it was that complicated to get a "Not for beginners" label. WOW! Is that down to the scale?

Looking forward to seeing more, but take your time.
 
P

paulhbell

Still here

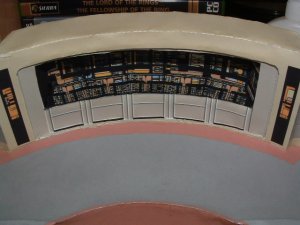
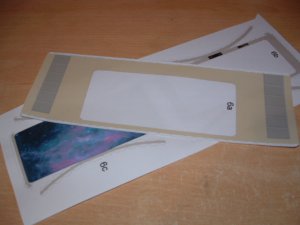
Photo's are, back wall and front view screen parts. The model actually looks a lot better than it does in the photo's.

I have finished the back wall, one side wall and started on the front view screen. The instructions show that both side walls are done before the front, but I have finished one side wall, that came out ok, so I thought the other side wall would be ok, I decided to skip to the front view screen and test the fit on that. I will build the other wall after the view screen.

I know you guys are eager for this to be finished, so Andrew can release the model and I apologise for the time it is taking to build it. I have some spare time between now and sunday, so I will have it finished for Sunday.

DSCF0104.JPG DSCF0105.JPG
 
Last edited by a moderator:

Master-Bruce

Active Member
Aug 15, 2007
1,012
12
38
Super job there buddy!! Looking forward to Sunday then!!

Slight and brief hijack, here's the start of my unfolding of the 1701-E bridge. Lots of parts to this as the walls are more complex and there are more tiers to the floor. This ones going to take a while but should be ready for a testbuild around the time the "D" bridge is out!!

Image16.jpg

How's the ear Paul?
 
Last edited by a moderator:
Status
Not open for further replies.