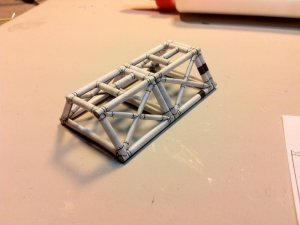
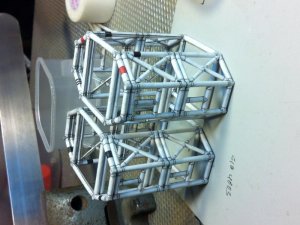
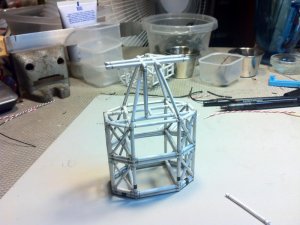
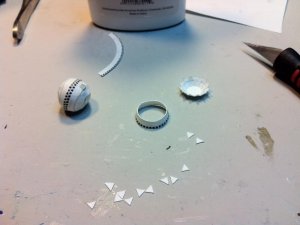
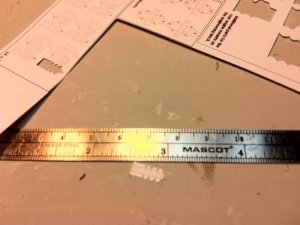
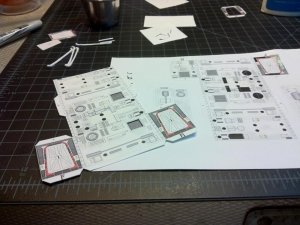
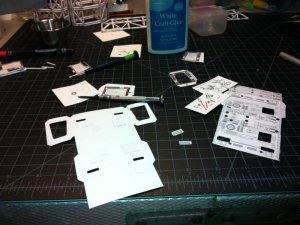
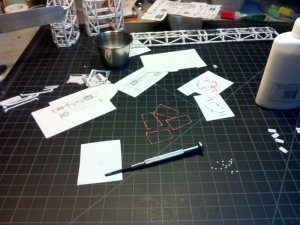
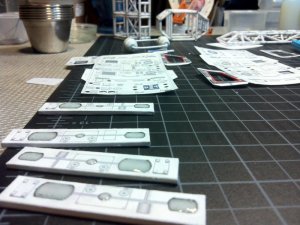
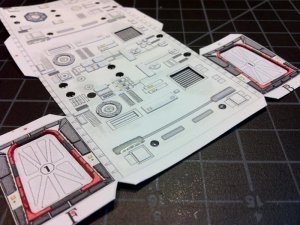
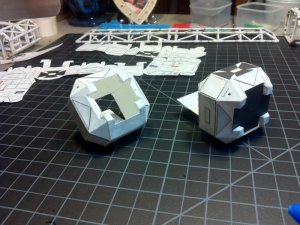
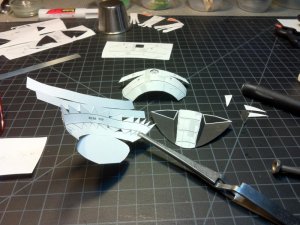
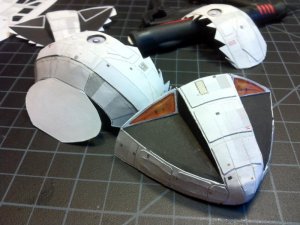
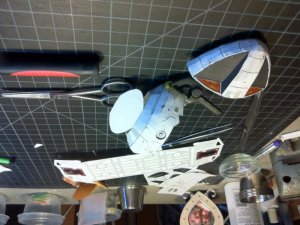
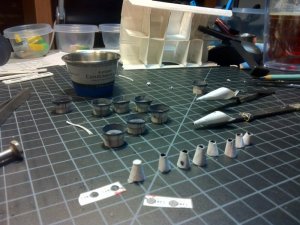
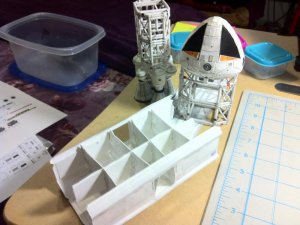
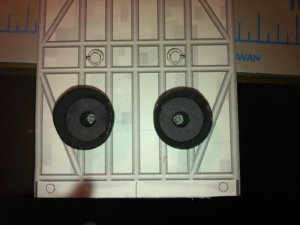
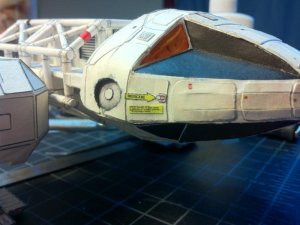
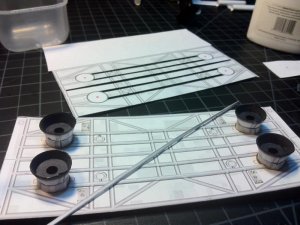
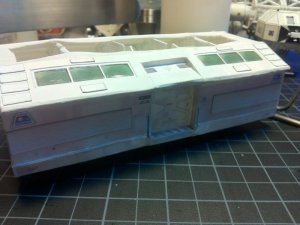
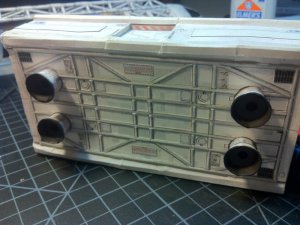
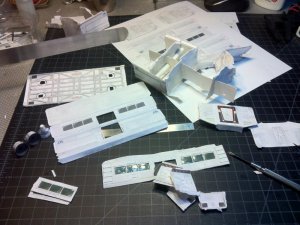
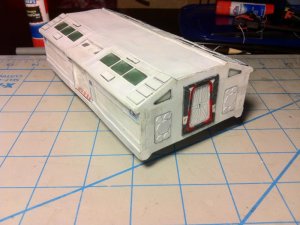
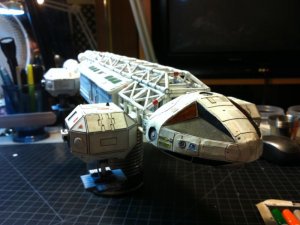
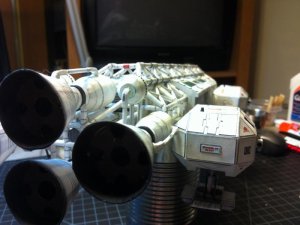
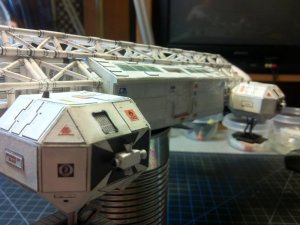
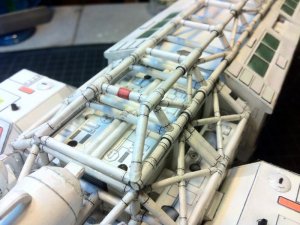
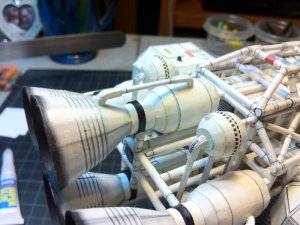
My Space 1999 Eagle Transporter

Tintellaar

New Member
Jan 13, 2011
64
3
6
59
Springfield, IL
Ok, the first 6 photos of the build :) Enjoy, I did!!!

OH, I truly want to thank the designers Keith Withers and Marc Robitaille. It is the designers that bring the joy of the build!
 

Attachments

  • IMG_2247_800x598.jpg
    IMG_2247_800x598.jpg
    46.4 KB · Views: 19
  • IMG_2353_800x598.jpg
    IMG_2353_800x598.jpg
    76.6 KB · Views: 19
  • IMG_2389_800x598.jpg
    IMG_2389_800x598.jpg
    71 KB · Views: 15
  • IMG_2406_800x598.jpg
    IMG_2406_800x598.jpg
    44.8 KB · Views: 15
  • IMG_2411_800x598.jpg
    IMG_2411_800x598.jpg
    56 KB · Views: 14
  • IMG_2412_800x598.jpg
    IMG_2412_800x598.jpg
    48.7 KB · Views: 16

Tintellaar

New Member
Jan 13, 2011
64
3
6
59
Springfield, IL
6 More :)

I did a build of the Delorian from BTTF... On it wires are use for tubes and electrical, I wish I had thought of that for the lines between the fuel tanks...
 

Attachments

  • IMG_2414_800x598.jpg
    IMG_2414_800x598.jpg
    35.3 KB · Views: 11
  • IMG_2463_800x598.jpg
    IMG_2463_800x598.jpg
    104.1 KB · Views: 11
  • IMG_2467_800x598.jpg
    IMG_2467_800x598.jpg
    80.4 KB · Views: 12
  • IMG_2490_800x598.jpg
    IMG_2490_800x598.jpg
    79.7 KB · Views: 12
  • IMG_2497_800x598.jpg
    IMG_2497_800x598.jpg
    77.8 KB · Views: 10
  • IMG_2512_800x598.jpg
    IMG_2512_800x598.jpg
    86.9 KB · Views: 13

Tintellaar

New Member
Jan 13, 2011
64
3
6
59
Springfield, IL
6 More :) :)

I really enjoy going the extra light year and adding depth to my builds... Sometimes it works, sometimes not, but I think the doors and above the tanks that mount to the sub frames look pretty good :)
 

Attachments

  • IMG_2520_800x598.jpg
    IMG_2520_800x598.jpg
    94.3 KB · Views: 13
  • IMG_2524_800x598.jpg
    IMG_2524_800x598.jpg
    87.6 KB · Views: 12
  • IMG_2525_800x598.jpg
    IMG_2525_800x598.jpg
    63.1 KB · Views: 10
  • IMG_2538_800x598.jpg
    IMG_2538_800x598.jpg
    87.5 KB · Views: 12
  • IMG_2567_800x598.jpg
    IMG_2567_800x598.jpg
    72.9 KB · Views: 10
  • IMG_2581_800x598.jpg
    IMG_2581_800x598.jpg
    93.3 KB · Views: 11

Tintellaar

New Member
Jan 13, 2011
64
3
6
59
Springfield, IL
Again...

Sorry about the upside down pics, I will come back later and correct if possible... The command module was very difficult!!! I still don't have my ability to do curves down to a tee... but overall, I think it came out ok... :)

Oh, in the last pic of this set, I built a support frame for later assembly... turns out it was a disaster! caused really ugly bends and protrustions on the surface. I had to build it again from scratch and still had a hek of a time getting a smooth surface and still, not as smooth as another build on this site. I dont remember whose, but it was great!
 

Attachments

  • IMG_2698_800x598.jpg
    IMG_2698_800x598.jpg
    85.2 KB · Views: 17
  • IMG_2700_800x598.jpg
    IMG_2700_800x598.jpg
    63.7 KB · Views: 14
  • IMG_2714_800x598.jpg
    IMG_2714_800x598.jpg
    78.3 KB · Views: 13
  • IMG_2720_800x598.jpg
    IMG_2720_800x598.jpg
    91.4 KB · Views: 12
  • IMG_2739_800x598.jpg
    IMG_2739_800x598.jpg
    88.4 KB · Views: 12
  • IMG_2742_800x598.jpg
    IMG_2742_800x598.jpg
    72.9 KB · Views: 18

Rhaven Blaack

!!!THE MAN BEHIND THE CURTAIN!!!
Staff member
Administrator
Moderator
Jun 12, 2009
12,493
9,857
228
Oregon
www.deviantart.com
It looks really good so far. You are right, adding the extra detail (whether it is raising, recessing, or combination of both) does make a model come to life and gives it that little extra "POP".
Needless to say, I will be following this thread.

Keep up the GREAT work.
 
Z

Zathros

I would love to make this model, but until I find the right diameter tubes, no freakin' way!!

Yours looks great!!:thumb:
 

trt

Member
Jul 23, 2011
116
10
18
Durham, England
Amazing work. Extra detailing is time consuming and fiddley, but is a must on something of this size. Do you know what scale it is?

But I got to agree with Zathros, I'm not rolling miles of tubes, so I would happily 'cheat' to build this one.
 

ASC Mclaren

Well-Known Member
Nov 18, 2011
884
369
58
Western Washington
This is so awesome! You are building a beautiful model of one of my favorite sci-fi ships! I'll echo everyone else, I rue the thought of rolling and then aligning all of those tubes. I'll be watching eagerly. BTW, do you know what scale this is?
 

vbsargent

Member
Apr 16, 2008
175
3
16
MD, USA
I always liked the design of the Eagles. The intricate tubing harkens back to mid to late 70's NASA space stations conceptual designs. One that I remember was an old animation of a smallish machine that would float in space and make tubes arranged in a triangle to be used as supports. Very similar to the tubing in the Eagle design.

You are doing great justice to the Space 1999 model. VERY nice and . . clean . . . so . . . . perfect . . . . can . . . not . . . . turn . . . away . . . . .
 

DanBKing

Dan the Man
Feb 29, 2012
1,817
1,587
113
Netherlands
Avast! I see an Eagle emerging from yonder reaches....

Excellant build so far. :thumb:

But, I WANT ONE!!!!!... :mrgreen:

If I survive my current Master UHU02's Discovery build, I then want to attempt the Moonbus from 2001. The molding of the Eagle's nose will give me practice for the Moonbus.. :)

Space 1999 I first saw in South Africa, which frustratingly for me at the time, the whole series was dubbed from English to Afrikaans... wall1

I fell in love with the Eagle and have built a few plastic versions in my days....
I'd love to try this one, one day....

(But, Hey....!! Psssstt......!! Where do you get it ?????) :eek:ops:

Keep up the good work.. !!
 

Tintellaar

New Member
Jan 13, 2011
64
3
6
59
Springfield, IL
Wow! Thank you every one!!! Brings me great joy to hear all your supportive comments :) The tubing... Um, well, actually the tubing was not that bad... What kept me going was watching it come together like an erector set... The designers did an excellent job of matching parts... almost no alterations were needed for the fit... Um, scale? Not really sure, sorry... More pics coming soon...
 

scifimodelfan

Member
May 10, 2011
122
36
23
59
Worcester, MA
Love it always wanted to build one but all those tubes....very intimidating. I have it on my list of paper models to do one of these days. You are doing a great job keep it up.
 

Tintellaar

New Member
Jan 13, 2011
64
3
6
59
Springfield, IL
Got three more...

Okay, as with all my build, I took some artistic license and added some things that were not there originally... thoughts? I mean, it 'could' be... :)
 

Attachments

  • IMG_2759_800x598.jpg
    IMG_2759_800x598.jpg
    53.6 KB · Views: 10
  • IMG_2765_800x598.jpg
    IMG_2765_800x598.jpg
    63.6 KB · Views: 10
  • IMG_2769_800x598.jpg
    IMG_2769_800x598.jpg
    76.1 KB · Views: 11
Z

Zathros

She's looking great Karl! Keep doing whatever you doing because it is working! :)
 

Tintellaar

New Member
Jan 13, 2011
64
3
6
59
Springfield, IL
Couldn't wait

I wanted to show how the ribs for support idea turned out... Ouch, was not happy at all with the results, so I tore it up and started again salvaging what I could... Like the windows... pouring that liquid water is a pain... so I tried to save em... and the doors and the thrusters, but did the sides and roof again...
 

Attachments

  • IMG_2778_800x598.jpg
    IMG_2778_800x598.jpg
    65.3 KB · Views: 10
  • IMG_2780_800x598.jpg
    IMG_2780_800x598.jpg
    76.6 KB · Views: 8
  • IMG_2782_800x598.jpg
    IMG_2782_800x598.jpg
    84.9 KB · Views: 11

Tintellaar

New Member
Jan 13, 2011
64
3
6
59
Springfield, IL
Finals...

As I said, I redid the module and then assembled the model :)
 

Attachments

  • IMG_2810_800x598.jpg
    IMG_2810_800x598.jpg
    70.8 KB · Views: 9
  • IMG_2812_800x598.jpg
    IMG_2812_800x598.jpg
    64.5 KB · Views: 7
  • IMG_2911_800x598.jpg
    IMG_2911_800x598.jpg
    70.4 KB · Views: 9
  • IMG_2826_800x598.jpg
    IMG_2826_800x598.jpg
    67.9 KB · Views: 10

Tintellaar

New Member
Jan 13, 2011
64
3
6
59
Springfield, IL
Finals

The completed Bird :)
 

Attachments

  • IMG_2908_800x598.jpg
    IMG_2908_800x598.jpg
    65.6 KB · Views: 18
  • IMG_2914_800x598.jpg
    IMG_2914_800x598.jpg
    59.1 KB · Views: 13
  • IMG_2917_800x598.jpg
    IMG_2917_800x598.jpg
    67.7 KB · Views: 12
  • IMG_2919_800x598.jpg
    IMG_2919_800x598.jpg
    86.9 KB · Views: 13
  • IMG_2921_800x598.jpg
    IMG_2921_800x598.jpg
    79.8 KB · Views: 16