Okay, so here goes with my mini N layout.
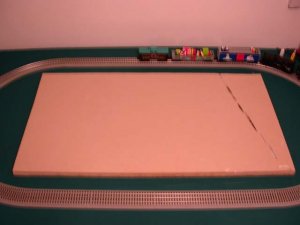
I first started with a 26"x48" surface of 3/4" birch plywood. I then carved a 26"x48" square out of a sheet of 5/8" drywall to provide the roadbed.
I haven't seen anyone use drywall and I don't know how well it will work, but since I have leftover sheets of it in my garage, I figured I'd give it a shot. I'll let you all know how it works out.