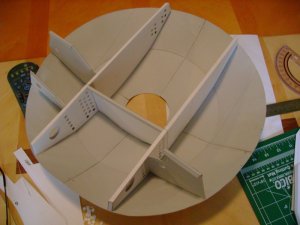
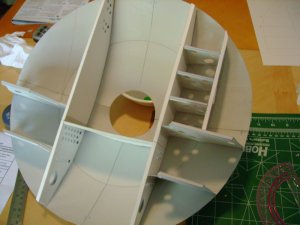
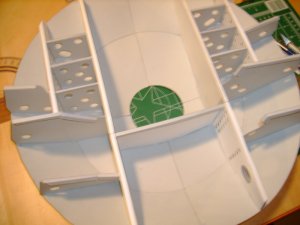
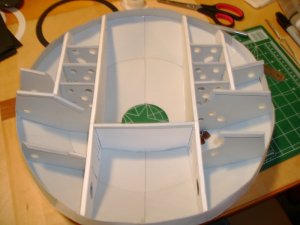
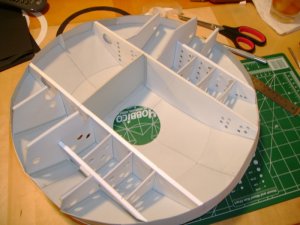
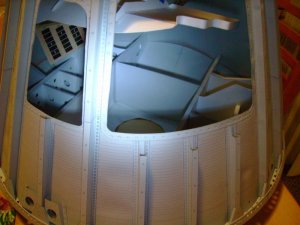
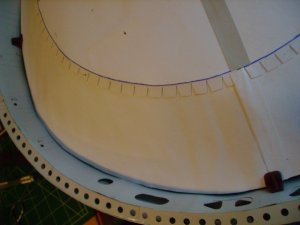
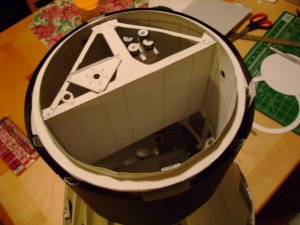
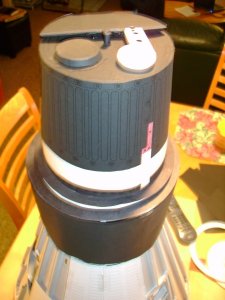
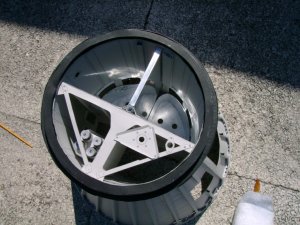
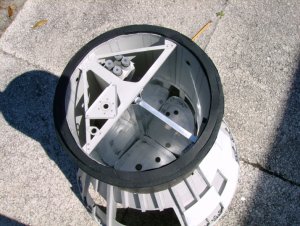
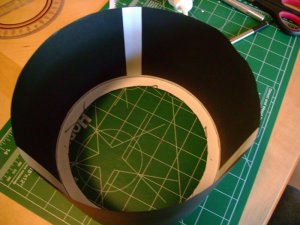
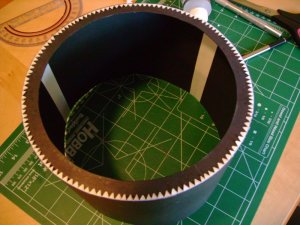
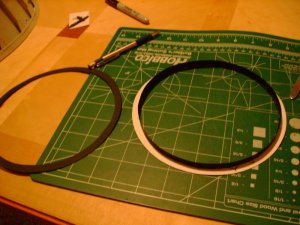
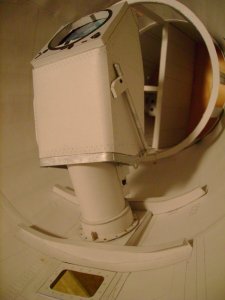
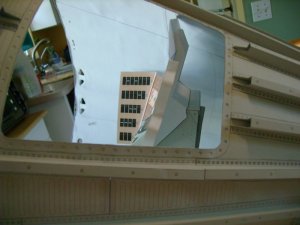
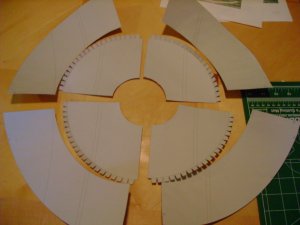
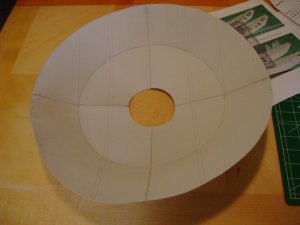
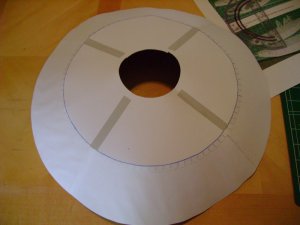
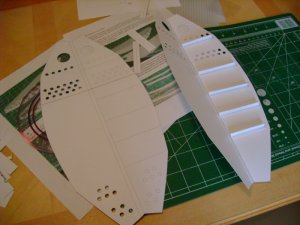
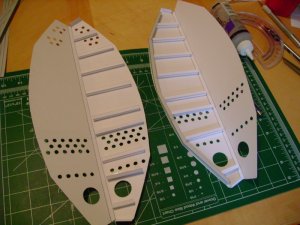
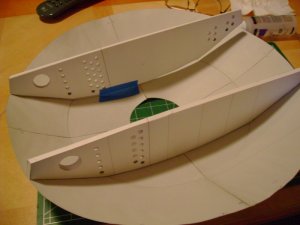
Model of the Week: Another 1/4 scale Merc..the journey begins

Nov 29, 2010
276
3
16
Lakeland Fl.
No sweat....a little adjusting, a little photo checking and every thing came out. I didn't have the scope pushed down on the shaft yet or rocked back at the proper angle. But after all that every things good to go.

Moving on to the aft bulk head.

Thanks Scott for the pics, these will help the fine tuning befor gluing.
 

Attachments

  • DSC01365.jpg
    DSC01365.jpg
    72.3 KB · Views: 13
  • DSC01369.jpg
    DSC01369.jpg
    67.7 KB · Views: 12
  • DSC01368.jpg
    DSC01368.jpg
    130 KB · Views: 13
  • DSC01367.jpg
    DSC01367.jpg
    110.9 KB · Views: 11
  • DSC01370.jpg
    DSC01370.jpg
    138.2 KB · Views: 11
  • DSC01371.jpg
    DSC01371.jpg
    141.8 KB · Views: 12
Nov 29, 2010
276
3
16
Lakeland Fl.
Ok gentlemen this should end any debate. After searching the net for a couple of hours and looking at hundreds of mercury earth view photos, this one and ONLY one photo of earth view through the mercury scope I found. I'm not wholy convinced it an actual photo but more of a training photo. It would seem you are both correct. With the type of lenses used the view would be a fish eye look, when flying level you would see the horizon in front. To see the rear horizon the craft would have to pitch nose down. This photo is actually of florida, although its really hard to tell.
 

Attachments

  • DSC01374.jpg
    DSC01374.jpg
    104.9 KB · Views: 10
  • DSC01376.jpg
    DSC01376.jpg
    119.6 KB · Views: 12
  • DSC01379.jpg
    DSC01379.jpg
    166.8 KB · Views: 13
  • DSC01381.jpg
    DSC01381.jpg
    150.6 KB · Views: 13
Nov 29, 2010
276
3
16
Lakeland Fl.
Aft bulk head comming together.

Excellent...guess whats on TV wile postig this, The Right Stuff
 

Attachments

  • DSC01378.jpg
    DSC01378.jpg
    115.3 KB · Views: 14
  • DSC01383.jpg
    DSC01383.jpg
    112.6 KB · Views: 12
  • DSC01384.jpg
    DSC01384.jpg
    116 KB · Views: 9
  • DSC01382.jpg
    DSC01382.jpg
    147 KB · Views: 11
  • DSC01385.jpg
    DSC01385.jpg
    172.9 KB · Views: 9
  • DSC01386.jpg
    DSC01386.jpg
    115.4 KB · Views: 12
P

Paper Kosmonaut

easy there on the quotes "You absolutely cannot see the earth like that...". If you look through the familiarization manuals, you will see the periscope had a special lens on it that could show the entire horizon similar to what Closet shows. it would be a fish eye look but you could see it all.
Scott

In other words, Scott, you say the same as what I said. :mrgreen:
One was able to see the horizon and curvature of the earth but only with having a very distorted view of it all... A full view of the whole earth was impossible in any way.

Good work on the scope, Closet Astronaut. The Instrument panel and scope inside the hull look spot on. Almost too good to be true.
Scott has made it a really good design. Great to see it come alive.
 

Mercsim

New Member
May 28, 2007
18
0
6
Chandler, AZ USA
I love discussion boards. I always get enlightened. Hopefully others do too...

I merely thought that "absolutely cannot..." was a bit harsh. The glass is either half-full or half-empty. I always prefer to see words of encouragement instead of discouragement.

Maybe something like "That photo is neat. Its a cool idea to put one there. Maybe you could find one that resembled the distorted view you would get so close to the earth?" Same message but a little softer.

Thank you for supporting Closet. He (and Paul) are doing great work. I get e-mails from other builders but I can't get them to post or share in the forums. Its good to see these guys and other readers (like PK) posting and participating.

It always gets my day stated with a smile :)


Scott
 
Nov 29, 2010
276
3
16
Lakeland Fl.
Bulkhead progress

Don't worry there PK I've read your postings on other models and your cretiqueing is always spread out evenly,99.9% of the time I agree with you. I've seen models on here that are absolute works of art and others that I would be embarresed to post. When using written word there's no voice inflection, no facial expressions or body language so things could be taken the wrong way. But have no fear I have thick skin and I know your trying to help. I appreciate your opinions.

Yes Scott has done an outstanding job on this design. EVERY THING fits, EVERY THING goes together perfectly. Many mods I have built have been a royal pain in the behind, poor design, parts don't fit right, parts too big or too small ect


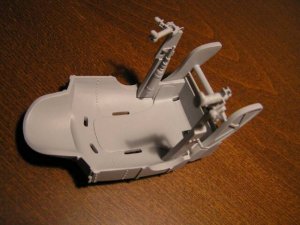
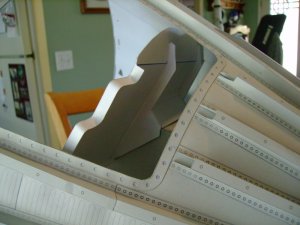
Do you think we could get Scott to make just one more piece, it would take a good designer to make, it's something that would be tough to make from scratch, somehting that would really make or break this model if done badly......? The seat.

.
 

Attachments

  • DSC01387.jpg
    DSC01387.jpg
    133.5 KB · Views: 12
  • DSC01391.jpg
    DSC01391.jpg
    132.6 KB · Views: 13
  • DSC01393.jpg
    DSC01393.jpg
    93.3 KB · Views: 11
  • Mercury4.jpg
    Mercury4.jpg
    39.1 KB · Views: 14

PaperAir

Active Member
Nov 20, 2008
941
70
33
66
monson ma
Nice job. Are you going to make the heat shield removable. There is a lot of detail between the heat shield and the aft bulkhead.
 
Nov 29, 2010
276
3
16
Lakeland Fl.
Actually I'm going to have to make the BH and heat shield removable, I will be detailing the inside and don't have anywhere to store these large parts so I will be assembling and (desembling) it often. I plan to start the detailing next in the recovery section once thats done then I'll glue in the front BH then work my way back.

And yes there is ALOT of stuff between the aft bh and heat shield. I found some great photos the other day of this.
 

Attachments

  • DSCN4514.jpg
    DSCN4514.jpg
    82.6 KB · Views: 12
  • DSCN4515.jpg
    DSCN4515.jpg
    78.6 KB · Views: 11
  • DSCN4516.jpg
    DSCN4516.jpg
    94.4 KB · Views: 12

Mercsim

New Member
May 28, 2007
18
0
6
Chandler, AZ USA
The dimples were only on one side so to speak...It was actually two sheets welded together. The outer side was a dimpled sheet and the inner side was smooth. Thus the appearance of dimples on one side. So my printed sides look right; dimples outside, smooth inside.

As a side note, when the Liberty Bell was recovered, the dimples were all smashed flat due to the pressure as it sank!

Scott
 

PaperAir

Active Member
Nov 20, 2008
941
70
33
66
monson ma
that,s a lot of pressure to do that to titanium.Where they smashed or do to greater pressure on the outside imploded.
 
Nov 29, 2010
276
3
16
Lakeland Fl.
Got the aft bulkhead complete. I doubled up on the paprer so there was a little warping so to counter this I applied a strip around the exterior to straighten the edges, I found a photo that shows this.

I used shelf tabs as a temporary hold ins
 

Attachments

  • DSC01395.jpg
    DSC01395.jpg
    102.3 KB · Views: 11
  • DSC01423.jpg
    DSC01423.jpg
    113.7 KB · Views: 6
  • DSC01424.jpg
    DSC01424.jpg
    139.7 KB · Views: 8
  • DSC01409.jpg
    DSC01409.jpg
    82.3 KB · Views: 9
  • DSC01403.jpg
    DSC01403.jpg
    154.5 KB · Views: 11
  • DSC01410.jpg
    DSC01410.jpg
    112.5 KB · Views: 11
Nov 29, 2010
276
3
16
Lakeland Fl.
Wanting to move on to the excape tower I need to get the foundation done first, so making outer skin for the recovery section and trimming out the top for the antenna to set in properly, started experimenting today, making and test fitting parts.
 

Attachments

  • DSC01414.jpg
    DSC01414.jpg
    157.7 KB · Views: 12
  • DSC01413.jpg
    DSC01413.jpg
    136 KB · Views: 12
  • DSC01422.jpg
    DSC01422.jpg
    80.5 KB · Views: 11
  • DSC01418.jpg
    DSC01418.jpg
    86.8 KB · Views: 12
  • DSC01411.jpg
    DSC01411.jpg
    78 KB · Views: 12
  • DSC01406.jpg
    DSC01406.jpg
    98.4 KB · Views: 11

PaperAir

Active Member
Nov 20, 2008
941
70
33
66
monson ma
shelf tabs what a cool idea.Are you going to make the shingles removable?Also this is turning out really cool!!!!
 
Nov 29, 2010
276
3
16
Lakeland Fl.
Well I have to get some shingles first, but I'm going to look for some really small black anodized screws if I can find some that will determine wich way I'll go. I also think covering 2/3rds of the main with shingles and leaving 1/3rd exsposing the stringers would be a nice touch.

I'm not going to worry about the deatil between the bulkhead and heat shield, I'm going to consintrate on the retro pack and excapetower.

Things are going well on the recovery section covering, should post photos next day or two.
 
Nov 29, 2010
276
3
16
Lakeland Fl.
Got the divider and parachute trays done.
 

Attachments

  • DSC01429.jpg
    DSC01429.jpg
    155.2 KB · Views: 11
  • DSC01430.jpg
    DSC01430.jpg
    166.9 KB · Views: 9
  • DSC01431.jpg
    DSC01431.jpg
    153.4 KB · Views: 9
  • DSC01436.jpg
    DSC01436.jpg
    138.1 KB · Views: 10
  • DSC01433.jpg
    DSC01433.jpg
    154 KB · Views: 9
  • DSC01440.jpg
    DSC01440.jpg
    200.9 KB · Views: 12
Nov 29, 2010
276
3
16
Lakeland Fl.
recovery sec covering
 

Attachments

  • DSC01426.jpg
    DSC01426.jpg
    178.5 KB · Views: 11
  • DSC01427.jpg
    DSC01427.jpg
    194.3 KB · Views: 11
  • DSC01428.jpg
    DSC01428.jpg
    175.1 KB · Views: 8
  • DSC01437.jpg
    DSC01437.jpg
    125.4 KB · Views: 11
  • DSC01434.jpg
    DSC01434.jpg
    133.8 KB · Views: 12
  • DSC01443.jpg
    DSC01443.jpg
    86.7 KB · Views: 13