Model of The Month: Mass Effect Normandy SR1 with fully functional Lights!

anthony344

Member
Mar 20, 2011
216
0
16
So you've got 6 leds and lots of flat sheets of transparent plastic set perpendicular to the light?

The strips of LEDs i can only cut to a length of 50mm which only comes out with 3 LEDs with one 150ohm resistor on it. on each strip has the negative & positive on both ends , i had to joint another strip of LEDs above to give a total of 6 LEDs. but that all i can fit in there , it's a tight fit.:mrgreen:

The sets of reflector strip are printed out on 180g matte photo paper but i had to double the parts of the reflector to be glued on both sides of each 25 reflector.

Here are the first two engine parts i have edit for the engine glow.
 

Attachments

  • SnapShot.jpg
    SnapShot.jpg
    21.9 KB · Views: 14

anthony344

Member
Mar 20, 2011
216
0
16
Other than straightening out the vertical pieces a little, I think it looks magnificent! Please, even if hand drawn, could you put up a schematic of your electronics? :)

Thanks john , if i don't come up with any other way in designing another one differently then i'll stick with that one & i'll make sure that all of those reflector are dead straight when i make all the sets of the engine.

I'll see what i can do with the schematics , i might use either Eagle pcb design software or i'll draw it up. either way:thumb: with these strips of LEDs are soo much easier & for tight spaces than having one by one LED & having too much wire every where & soldering.
 

dnalor

Well-Known Member
Oct 28, 2011
917
186
58
Belgium Europe
i found one with an xwing and he made lenses with a glue-gun..
http://www.therpf.com/f10/another-salzo-v3-build-50140/index5.html
the view looks warped... somewhere in the middle the picture with the view in the red engines.

And another builder (i google much :) ) put the electronics from a tea-light in the engines..to get that uh...i don't the english for it...but then it looks more organic like a flame...

I don't know if this works for your ship...but i want to try to work with it.
 

Attachments

  • thee lichtje.jpg
    thee lichtje.jpg
    55.6 KB · Views: 7

vbsargent

Member
Apr 16, 2008
175
3
16
MD, USA
Doh! Hit post WAY too fast!

@anthony344- The engine glow looks great! I wonder . . . I know that it would darken the light when the engine is turned on, but would it be possible to use a grayish tissue at the rear of the reflectors, so that when the lights were turned off it would look dark/black? I've never lit any models so don't know about the possibilities, but it always looked a bit odd to me that when an engine was not turned on, there was still a flat/blank area with color.
 

anthony344

Member
Mar 20, 2011
216
0
16
i found one with an xwing and he made lenses with a glue-gun..
http://www.therpf.com/f10/another-salzo-v3-build-50140/index5.html
the view looks warped... somewhere in the middle the picture with the view in the red engines.

Oh my that's what i was aiming for. Thank you dnalor for that site & for the reference on the engine glow.:thumb:
I'll do another one with the hot glue gun method & compare it to my version engine glow to which looks better. I might even do with out the reflectors beams they are a pain to work with.
 

anthony344

Member
Mar 20, 2011
216
0
16
Doh! Hit post WAY too fast!

@anthony344- The engine glow looks great! I wonder . . . I know that it would darken the light when the engine is turned on, but would it be possible to use a grayish tissue at the rear of the reflectors, so that when the lights were turned off it would look dark/black? I've never lit any models so don't know about the possibilities, but it always looked a bit odd to me that when an engine was not turned on, there was still a flat/blank area with color.

thanks vbsargent.
hmm, i did try it with black tissue paper but it was bad results when it was lit but grey tissue i didn't try that out with the light on. the blue looks a bit odd when looking at it in daylight when the light is off but when the light is on it looks fabulous in glowing.

I'll give it a go with the grey tissue & add more damping with 4 ply tissue.I'll take out the reflectors beams & see what the results looks like.
 
Z

Zathros

It's probably too late for this, bit if you recessed the whole assembly, the Blue part would be much less visible. Personally, I don't find this distracting, but finagling this kind of stuff can be fun. :)
 

anthony344

Member
Mar 20, 2011
216
0
16
Hot glue gun method engine glow.

I dissembled the prototype engine glow to try out the hot glue method & here are the results.

I still put 4 ply white tissue paper at the back of the LEDs to dim the bright areas of light showing. but i still need to make a front panel on the out side to make it look like a engine. I was thinking also to even out the LEDs layout & add another 4 more LEDs & have 10 LEDs. I have to modified the strips of LEDs to add more in. What do you guys think off it?

I want to thank all of you guys for helping me along with this, it is quite challenging to get this right. At least more brains are better than one.:wave:
 

Attachments

  • 000_0856.jpg
    000_0856.jpg
    98.2 KB · Views: 12
  • 000_0854.jpg
    000_0854.jpg
    87.2 KB · Views: 14

anthony344

Member
Mar 20, 2011
216
0
16
It's probably too late for this, bit if you recessed the whole assembly, the Blue part would be much less visible. Personally, I don't find this distracting, but finagling this kind of stuff can be fun. :)

Do you mean take all of the reflector beams off & leave the blue tissue showing completely.

I have tried it with the grey tissue & the grey tissue was the same results of the black tissue. when the light is on all it was showing was a black or greyish look instead of a blue light.
 
Z

Zathros

I mean make the whole assembly longer. The strips would be wider. You have the same amount of light coming out, but when off, with wider strips, you would not see the blue light. You could actually make a piece to attach to the end of this assembly. Something like the attached pick
 

Attachments

  • engine.jpg
    engine.jpg
    40.1 KB · Views: 19

anthony344

Member
Mar 20, 2011
216
0
16
I mean make the whole assembly longer. The strips would be wider. You have the same amount of light coming out, but when off, with wider strips, you would not see the blue light. You could actually make a piece to attach to the end of this assembly. Something like the attached pick

Ah now i know what you mean , i'll get to the editing now & i also think up where to put the LEDs & it might work very well of your engine mesh. instead of mounting the LEDs at the back of the engine, i'll have it mounted on the top & bottom of the engine case. With both lights face to face it would make the light less brighter or just right & not having those 6 LEDs light dots when its turned on.

Thanks john that looks more better engine version , then the one i made up.

I might do the schematics all combine than having separate with the wiring up , for the engine glow , engine vents lights , wing lights , fuselarge lights. it might take me awhile to draw up one. i got to get every thing right with the wire setup & i started drawing one of the engine glow wiring setups but not the other 3 engine yet.
 

anthony344

Member
Mar 20, 2011
216
0
16
How do you programm the lights?
Or is nothing blinking ? (wing lights)

I am designing a schematic with a program chip for the engine vents for one of the white LEDs to blink so the vents are decomposing the heat & the second LED to stay solid for vent Power source. for the wing i think the light is straight solid bright. but i need to find some more references of the Normandy SR1 & more pics & videos of it. i got some video of the SR1 but not enough of the lights showing clearly in the video of the wing.
 

anthony344

Member
Mar 20, 2011
216
0
16
Dude, very impressive.

Thanks mate:thumb: , i'm almost finish building the first engine thrust glow & i'm happy with the results that came out with Zathros design sketch pic. I'm finishing off the other 3 engine mesh so i can start building all 3 of the engine.

I just notice that after i edit the engine thrust glow i had to do the outer shell of the engine case aswell. since looking at daishi model design of the Normandy SR1 it was not design for to be fitted with lights. so as i change a alot of things for the Normandy i will upload the edit parts here for others if they want to do the same with fully lights on there Normandy SR1.
 

anthony344

Member
Mar 20, 2011
216
0
16
Edit engine lights where they are located.

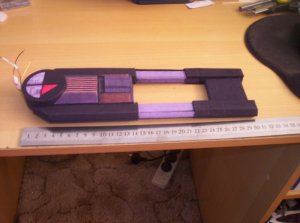
Here what i have been progressing on for the location of the lights & even some changes to the engine drive & new features i have added to make it more detail to the engine & vents.

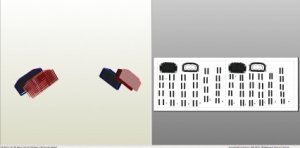
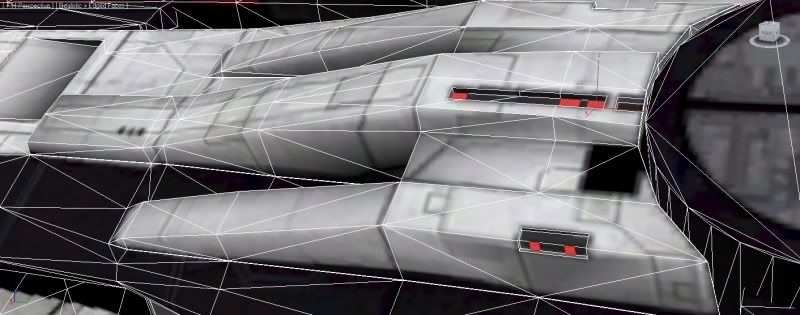
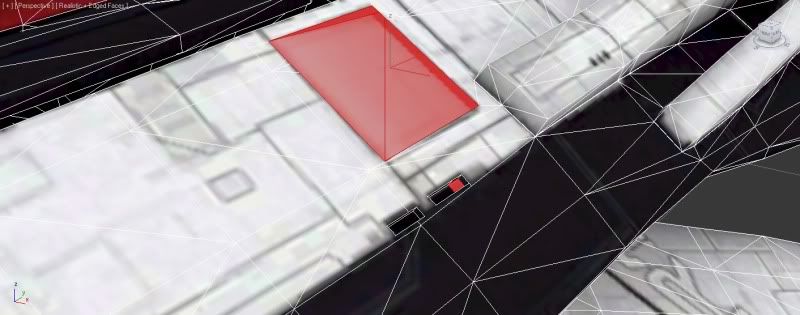
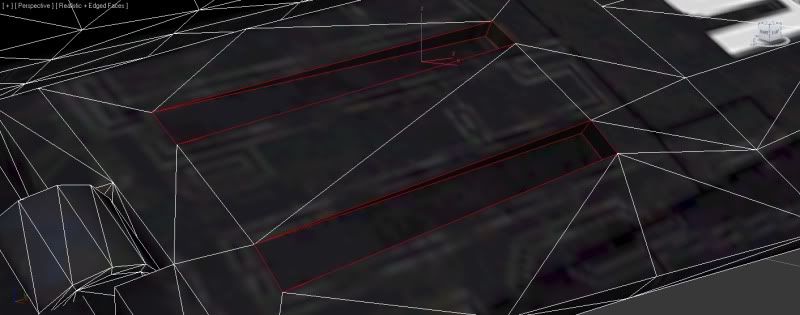
Here is one of the engine drive vents , as you can see there are some highlighted red on the vents. those are the location where the LED lights are going to be placed. i'll be using single 1205 white SMD LED 5mm & some single 805 white LED 3mm tiny for those location. I have countersink those area as you can see in pic for to counteract for those LEDs to be mounted. both side of the vent are going to be mounted with LED white lights.
3dsmax2012-05-1500-26-06-69.jpg

3dsmax2012-05-1500-26-19-33.jpg


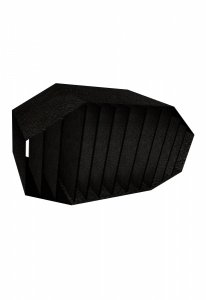
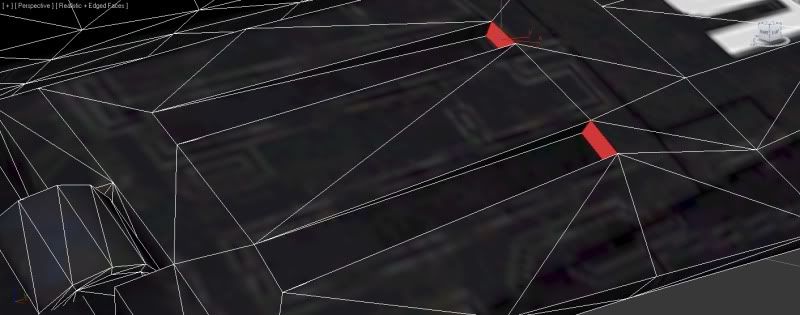
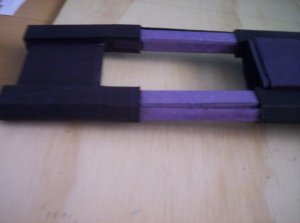
Next pic is one more LED light to be mounted right next to another vent as you can see in pic with the highlighted little red box next to the vent. I have done some modified to the vent aswell to make it looks more realistic like a vent & add more detail to the engine. from the main mesh there was no vent there just a texture look like a vent.
3dsmax2012-05-1500-26-56-66.jpg


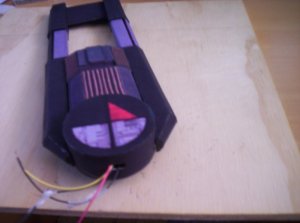
last edit engine pic is at the front of the engine , this one i have thought up my self when i was looking at the texture outline pattern on the front of the engine. I have done two vents like shape at the front of the engine to added two more LEDs where those vent shape thingy are to bring the ship alive & brighten up the front of the engine.The two square red box is where the LED is going to be mount.
3dsmax2012-05-1500-28-03-19.jpg

3dsmax2012-05-1500-28-13-70.jpg


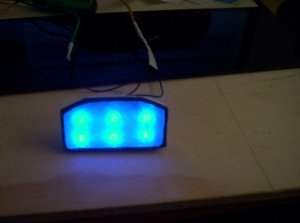
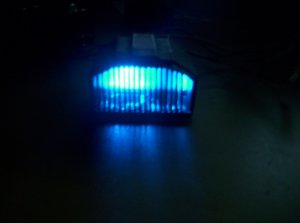
I'm just roughly guessing but after calculating where the LEDs are going to be placed on the Normandy there is near about 120 white LEDs to the ship & the engine thrust glow is about 36 blue LEDs. Now that alot.:eek:

I'm still using some of daishi parts of the Normandy SR1 & most is my edit parts for the LEDs to be mounted.

Stay tuned. Next post is the built engine glow pics.:wave:
 

anthony344

Member
Mar 20, 2011
216
0
16
one built engine glow ready & 3 more to go to complete all 4 engine.

here it is the final design of the engine glow. the edit engine has a barrier that i have added in with zathros design at the back for the insulation & to hide most of the LEDs in showing when the lights are on.

There is a total of 12 blue LEDs in one engine, i have power up 6 LEDs to light up from the bottom two pics blow & the third one up from the bottom two pics below is powered up with all 12 blue LEDs. It's spectacular when seeing it from you naked eyes but in pics it terrible. the pics may look like it need touch up with colour in but it just from the camera flash where some of the glue has smear in those area ,but it looks great in person.

I just got to add one more piece of reflector at the end of the engine to completed. then it's time to build the other 3 engines. but i'm struggling to build now it's so cold here my hands are freezing & it's windy outside. so it going to be a slow struggling process build.
 

Attachments

  • 000_0870.jpg
    000_0870.jpg
    112.2 KB · Views: 11
  • 000_0873.jpg
    000_0873.jpg
    110.2 KB · Views: 7
  • 000_0874.jpg
    000_0874.jpg
    102 KB · Views: 9
  • 000_0878.jpg
    000_0878.jpg
    85 KB · Views: 12
  • 000_0881.jpg
    000_0881.jpg
    80.7 KB · Views: 9
  • 000_0888.jpg
    000_0888.jpg
    32 KB · Views: 11

anthony344

Member
Mar 20, 2011
216
0
16
Little Update Upper Left Engine.

Here is the progress so far. I had a trouble with the scale for the engine glow case a little bit to big that it did not match to daishi model so i had to rescale it close & rebuild it over again.

A little side note : i have made another texture for the whole Normandy SR1 , even on the lower wing for the SR1 logo showing & re brighten up the texture a little to show clearly.

I have measured the back of the engine & the length of it is about 305mm long so far. the total length from the front to the back of the engine is 878mm long.

Here is where i'm up to.
 

Attachments

  • 000_0897.jpg
    000_0897.jpg
    128.1 KB · Views: 13
  • 000_0895.jpg
    000_0895.jpg
    96.9 KB · Views: 8
  • 000_0894.jpg
    000_0894.jpg
    89.1 KB · Views: 9