logging mallett

papertrain

Member
Jan 12, 2007
54
1
16
77
virginia
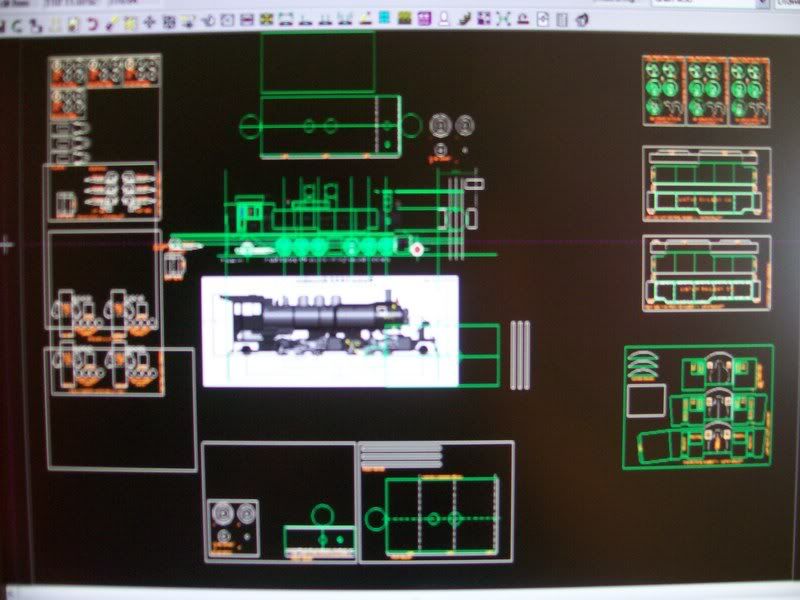
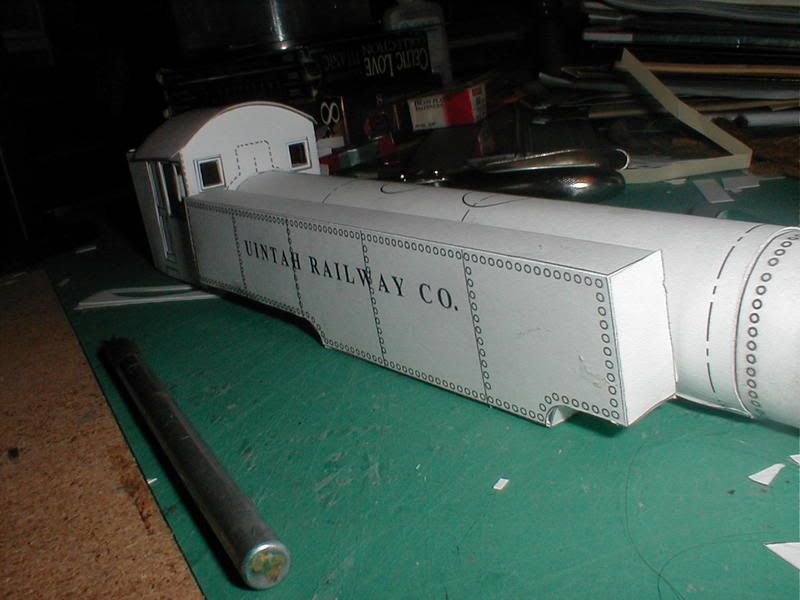
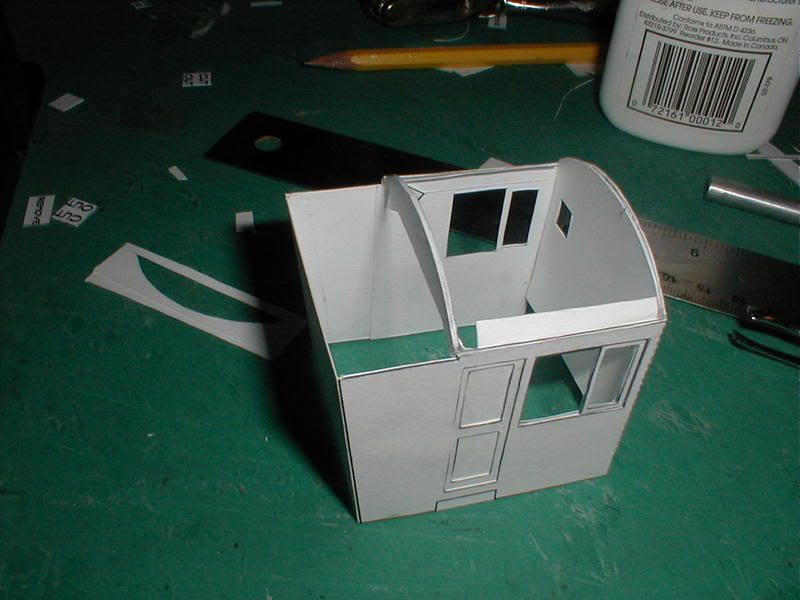
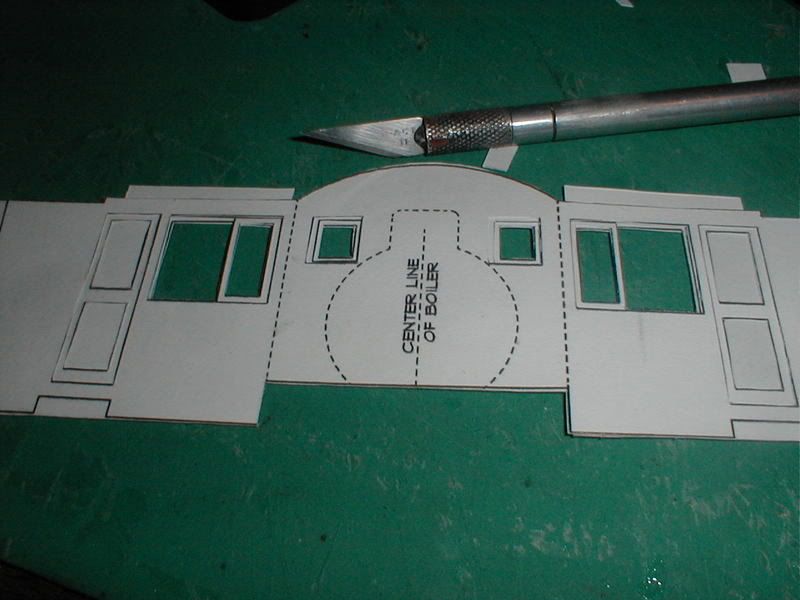
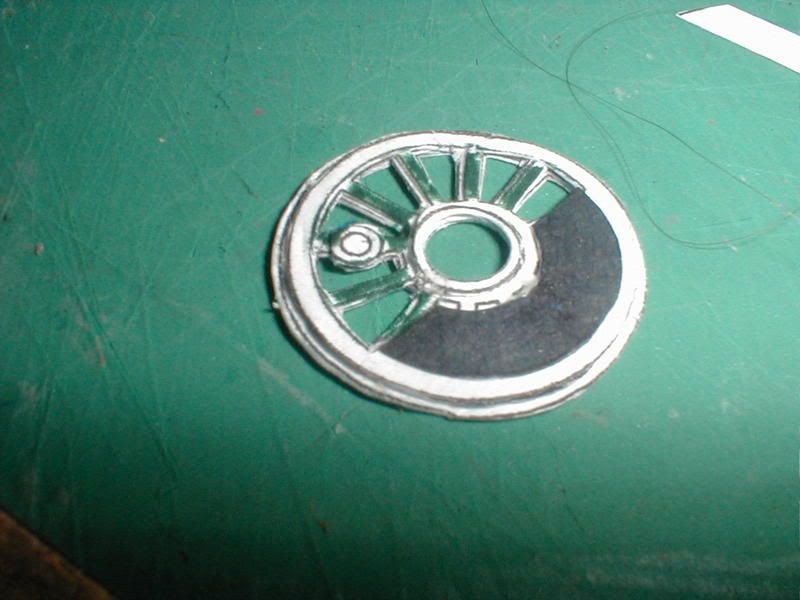
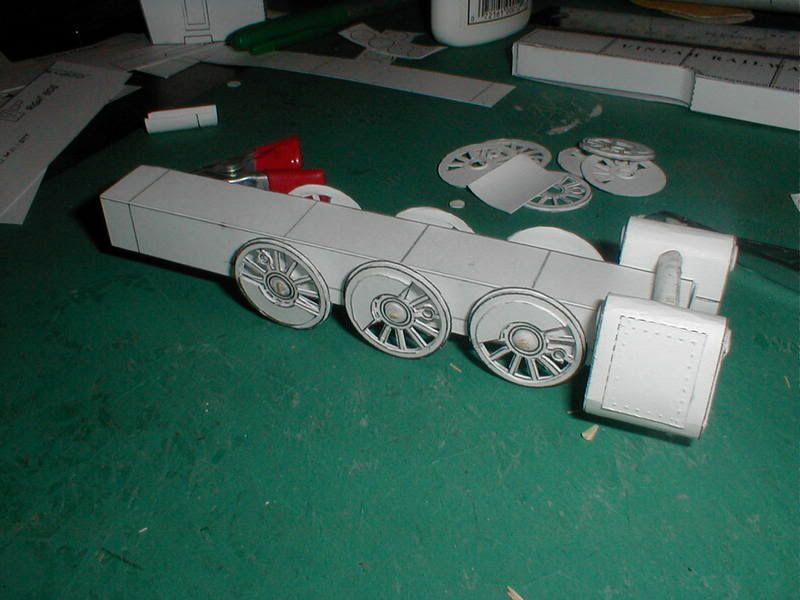
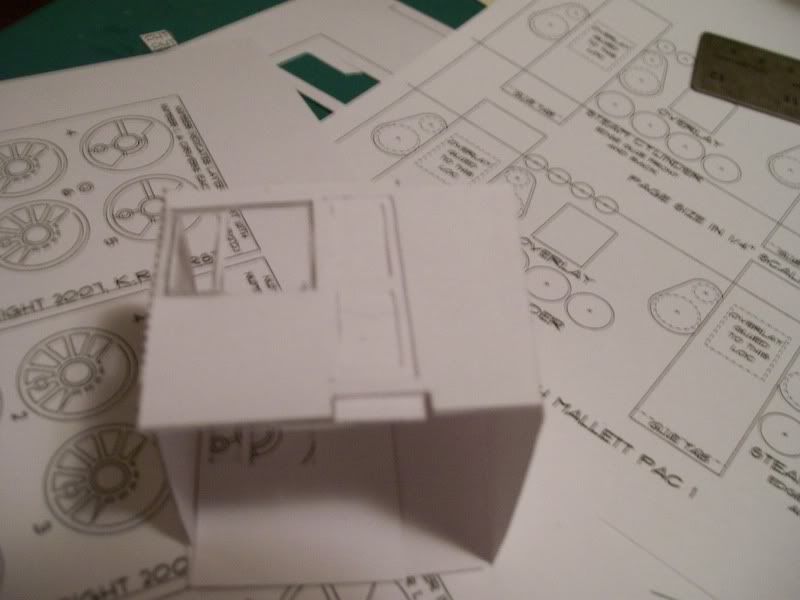
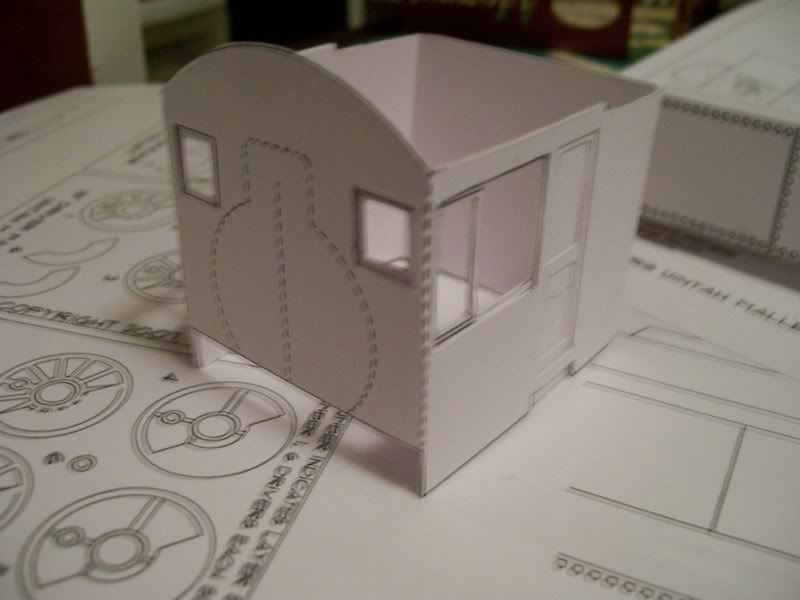
Here is a new project I am starting. I have been working on the drawing and started a test fit to see if things will work. This test is in 1/4" scale although it can be printed in any scale.:grin: I am using a different camera and it does not do goot at closeups...i will go back to my olympus for them.
Picture005.jpg

Picture001.jpg

Picture003.jpg

Picture002.jpg


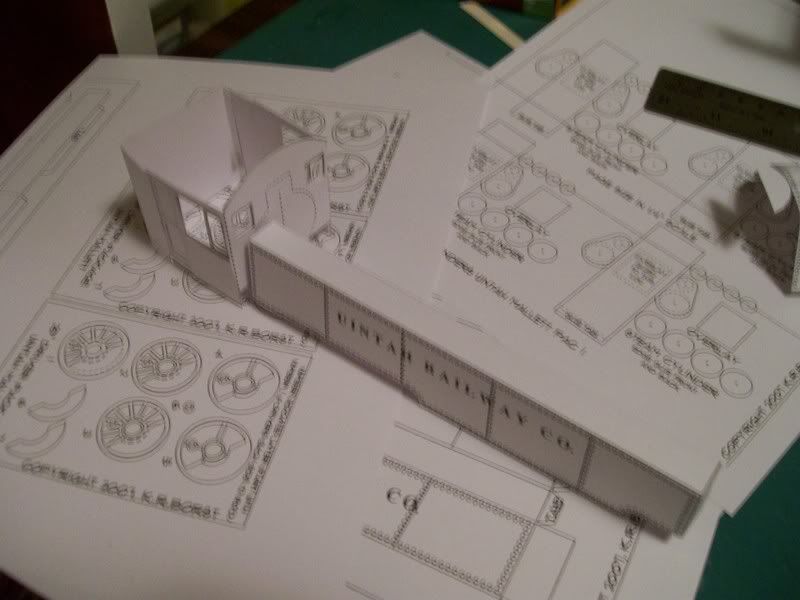
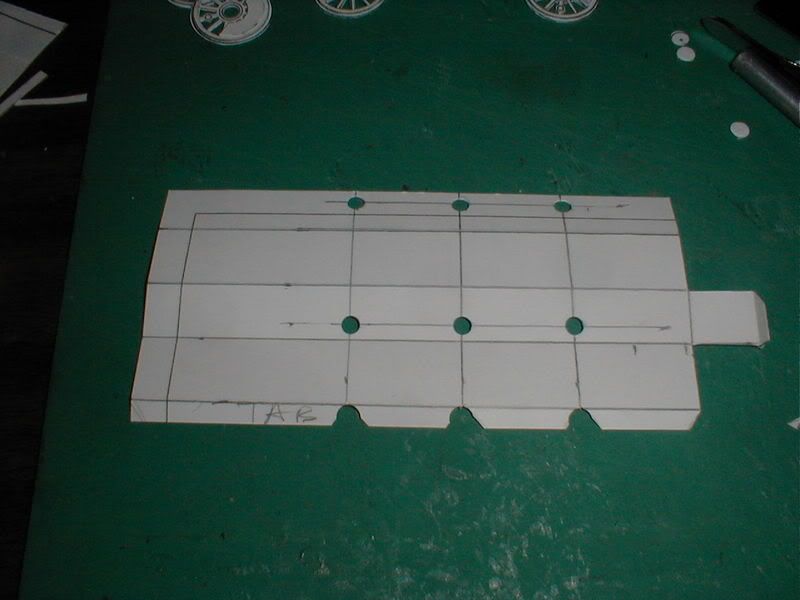
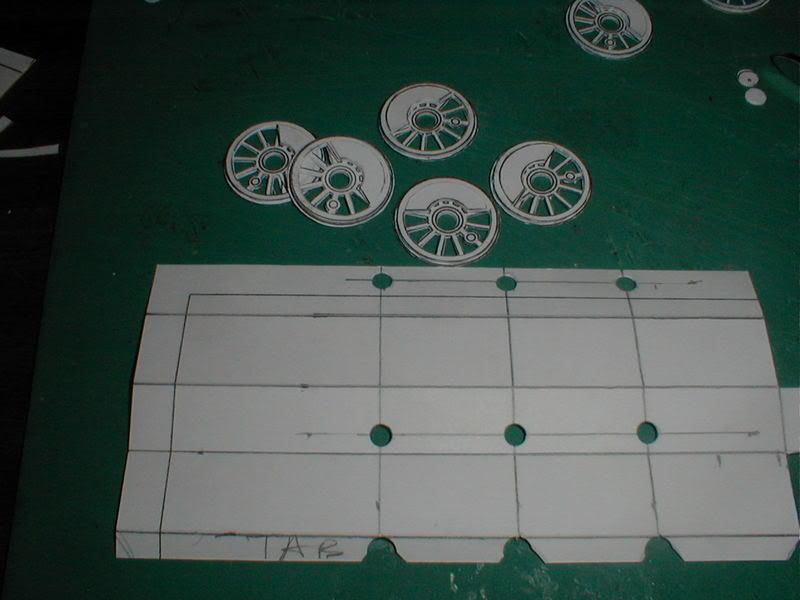
Since I do all my designs flat and not 3 dimensional i have found that i need to make the boiler wrapper longer so that is it the correct diameter. I think i have about 50 % of the parts drawn. I am haveing a hard time trying to get the full length on one sheet.:cry: I have have to break it into 2 sections to get it right.
Would anyone be interested in doing the color layout from jpegs or other format. I dont like how the color truns out on my program.
papertrain (Kenn)
 
S

sdk2knbk

Oh, Boy! A Uintah Mallet! Our local animal shelter/pet store/animal specialty outlet store has a G gauge layout running all through the store at about 8 feet off the floor. They don't run anything on it anymore (wore the trains out?), but I used to admire the Uintah mallet that ran on it. I'll be watching this one with great interest, Kenn!

Scott K.
 

Prowler901

New Member
May 18, 2005
10
0
6
57
Upstate New York
www.steammachine.com
Ahh.... the Uintah Railway... The crookedest railroad in the West. Those mallets have always been a favorite of mine. Of course I'm a big narrow gauge fan to boot. Someday I hope to be able to design models of the D&RGW's K series narrow gauge locos :)

Regards,
Todd
 

thewoodengraver

Active Member
Nov 4, 2005
96
1
36
www.thewoodengraver.com
The narrow gauge has quite a promising future in cardmodels!
Very nice! Will look quite handsome next to my Porter!
Great job Kenn! I would offer help with the paint but have my own Dragon to wrestle.
 

papertrain

Member
Jan 12, 2007
54
1
16
77
virginia
i am setting up the project so i can do several versions of tanks and cabs assemblys,,,,,,,will set up the sheets chinese,,,,one from column A and one from column B:grin: the hardest part is getting the set up on the first one..then just a mater of plugging in sheet metal:twisted:
 
Very nice design work. Can't wait to see this baby with some textures on it.
It looks like you are doing a high quality design, just at a glance of the parts sheets.
Another one that I am itching to see on my cutting mat!:twisted:

Thanks for sharing your progress with us and keep up the good work!

Russell
 

papertrain

Member
Jan 12, 2007
54
1
16
77
virginia
this is screen photo,,,,no my screen isnt warpped:grin: i am working 3 drawings super imposed on top of each other
Picture028.jpg

i will be posting more this weekend sometime:twisted:
 
C

cgutzmer

Looking great pt! Is it the same scale as the caboose I am working on? Different era of course but just wondering!
Chris
 

papertrain

Member
Jan 12, 2007
54
1
16
77
virginia
I never realized how long these malletts were until i put this together.They were/are looooonnggg.:roll: These are some more progress photos, I redid the cab assembly a bit and put together a fast wheel. They are the hardest part of the whole build,and there are 12 of those things. wish there was a circle cutter8) the wheel has 6 layers alone. Lets see,6 and 12,,,,,they are going to take forever to put together:cry:
Picture007.jpg

Picture004.jpg

Picture001-1.jpg

Picture008.jpg

Note to self:the roof needs tabs to install.........who forgot the tabs?:mad:
I also decided to design the boiler like a rocket and have the ends a seperate tabbed piece instead of being connected. More later,:grin:
papertrain
 
C

cgutzmer

thewoodengraver said:
I hate bringing this up to scalpel users, but, try using scissors...tiny scissors if you got them, you may find your non-straight cuts with scissors more accurate.

Agreed phil :) I use scissors whenever possible. sometimes they work better sometimes they dont!
Chris
 

papertrain

Member
Jan 12, 2007
54
1
16
77
virginia
I have the drivers set up and designed the chassis. Now i have to go and put it in the computer. Did it by hand so that could get it set the way i wanted it.
along the way i found i wanted to redisgn the wheel so i have to adjust the computer to match what i actually ended up doing. I am also thinking i should redesign the cylinders becasue i dont like how they look. the look a little more bulky that i think they should. (since there were several different types maybe it really is not that important. I have even seen different types on the same engine.)i am working up the bolster now and the mounts for the boiler and cab. The cab with minor modifications can work for the Sumpter Valley and the Uintah 250, both of them used a seperate tender. :grin:
Picture014.jpg

Picture015.jpg

Picture017.jpg

I have come to the conclusion i am a better designer than builder:cry: By the time i finish this monster i think i will gain in the building aspect8) .
will post more later. I have also come to the conslusion the best way to do the wheels is to make the final outside cut they should have all the layers in place. I will adjust the drawings and quantities of things to reflect laminated pieces.:roll:
pt:grin:
 

spikeyfaz

New Member
Mar 4, 2007
3
0
1
UK
Hello there.

This is my first post as I've just found this site by chance after doing a Google search for the Uintah Mallet. I'm really impressed with what you guys are doing here :cool: . I've scratchbuilt models in metal and plastic but a card Mallet would be a great challenge for me.

Do you make these designs available to other members?

As I'm unfamiliar with how this forum works I'd really appreciate any advice or help. The bottom line is I really want to build a card Uintah Mallet :) .
 

papertrain

Member
Jan 12, 2007
54
1
16
77
virginia
I am working on this to have available to others. Right now i am designing the the model for it and sharing the process with everyone. The problems that I have the successes are out in front for all to see. I will be getting it colorsed when i get that final pattern all corrected and fitting properly. Right at the moment this is a prototype that i am designing as I go. Keep watching for more posts later today. I will be showing how the wheels and axels are put together and some changes to the cylinders that i am makeing right now.:grin:
papertrain
you might also look at the caboose i am working on. there is also a beta build on this (first build) by another member of the group
BTW welcome to the group. I know you will find a lot of nice builds going on and a lot of great people..:roll: