

Lightship Ambrose - Free Model Competition
- Thread starter mpakier
- Start date
You are using an out of date browser. It may not display this or other websites correctly.
You should upgrade or use an alternative browser.
You should upgrade or use an alternative browser.
- Status
- Not open for further replies.


Wow:grin: those parts are so small. I easily get intimidated when I see very tiny parts:cry: I have to say you're doing great.
Keep those pictures coming:grin:
Keep those pictures coming:grin:
miguelj said:Wow:grin: those parts are so small. I easily get intimidated when I see very tiny parts:cry: I have to say you're doing great.
Keep those pictures coming:grin:
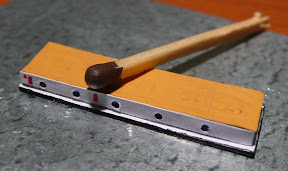
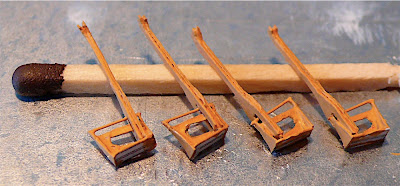
The parts are not so small. They look very small on picture especially with the match
but when you work with them there is no problem with the size. It could be
a problem with even smaller parts, 2 times etc. I like work with small parts because
it's less to cut, glue and paint.
dinsour said:Mpakier. you say you are just learning. Wow, it looks like you could give the experts a run for their money. Great job so far, thanks for showing us your work. It looks great
73 Ron
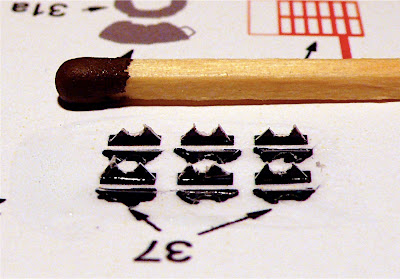
I'm learning to build a model like an expert because I think that it is the only way
that make sens. I checked many build reports for best techniques and now
I try to use them myself. It's not very complicated it only takes much more time.
You can build the part above in 15 minutes. I choose the more complicated way and
spent on it almost 3 hours. This is only this. Nothing special.
Hello. I'm building now a superstructures of the ship.
First you can see the way how I want to make the doors more realistic.
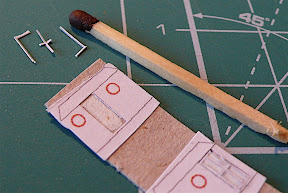
As you can see at the first time they were very ugly (on the right). But at the
end I learned how to make them better (but I think I still have a lot to learn here).
Now you can see all the parts and the structures glued together.
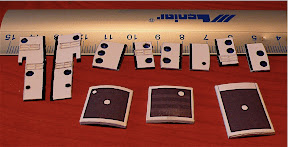
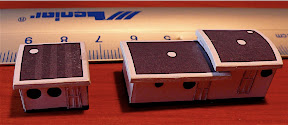
At the end the whole ship together as it looks now.

First you can see the way how I want to make the doors more realistic.
As you can see at the first time they were very ugly (on the right). But at the
end I learned how to make them better (but I think I still have a lot to learn here).
Now you can see all the parts and the structures glued together.
At the end the whole ship together as it looks now.
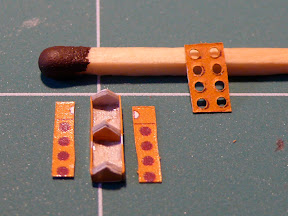
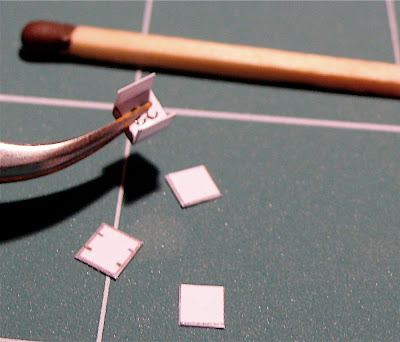
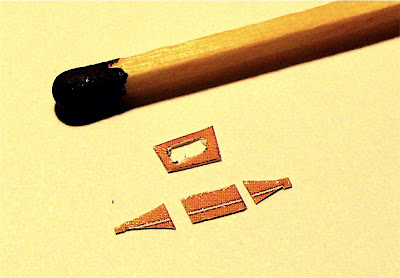
Here I have a small tutorial for everyone who don't know how to build
small parts.
First you have to cut all the pieces. As you see I prepared additional base that is
laminated to 1mm.
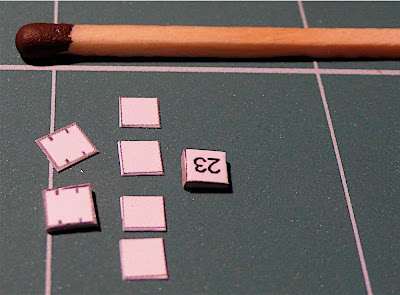
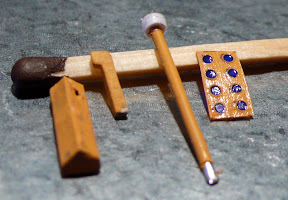
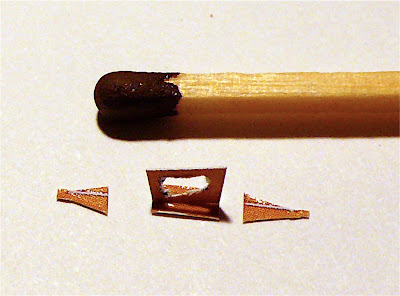
Now you glue the base to sidewalls.
Then you glue the other walls and the roof.
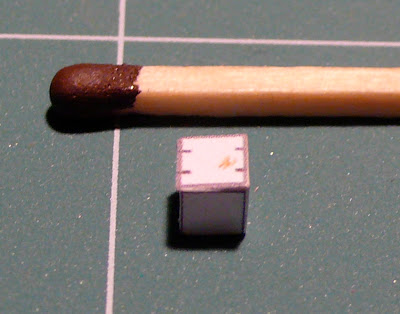
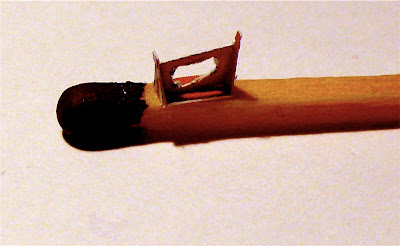
Now if you are an expert (you were able to cut and glue properly) you are done.
If you are not expert like me. You have still some job to do.
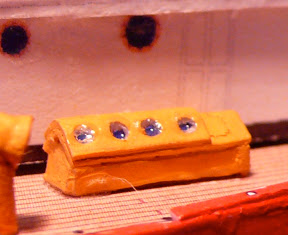
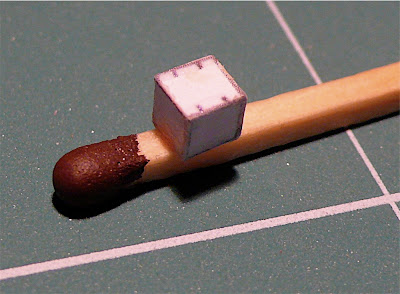
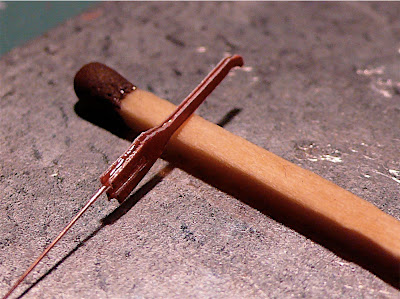
First you have to sink the part in superglue (cyanoacrylate). This makes the
paper strong as plastic. Now you have to polish up with sandpaper.
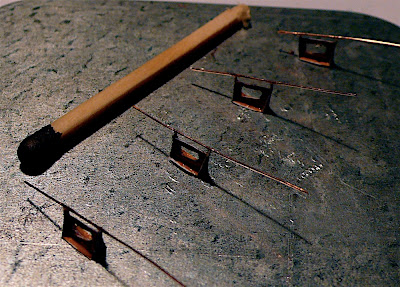
After all this the part is ready to be painted to your favorite color.
small parts.
First you have to cut all the pieces. As you see I prepared additional base that is
laminated to 1mm.
Now you glue the base to sidewalls.
Then you glue the other walls and the roof.
Now if you are an expert (you were able to cut and glue properly) you are done.
If you are not expert like me. You have still some job to do.
First you have to sink the part in superglue (cyanoacrylate). This makes the
paper strong as plastic. Now you have to polish up with sandpaper.
After all this the part is ready to be painted to your favorite color.
C
cgutzmer
That is marvelous work!")
I still want to know where you found that gigantic match stick.:grin:
I'm loving this build thread!
Cheers!
Jim
I still want to know where you found that gigantic match stick.:grin:
I'm loving this build thread!
Cheers!
Jim

Don't respond, keep working at it...but I just had to say this is brilliant work, as such small scale!
Bravo!!:yep:
(I just wanted to use that last smilie...never used that one before.:grin: )
Cheers!
Jim
Bravo!!:yep:
(I just wanted to use that last smilie...never used that one before.:grin: )
Cheers!
Jim
This is a very clean build- Looks great!:-o It's all so tiny!:shock: I look forward to more inspiring pix, but like Chris says, keep building. We'll catch up later.
Amazyah
Senior Member
M
Mark_1984
Superb job - I tried this one ages ago and it ended up in the bin as I couldn't get it square. I never got as far as trying to do all the fiddly bits.
Those details are coming out brilliantly!
Takes a real steady hand to cut those small parts out, and you did a fantastic job of it.
Outstanding work!
Cheers!
Jim
Takes a real steady hand to cut those small parts out, and you did a fantastic job of it.
Outstanding work!
Cheers!
Jim
- Status
- Not open for further replies.