

Jay's Box of Sci-Fi CardToys
- Thread starter marksolo
- Start date
You are using an out of date browser. It may not display this or other websites correctly.
You should upgrade or use an alternative browser.
You should upgrade or use an alternative browser.
- Status
- Not open for further replies.
")
lol, but the site is still getting worked on, so that means that the posts will come back. i think
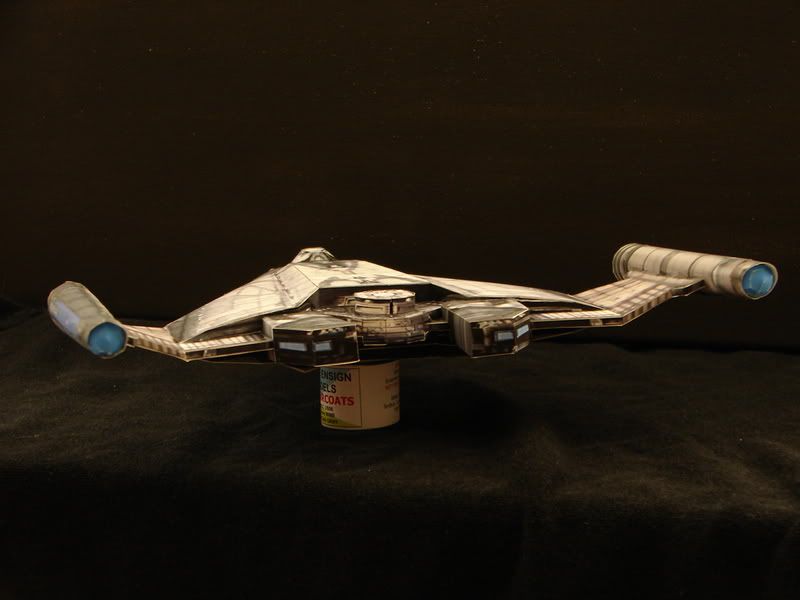
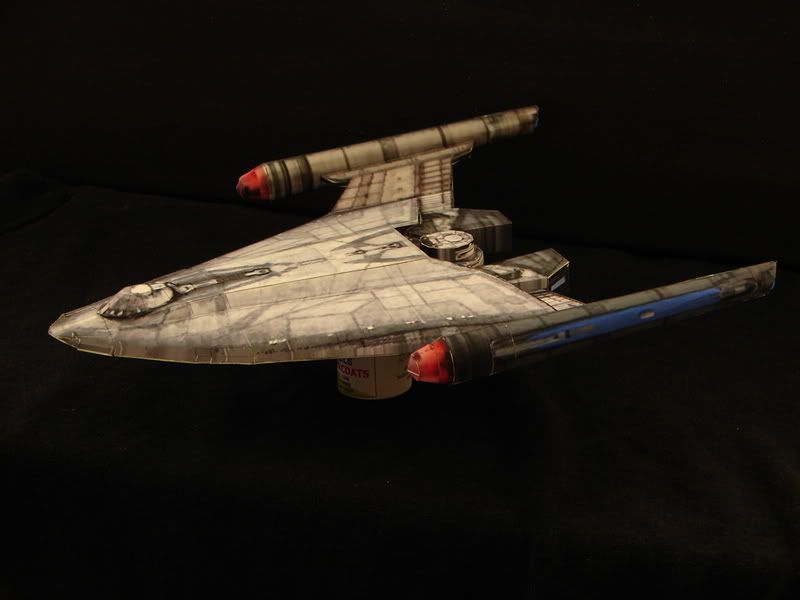
delta warp vessel
hey jaybats,
your delta warp vessel from "Enterprise" is missing the warp engines.
hey jaybats,
your delta warp vessel from "Enterprise" is missing the warp engines.
rescaled galactica
for those who whant to know the differnce in size.


for those who whant to know the differnce in size.
Last edited by a moderator:
thanks!
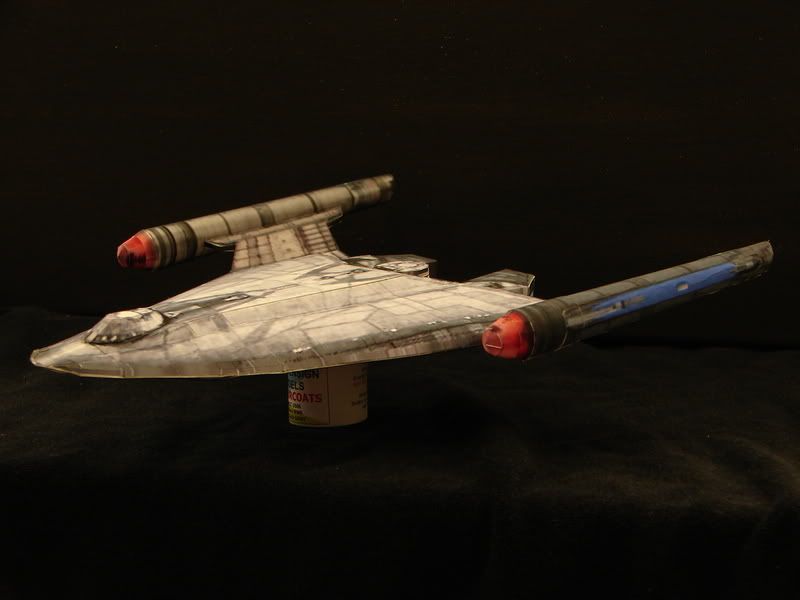
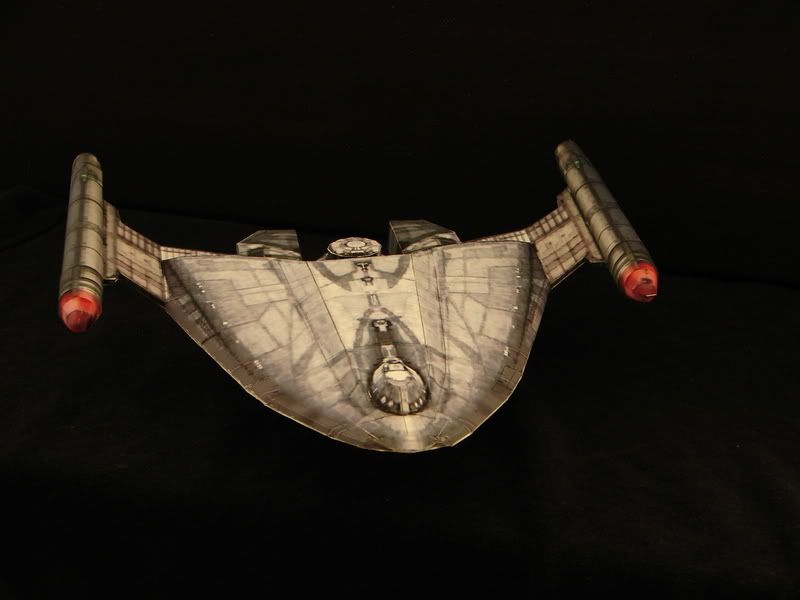
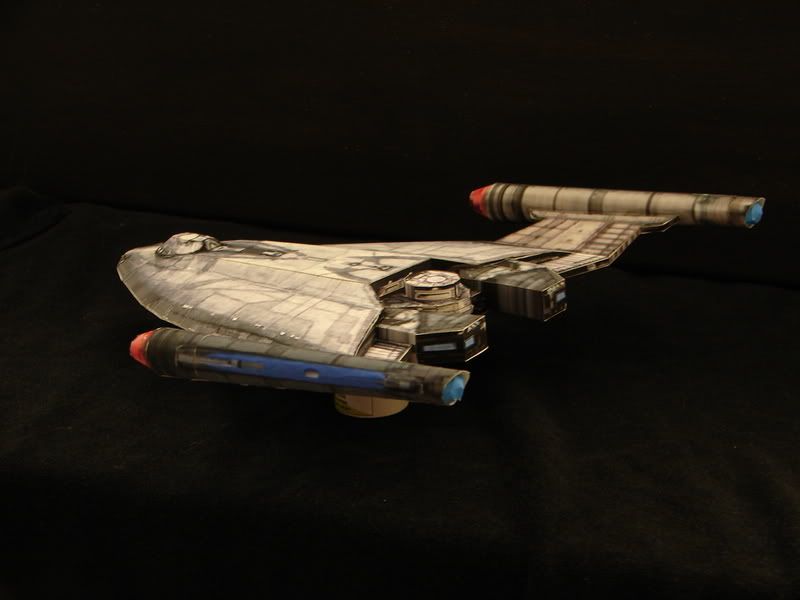
the missing Delta-type warp nacelles have been recovered.
looks like i'll have to upsize the Pegasus...
the missing Delta-type warp nacelles have been recovered.
looks like i'll have to upsize the Pegasus...
Hi Jaybats! I had just lurched around your new models (I (and my uncle who nearlly build them all) like them very much) and my first view was the "Swinetrek" with a "YEAH"! I think, after the bismarck-build THIS will be my first SciFi-"Starship". I hope I will not have to build Mrs. Piggy also...
Thanks for the new models!
Thanks for the new models!
Oops, sorry, looks like I forgot to cut the slot on the rear of the delta hull all the way through! Just cut the central part in the middle from left to right, then fold them inward to create a gap as thick as the slots on the sides. The central parts can form tabs to hold the wing. Insert the wing between the slots, then insert the impulse engines and middle part over/under the wing, positioning them as indicated in the texture. Diagram attached.

Last edited by a moderator:
hmm, just noticed the original instruction graphic (attached) was missing from the file. uploaded a new file with both instruction graphics.

Last edited by a moderator:
ok im not sure if i built this right. some of the part positioning was not clear.as such i didnt spend any time cleaning this one up.


Last edited by a moderator:
Jay! I found their new fantastic models! I am crazy to build to Delta Warp Vessel but I intend clue in the scale of my NX 01 (1/1000) thank you very much!
Péricles sign1:thumb:
Péricles sign1:thumb:
C
cgutzmer
WHOA, NICE!!!
The Excalibur came out pretty well, don't worry! I think you just need to crease the points on the "petals" to make them close up a bit more. I don't know how else to make them close. In the meta model, the crease line runs all the way from the point to the middle of the rear of each petal. Tell me which parts did you have to figure out further, I'll revise the instruction graphic.
The Delta looks shiny, did you use metallic cardstock?
no, the delta is printed on matte cardstock. the textures just gave it a really good look. as for the excalibre i think an exploded parts veiw would help. the parts in the nose i couldnt figure theri orintation.the wings i ended up ctting the big tab off cause i couldnt figure how they attached to the hull. but otherwise had fun building.
been pretty quiet scince the new site started. i posted a bit but didnt seem able to re kik start this thread. im currently on break from paper till i finish my 1/350 USS North Carolina. as soon as i finish it ill get back on some of Jaybats kits.
X-71 wings
in case you're having difficulty with the X-71's wings, note that they have to be thick at the side that attaches to the fuselage, and that they droop downwards and are not flat in line with the bottom of the fuselage:
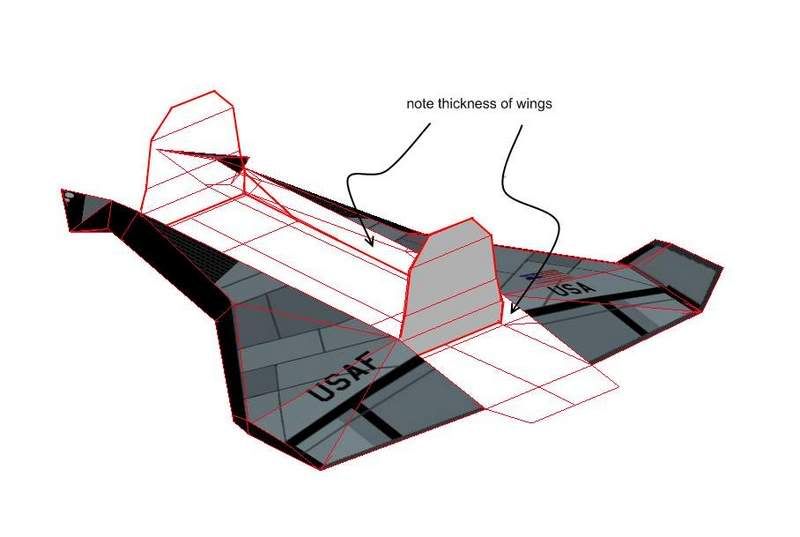
the forward leading edge of the large wing has a triangular cross-section to give the wing some volume. i now realize that i should have put in some internal wing support as well to create that thickness.
it would probably be better to put the wing assembly together first (mind the gap), then attach the internal support, then wrap the fuselage onto it.
in case you're having difficulty with the X-71's wings, note that they have to be thick at the side that attaches to the fuselage, and that they droop downwards and are not flat in line with the bottom of the fuselage:
the forward leading edge of the large wing has a triangular cross-section to give the wing some volume. i now realize that i should have put in some internal wing support as well to create that thickness.
it would probably be better to put the wing assembly together first (mind the gap), then attach the internal support, then wrap the fuselage onto it.
- Status
- Not open for further replies.