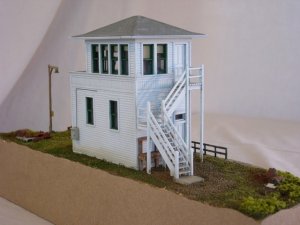
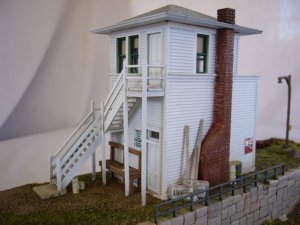
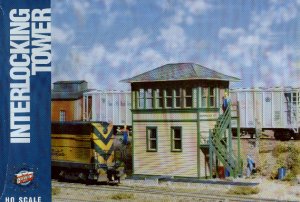
I decided I didn't like the one-piece stair casting that came with the Walther's interlocking tower so I began to think about how I could make individual steps. After some deliberation (scratching from wood or styrene or using CV steps, etc.) a light bulb came on and I decided I'd cut stringers off the sides of the existing one-piece stair sets. They were already the right height or length and all I'd have to do is add the stairs themselves. A quick trip to the hobby shop in San Dimas (we were living in Diamond Bar with my in-laws at the time) brought home some scale stripwood and the rest wasn't that difficult.
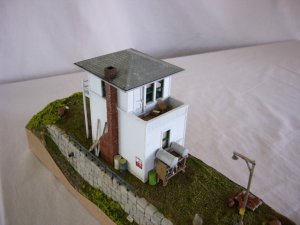
The second floor, well, I thought an outdoor porch might be a nice touch so the front and back walls were shortened on that floor and the window set brought in. Scratching the rest of the wall and the floor was easy. A chair and some pulp mags made a good eye-catcher.
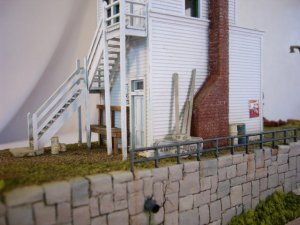
Reducing the width of the roof was trickier because of the angles. The other insane upgrade was the chimney. I widened the base and angled it to add interest. But the hard part was creating brick. I decided to do it one layer at a time, gluing on strip styrene in horizontal bands then coming back over it with a knife and cutting in the joints between 'bricks' on each band.
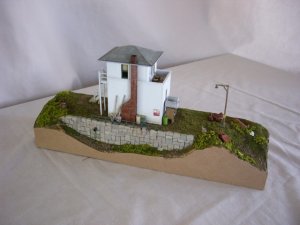
It turned out okay, I think, but I don't know that I'd do it that way again. It may have been easier to make a wood or plaster master and cast a resin chimney or just use the master itself. But the casting stuff was buried deep in our storage unit and I had time on my hands so I went the route you see in the photos.
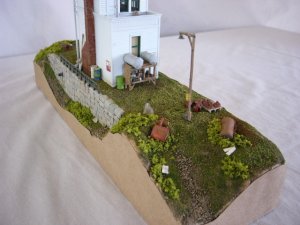
The stone wall in the diorama was just for funsies. All that you see there came with the diorama; the junk, signs, etc. The base is foam on a small plank of thin wood (1/4 or 1/8" I think). I let the piece of wood dictate the size. I placed details around according to where I'd store them if I were a little person in the scene, like the paint cans under the stairs, signs leaning out back, etc. Alright, enough jibber jabber, here 'tis:
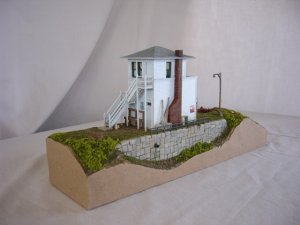
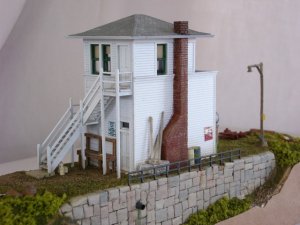
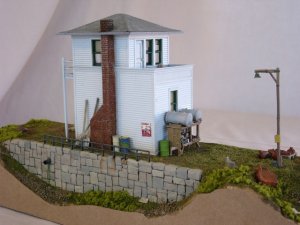
These first three are from the 'back' of the building, not the track side. I intended this side to be the focus, placing the structure between the aisle and the track on a layout. Of course the buyer could put it wherever he or she wanted. Don't get me started on the guy who actually bought it....:curse: Let's just say for my first ebay sale it wasn't a smooth, easy experience and that had nothing to do with ebay, only the lack of communication on the buyer's part.
The second floor, well, I thought an outdoor porch might be a nice touch so the front and back walls were shortened on that floor and the window set brought in. Scratching the rest of the wall and the floor was easy. A chair and some pulp mags made a good eye-catcher.
Reducing the width of the roof was trickier because of the angles. The other insane upgrade was the chimney. I widened the base and angled it to add interest. But the hard part was creating brick. I decided to do it one layer at a time, gluing on strip styrene in horizontal bands then coming back over it with a knife and cutting in the joints between 'bricks' on each band.
It turned out okay, I think, but I don't know that I'd do it that way again. It may have been easier to make a wood or plaster master and cast a resin chimney or just use the master itself. But the casting stuff was buried deep in our storage unit and I had time on my hands so I went the route you see in the photos.
The stone wall in the diorama was just for funsies. All that you see there came with the diorama; the junk, signs, etc. The base is foam on a small plank of thin wood (1/4 or 1/8" I think). I let the piece of wood dictate the size. I placed details around according to where I'd store them if I were a little person in the scene, like the paint cans under the stairs, signs leaning out back, etc. Alright, enough jibber jabber, here 'tis:


These first three are from the 'back' of the building, not the track side. I intended this side to be the focus, placing the structure between the aisle and the track on a layout. Of course the buyer could put it wherever he or she wanted. Don't get me started on the guy who actually bought it....:curse: Let's just say for my first ebay sale it wasn't a smooth, easy experience and that had nothing to do with ebay, only the lack of communication on the buyer's part.


