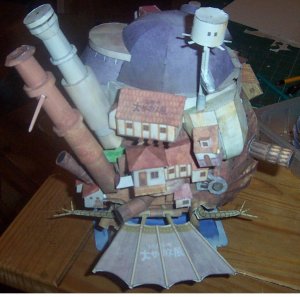
is that picture 5? cos I too have the same gap, luckily its covered by a little tree.I have got a bit of a gap between the observation tower base and the turret rim/body
You're on the home run now, good luck.
is that picture 5? cos I too have the same gap, luckily its covered by a little tree.I have got a bit of a gap between the observation tower base and the turret rim/body
Kaz said:is that picture 5? cos I too have the same gap, luckily its covered by a little tree.
You're on the home run now, good luck.
Jackrum said:I found the pipes and chimneys to be pretty easy, just curl the parts around a screwdriver or somesuch and it all goes together very well. Or at least it did for 160 gsm paper
I went with what fitted and what I could see - or I thought I could see in the other builds. I build in one room with the computer in another and I tend to forget things going between them. Despite have a huge office desk for the computer the Ghibli fans just fill it with stuff.Kaz said:Wowee,
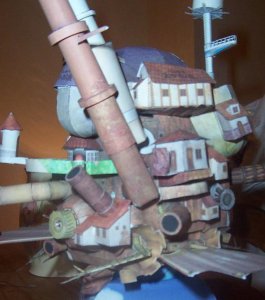
To the left of the propeller housing on photo 19 there is a pipe with a 90 degree
bend in it, mine sits underneath the rear left leg, I think I have some white showing under it, and to the right of the prop housing, your house has an extension to it, mise doesn't. I hope you had proper planning permission
As I said earlier, its a daunting but very forgiving model. Its looking sweet.
WHAT!!! are you mad?Maybe next time.
WHAT!!! are you mad?Maybe next time.