GeeBee R1 Racer, 1:33, Rafal Ciesielski

Status
Not open for further replies.
S

shrike

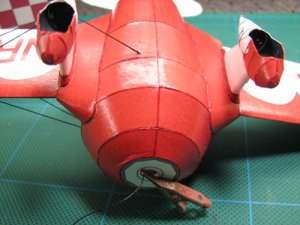
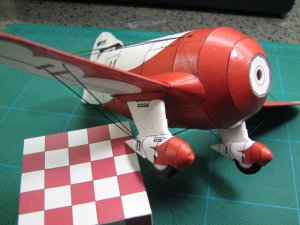
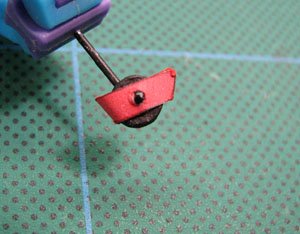
The streamlined covers for the wheels are traditionally referred to as 'Pants' if they are seperate.
If they are integrated into the landing gear, then they are 'spats'(US), or "trousered"(UK)
 
C

cgutzmer

And to think all this time I have been referring to them as "those thingies that cover the wheels" heh heh
Chris
 

Bowdenja

Active Member
Sep 26, 2005
485
0
36
67
Madison, MS
Well since I've become a card modeler I've come to give them a name that is three words long................ they make me say them everytime I have to build the darn things!:grin:
 
S

shrike

I'm not sure which three words those are exactly, but I'm 100% certain I've used them in the same context.
I have a love/hate relationship with them.
I love airplanes of the era when they were prevalent. Four of the last six models I've built have had them, and the next in the queue will bring it to 5/7.
I HATE doing them. Or rather I hate the way they turn out. The pants on Rafal's GeeBee have been my favorite so far because of the building method.
 

Bengt F

Active Member
Nov 26, 2005
177
0
36
GeeBee R-1 Racer

Rick,

Your build of this beautiful well-known 30s racer airplane looks VERY good indeed.
I´d also like to build this one - it´s printed out already and it´s waiting in long line of "to-do" projects. I´ll certainly look at this thread when I get to it. Your observations on the parts fit, etc, will be most helpful. Thanks for the fine pictures.
Take care, Rick.

All the best,
Bengt :grin:
 

rlwhitt

Active Member
Aug 25, 2006
196
0
36
63
Clemmons, NC, USA
Thanks Bengt!

Long time no chat! I have not been spending much time hanging out in the Space related forums lately. Perhaps once Greelt P. releases his Saturn V first stage it'll be time to make another foray into that category!

Rick

Bengt Fredén said:
Rick,

Your build of this beautiful well-known 30s racer airplane looks VERY good indeed.
I´d also like to build this one - it´s printed out already and it´s waiting in long line of "to-do" projects. I´ll certainly look at this thread when I get to it. Your observations on the parts fit, etc, will be most helpful. Thanks for the fine pictures.
Take care, Rick.

All the best,
Bengt :grin:
 

rlwhitt

Active Member
Aug 25, 2006
196
0
36
63
Clemmons, NC, USA
Continuing with the wheels

Now that the laminated wheel disks are dry, they have to be sanded to shape and size. Mine were too large in diameter and needed to be cut down a bit to fit into the spats.

Shown here are the wheel disks mounted on a dremel cutoff wheel mandrel, which happens to have a screw shaft about 1mm. Then it's easy to spin and sand!
 

Attachments

  • Wheels12-Sm.jpg
    Wheels12-Sm.jpg
    43.5 KB · Views: 268

rlwhitt

Active Member
Aug 25, 2006
196
0
36
63
Clemmons, NC, USA
Rigging

Can't mount the wheels just yet, since they would be in the way of the rigging lines that pass through the spats. So we'll do the rigging next. This first picture shows a handy tool I fashioned from thin wire. Poke the thread into the hole a ways and hook the end with the tool to draw it out the front bulkhead hole. Then tie a knot in the end, put a dab of glue on, and pull it back out the side of the fuse for a secure mount.

You may notice the shiny finish I've got now. Before I started the rigging, I sprayed it with Krylon gloss varnish.
 

Attachments

  • Rigging01-Sm.jpg
    Rigging01-Sm.jpg
    70.2 KB · Views: 280

rlwhitt

Active Member
Aug 25, 2006
196
0
36
63
Clemmons, NC, USA
Here I've threaded the rear rigging line through the wing and the rear hole on the outside of the spat. This line terminates here. Pin the line taught while you glue the thread inside the spat, cut it off when dry.
 

Attachments

  • Rigging02-Sm.jpg
    Rigging02-Sm.jpg
    69.6 KB · Views: 282

rlwhitt

Active Member
Aug 25, 2006
196
0
36
63
Clemmons, NC, USA
Repeat the whole process with the forward line. This one passes all the way through the spat to head off to its termination point on the bottom of the fuse.
 

Attachments

  • Rigging03-Sm.jpg
    Rigging03-Sm.jpg
    65.3 KB · Views: 289

rlwhitt

Active Member
Aug 25, 2006
196
0
36
63
Clemmons, NC, USA
And finally, do the trick with the hooking tool again to draw the end of the line outside where you can hold it pulled tight while you put glue in the hole to hold it. I used CA at this point for max strength as there will be no knot in there to hold it.
 

Attachments

  • Rigging04-Sm.jpg
    Rigging04-Sm.jpg
    73.2 KB · Views: 284

rlwhitt

Active Member
Aug 25, 2006
196
0
36
63
Clemmons, NC, USA
Rigging Complete!

Rigging done, little wires glued on and painted, wheels mounted with bits of wire.

All that's left now is the tail wheel, canopy, cowl, and mount the engine!
 

Attachments

  • Rigging05-Sm.jpg
    Rigging05-Sm.jpg
    95.5 KB · Views: 237

cmdrted

Active Member
Jul 8, 2004
334
0
36
68
Avondale,Pa. USA
Dude! That is the coolest thing I've ever seen! I've never seen wheels come out that way before! You just chuck it in the dremel. What did you use to sand the shape like that? Also the rigging stuff was definetly way cool! This little plane you've built has shown some great tips thanks!
 

rlwhitt

Active Member
Aug 25, 2006
196
0
36
63
Clemmons, NC, USA
Thanks! I just used plain old sandpaper held against the turning wheel, working down the corners until they are rounded. I helps to start by running it against a sanding block to get the diameter right and everything even.

cmdrted said:
Dude! That is the coolest thing I've ever seen! I've never seen wheels come out that way before! You just chuck it in the dremel. What did you use to sand the shape like that? Also the rigging stuff was definetly way cool! This little plane you've built has shown some great tips thanks!
 
S

shrike

Get ye to the local beauty supply shoppe!

In the nails section you can find foam boards covered in sandpaper in a lot of different grades ( my current fav is 100/180 grit wet/dry) that are perfect for doing wheels this way. Firm enough to shape, yet with just enough give to make the operation easier.
 
Status
Not open for further replies.