

GeeBee R1 Racer, 1:33, Rafal Ciesielski
- Thread starter rlwhitt
- Start date
You are using an out of date browser. It may not display this or other websites correctly.
You should upgrade or use an alternative browser.
You should upgrade or use an alternative browser.
- Status
- Not open for further replies.
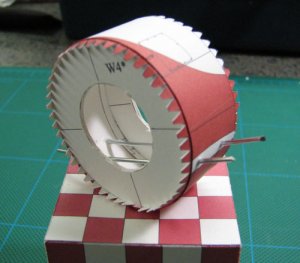
Well, here we are back at the cockpit section - time to find out what if anything was not fitting right before. I rolled the 5th skin section and test fit it on the forward cockpit former. Perfect fit. So it was the 6th skin piece that will be tight. Good thing I waited instead of shaving that former down. ")
But now I've got an odd sequence issue. I'll have to slip the cockpit section through skin 5 and slide it backwards. I decide to maybe get a better seam match I'll tackle that cockpit skin first. It is indeed barely long enough, it needs a good tight fit and tug to pull it all the way around, starting by tacking it down up top. You'll need to notch a bit of the cockpit hole (the one that says cut out after assembly) to fit around the back former.
But now I've got an odd sequence issue. I'll have to slip the cockpit section through skin 5 and slide it backwards. I decide to maybe get a better seam match I'll tackle that cockpit skin first. It is indeed barely long enough, it needs a good tight fit and tug to pull it all the way around, starting by tacking it down up top. You'll need to notch a bit of the cockpit hole (the one that says cut out after assembly) to fit around the back former.
Attachments
This plane never looked like a plane.............. just a BIG engine with wings!
The Build looks very good!
The Build looks very good!
Didn't they only ever fly a handfull of times and crashed every time?Golden Bear said:What a beauty! I'll give you a 9.9 for the seams on this puppy.
I was just scanning around airplane pic sites and one of the museums has a GeeBee that is supposed to be flyable... but they won't fly it. The things were just dangerous. All engine.
Carl
S
shrike
There is a GeeBee Model Z replica (Miss Springfield - the balck and yellow one) in a museum. I understand it was a little squirrelly to fly.
Delmar Benjamin has an R-1 replica that he's flown regularly in airshows for the past 10 years or so. It flies quite nicely.
The problem with the GeeBee racers wasn't so much with the airplanes as with the pilots. None of them had any experience with aircraft with this high a performance - Even Jimmy Doolittle would be considered a 'low-time' pilot by todays standards.
I honestly don't see how this thing would obey the laws of aerodynamics with these tiny little wings. Wonder how fast you had to get before it lifted off?
The Gee Bee was indeed a treacherous machine to fly. I saw a film once where the pilot was making a very low-altitude, high-speed run and the plane suddenly corkscrewed right into the ground. Supposedly the gas cap, which was located in front of the windscreen, came off and went through the windscreen. Yeesh!
The GeeBee-R1 in the hands of a competent pilot was a thing to behold. Delmar Benjamin, who had the replica R-1 built, flew the wings off of it. His on the deck knife-edge pass the length of the runway followed up with a knife edge climb-out was something to see! But, this being said, it was all accomplished with horsepower. Of course, pilot skill also had a lot to do with it. I believe that this R-1 replica is now in the hands of the Fantasy of Flight museum in Florida [near Orlando]. Great place to visit, if you ever get the chance. Beautiful build on the R-1, Can't wait for posts.
Later,
Fred Z.
Later,
Fred Z.
Well if the thing was a hard to fly machine, at least Rick is making a great plane built right here.
Keep us in the loop, Rick!
Keep us in the loop, Rick!
I'm back! I hope everyone had a good Thanksgiving holiday!
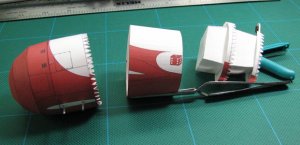
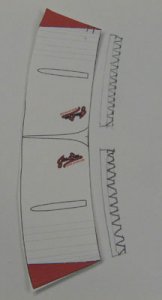
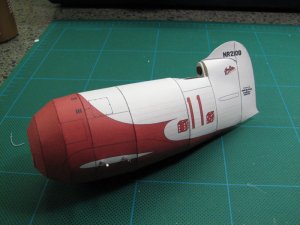
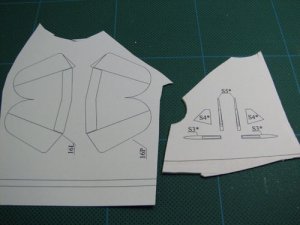
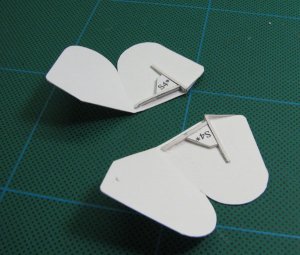
Continuing on with the fuselage. The fuse section at back of the cockpit has an issue with the free model. It appears that during the rearranging of things from the printed version, the glue strips that go at the back of skin section 7 and former W8 have gone missing. I see from the pics on the Kartonmodell thread that they are there, and used the pic to deduce the general size. The picture below shows a hand drawn set of strips, done by tracing the curve of the skin part 7 (this is a rough cut one - I had already cut and glued the real one).
Continuing on with the fuselage. The fuse section at back of the cockpit has an issue with the free model. It appears that during the rearranging of things from the printed version, the glue strips that go at the back of skin section 7 and former W8 have gone missing. I see from the pics on the Kartonmodell thread that they are there, and used the pic to deduce the general size. The picture below shows a hand drawn set of strips, done by tracing the curve of the skin part 7 (this is a rough cut one - I had already cut and glued the real one).
Attachments
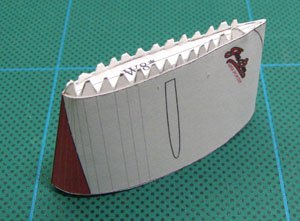
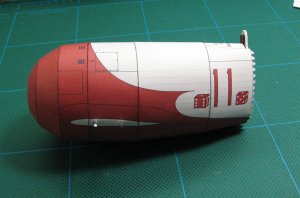
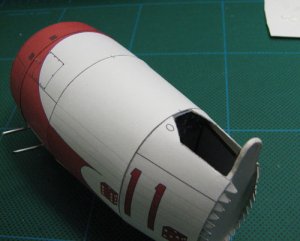
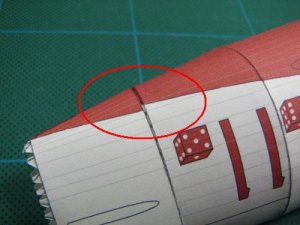
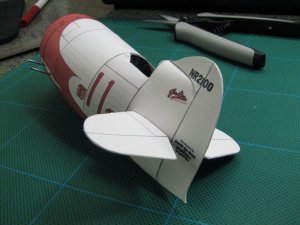
Another problem. When dry fitting this section I found that when the bottom seam was lined up, one side's pattern matched up fine, but this side was off by a bit more than 1 mm. I ended up cutting the section back apart at the botton seam and trimming it to work.
Attachments

- Status
- Not open for further replies.