Free Model #4 - papershipwright hmvs cerberus 1:250

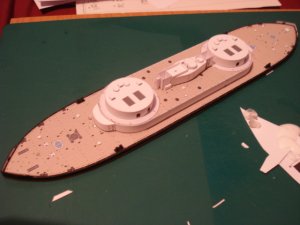
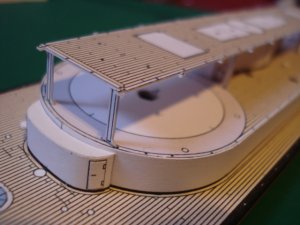
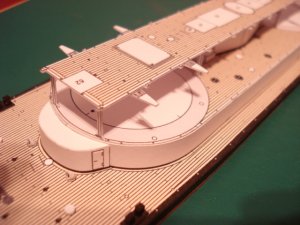
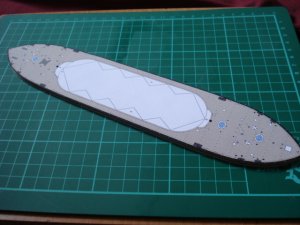
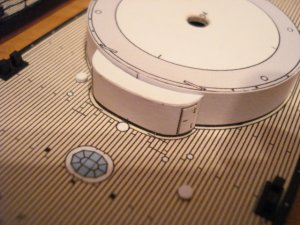
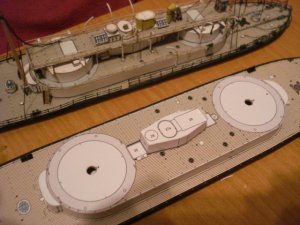
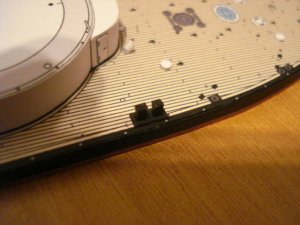
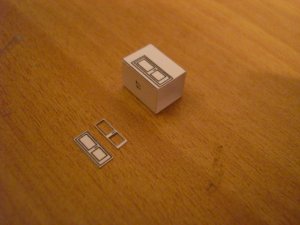
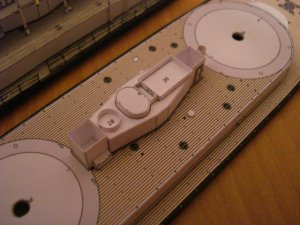
i dont stand a chance in hell of winning anything but its gives a little more insentive to complete this ship i posted a while back a picture of my original cerberus one of my first ever kits and a butcherd mess so i decided on a re-build from scratch to see if i can improve on it
the kit...http://www.papershipwright.co.uk/ps02/details.shtml
 

Attachments

  • DSC01215.JPG
    DSC01215.JPG
    136.9 KB · Views: 29
  • DSC01216.JPG
    DSC01216.JPG
    134.8 KB · Views: 15
  • DSC01219.JPG
    DSC01219.JPG
    146.7 KB · Views: 16
  • DSC01221.JPG
    DSC01221.JPG
    135.7 KB · Views: 16
  • DSC01222.JPG
    DSC01222.JPG
    153.4 KB · Views: 10
  • DSC01227.JPG
    DSC01227.JPG
    138.1 KB · Views: 17
S

Soaring

WOW! Your build is FANTASTIC! Not to mention the speed! The detail is noteable too! Great job ;)
 
ill go throgh the photos.....
1. the hull construction for this ship is a very delicate so as its a completely flat plane i laminated top and bottom parts to 1mm card and made a 2mm core to go between them it makes the model much stronger
2. deck sides to go on plus brestwork which uses the original formers cut off at the main deck and reduced by 1mm to allow a card reinforced deck
3. detail on bow and stern(note the lettering on the rear of ship not symetrical)
4.bulwarks bow/stern parts
5.bow bulwark in place
6.bow head stern head is simmalar but larger
next post 7.superstructure central part beside origonal cerb
8.some beck dodads
9. superstructure component with door i should have made this upside down to remove the black lines...oh well
10.complete superstructure
11.turret using the top and botton of the turret laimated to 1mm card with the formers recuced by 2mm to allow the thickness
12. vent part
next post 13. completed vent i hate these little sods
14.so far....... guns next
 

Attachments

  • DSC01255.JPG
    DSC01255.JPG
    147.5 KB · Views: 22
  • DSC01258.JPG
    DSC01258.JPG
    152.3 KB · Views: 16

redhorse

Member
Dec 28, 2007
104
0
16
McKinney, TX
This is looking very good, and so many little tiny details!

What are all of the diagonal lines for under the second deck? Is it just placements for reinforcements?
 

Elliott

Senior Member
Jul 18, 2006
645
1
36
Nicely done! Had this one for some time but chicken out every time I look at it. This may be just the thing. Judging from your other builds, you are more talented than you give yourself credit for.
 
i attempted to make the flying deck supports 3d by cutting out the center and putting a pice of 8o gsm paper in between to give the proper h-beam shape they ended up to flimsy for use so i went with the 2d versions.
flying deck in place this is a 2 sided part and it was difficult to alighn properly i held it against a spotlight so i could get it match both sides accurately
 

Attachments

  • DSC01257.JPG
    DSC01257.JPG
    155.6 KB · Views: 16
  • DSC01259.JPG
    DSC01259.JPG
    151.4 KB · Views: 17
  • DSC01260.JPG
    DSC01260.JPG
    147.1 KB · Views: 15
davit supports these were tricky to cut out i had to soak them in superglue to harden them so they could be cut thats all for the moment im goving the ship a rest for a few days so i dont cock it up:p
 

Attachments

  • DSC01261.JPG
    DSC01261.JPG
    128.7 KB · Views: 17
  • DSC01263.JPG
    DSC01263.JPG
    155.3 KB · Views: 17

Elliott

Senior Member
Jul 18, 2006
645
1
36
Good choice. It's not like it's due tomorrow or anything. Wish I could learn to put a model down and wait.
 
ive had a bit of an acident with this model as i managed to stab myself with a scalpel and bleed all over its nice white superstructure so im re-starting again it shouldnt take long to get back to were i was but i wont be beaten i can also address a few minor problems like holes for rigging second time round..pictures soon:mrgreen:
 

SEBRET

Member
May 19, 2008
302
0
16
35
Earth
www.flickr.com
Sorry to hear about your misfortune buddy. Hope the second one goes well. I had an issue with an exacto once, practically sliced my thumb in half. Funny part is I just rolled it up in a paper towel and worked on the model for another 7 or 8 hours, then I went and bandaged it up. Got the model done on time. lol
 
act 2announce1
new hull the difference between this new hull and the last(apart from being covered in blood) is i punched lots of tiny holes with a surgical needle(sewing needles tend to bend) throgh the 1mm top layer for rigging i found that putting a drop of super glue on the end of a length of wire and pushing it into the hole gives a nice neat,strong attachment for rigging...so starting again wasnt a total loss
 

Attachments

  • DSC01301.JPG
    DSC01301.JPG
    155.6 KB · Views: 15
  • DSC01302.JPG
    DSC01302.JPG
    135.4 KB · Views: 19