Fly Model 1/200 Titanic

Status
Not open for further replies.

jkrenzer

Member
Oct 2, 2007
126
0
16
Syracuse, NY
I mentioned during my recent HMS Rodney and my new Yubari thread that I was also working on Fly models Titanic.

The model is nearing completion but I will post some photos till she is done. The model has been alot of fun and with the exception of the very tiring upper deck vents shes has been a pleasure and somewhat easier build. The fit is terrific, especially the hull plating and bridge work.

I hope you enjoy what is left of the build.

I was going to add this to Paper Model forum but there far to difficult to upload images. They asked for some but this forum works better at uploading the pictures. This site reduces the files sizes automatically and I do not want to spend time with the images.


:wave:
 

Attachments

  • P2040011.jpg
    P2040011.jpg
    169 KB · Views: 540
  • P2040009.jpg
    P2040009.jpg
    129.4 KB · Views: 534
  • P2040005.jpg
    P2040005.jpg
    147 KB · Views: 479
  • P2040001.jpg
    P2040001.jpg
    133.4 KB · Views: 483
  • P2040002.jpg
    P2040002.jpg
    174.3 KB · Views: 471
  • P2040004.jpg
    P2040004.jpg
    185.5 KB · Views: 666

papastumpy

Member
Dec 20, 2008
140
0
16
Lowell, North Carolina
Outstanding, one of my favorite ships. I will look for one to add to my growing collection. I followed your Rodney thread and I have to say as you stated in that thread, the Fly kits are wonderful and do not overwhelm you with too many details. I have wondered what if you had Gold Model Details enlarge their PE f/Titanic to 1:200 and add to this kit, wow. Keep'em coming, impressive workmanship.:wave:
 

Teamski

Member
Mar 29, 2007
309
0
16
Delaware
She's a big 'un, that's for sure! I'm personally looking forward to all those beautiful lifeboats, hehehehe!!

-Ski
 

NYC Irish

Member
Apr 26, 2004
172
0
16
Cork Ireland
Thats a fine build, well done.

I have the kit myself, but was a bit dissapointed wit the colour choices, yours seems quite good in tose pics, I wonder did I get a bad copy..

Do you have the Laser Cut Railings? Will you use them?
 

Bengt F

Active Member
Nov 26, 2005
177
0
36
Fly Model-Gomix 1/200 Scale Titanic Model

Hi jkrenzer,

You must be one of the first to build this model and actually complete it!
I haven´t seen a completed one anywhere else. Congrats!

It is a very impressive build and, as you point out, the fit of the parts seem to be extraordinarily good. Thank you for sharing these fine photos. They will guide me when I get around to attempting this project.

Keep up the good work, Captain Smith!

All the best from Stockholm,
Bengt :thumb:
 

jkrenzer

Member
Oct 2, 2007
126
0
16
Syracuse, NY
I still have a ways to go. I think I may go after the ships boats next, they printed all the parts on the thinest paper, not card so I will practice one, if works great otherwise I'll need to scan and print them in heavier bond.

I'm not sure how accurate the colors are but they seem decent from pic's of models I have seen. The decks are fantastic. These photos are in natural light, no sun - no flash. I did not pain the hull bottom at all and use crayolla markers on all the white edges. the masts i painted with thinned Model Master dessert brown, I placed bass wood dowels into my drill and tapered them with sandpaper. I was tempted to apply wood stain to them but since i added thin paper strips to simulate the rigging tie rings I painted it instead.

I wil be using brass photo etch rail that I buy in the states from Tom's Modelworks.
:wave:
 

Bengt F

Active Member
Nov 26, 2005
177
0
36
The Colors of The Gomix/Fly Model 1/200 Titanic

Hi jkrenzer,

The colors of the real 
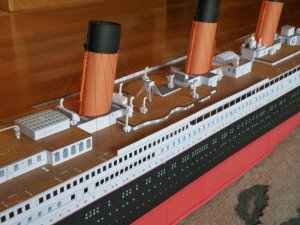
RMS Titanic are seemingly a subject of endless debate and discussion, for example, the color of the funnels - the so called 'White Star Buff'. As there are no ships left that have not been scrapped up, no one really knows for sure. However, there are some coloring guidelines on the web, for example at TMRA - the Titanic Research and Modeling Association: http://titanic-model.com/articles/p...Paint Reference Main Page.htm#white star buff

I made some preliminary Photoshop coloring tests, based on scans of the Fly Model Titanic sheets, when it was released, and this is roughly what I came up with for the funnels (the tubing is not color corrected, for a comparison of the original Fly Model Titanic):

GOMIX-White-Star-Buff-BF.jpg


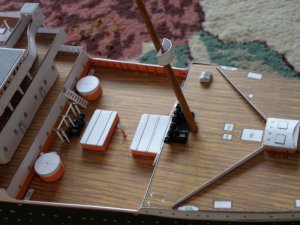
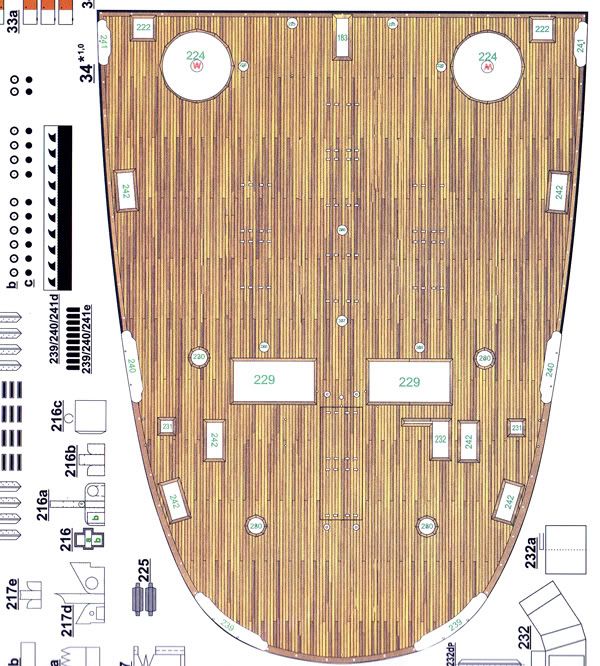
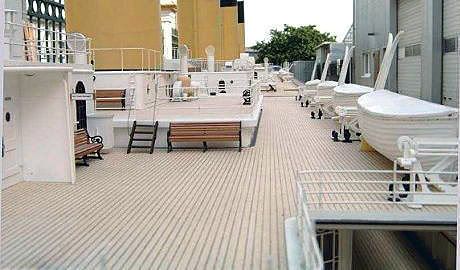
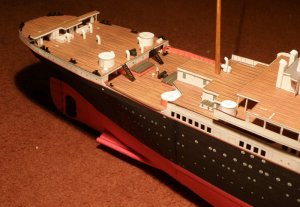
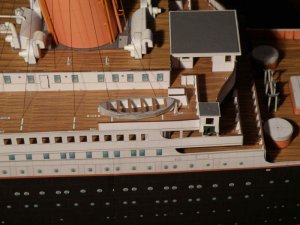
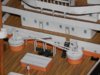
Another difficult coloring decision are the pine-planked decks, which were made out of very bright varnished 'Yellow-pine' planks (except for the well decks, the poop deck and the forc'sl deck, which were made from another, slightly darker wood). Natural pine is very bright in color, a yellowish-green white shade.
The Fly Model decks are perhaps a tad too dark red-brown and a bit too saturated, so I did this somewhat brighter version, with which I am not entirely satisfied (it´s still too green in color - it needs to be less saturated). However, this is in fact the poop deck planking, which should be a bit darker than the boat deck and promenade decks.:

GOMIX-poop-deck-BF.jpg


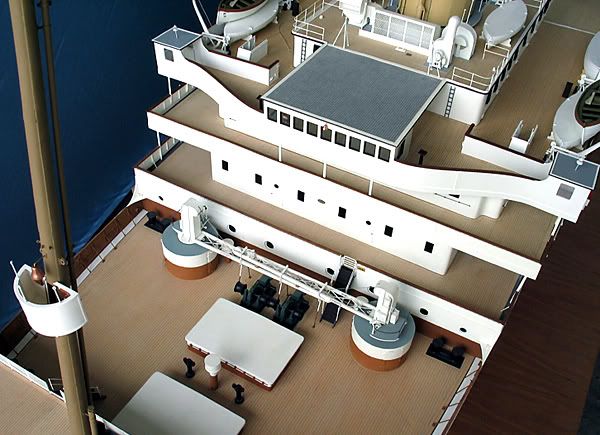
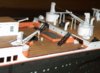
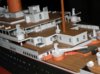
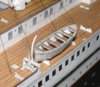
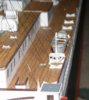
Peter-Davies Garner´s huge wooden model has authentic wooden pine decks and they are a big help for selecting a color for the deck planking (see also next photo after this one):

Bridge-and-well-deck.jpg


This is the boat deck of Peter´s model, with the lower funnel color also visible (in bright daylight, by the way):

PeterDavies-Garner18Titanicmodel.jpg


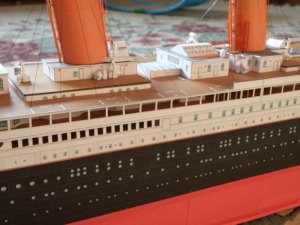
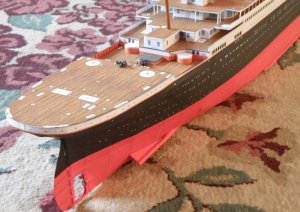
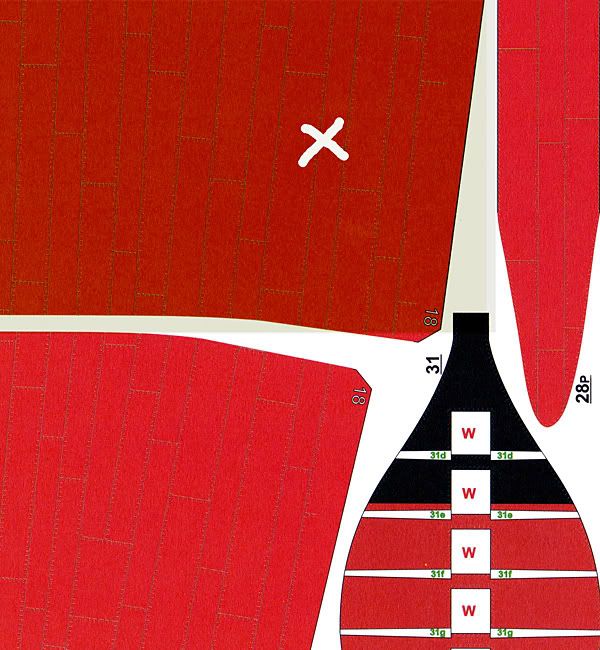
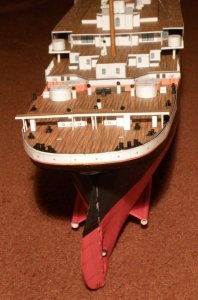
Then there is the 'Red Lead' rust-protective hull color below the waterline. The original color was very dark brownish red, whereas on the Fly Model sheets it´s a bit pinkish red, very heavily saturated and much too bright. I tried to darken the color a bit (see X-marked area), but I believe it should be darker still and more rust-brown (and also less saturated):

GOMIX-lower-hull-color.jpg


My biggest problem is now that I have no A3 size scanner, in which to fit the big Fly Model sheets for color corrections. So, I have to save up some money for this and other larger projects.

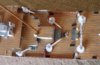
Will you be using the 1/192 scale photo-etched brass 'RMS Titanic Rails Set' from Tom´s Modelworks? These sheets are amazing in detail - scroll down for Tom´s Modelworks - the big sheet looks just like the smaller 3511 rails version:
http://rivetcounter.txc.net.au/Tutorial/Alteration_Pages/06Support_Products.html

I look forward to seeing your continued work on the boats, the triple screws, the poop deck bridge and the railings. You have really performed wonders so far.

Keep up the good work!

All the best,
Bengt :thumb:
 

Bengt F

Active Member
Nov 26, 2005
177
0
36
Coloring of RMS Titanic Models

Hi jkrenzer, hi all,

'Old news' directly from the University of Useless Knowledge:

I found two more photos of Pater Davies-Garner´s big RMS Titanic model - here we can see two examples of the very light and pale yellow-beige 'White Star Line Buff' color of the lower parts of the funnels, as well as the bright Yellow-pine deck planking and the dark rust-brown/red antifouling lower hull paint. Peter Davies-Garner made extensive research into these colors and he is probably very near to the actual Titanic paint schemes:

In Orlando, Florida:
Display-in-Orlando-Florida.jpg


In Branson, Missouri (the 'warm-colored' tungsten lamps makes the lower hull look warmer that it really is):
Peter-D-G.jpg


Link to 'The Titanic Experience', Orlando, Florida exhibition, which was the first display of the Davies-Garner model: http://titanictheexperience.com/index.php?option=com_frontpage&Itemid=1
And a link to the one in Branson, Missouri, where the immaculate Davies-Garner model is now housed: http://www.titanicbranson.com/about_titanic.php - try the site´s Webcam, for a different perspective on the Titanic!

A bit of Titanic trivia, by the way - a 100 year centennial 'Titanic Memorial Crossing' is planned for 2012 - I wonder in which ship?:
http://www.titanicvoyages.com/

All the best from Stockholm,
Bengt :thumb:
 

jkrenzer

Member
Oct 2, 2007
126
0
16
Syracuse, NY
I have completed some additional detail over this last weekend. The stern and bow details heav been added. I have to add rails shortly but first I must build the derricks and the ships boats.

There is a one fatal flaw I discovered, the ship has 8 derricks but Fly only provides parts for 6. I decided I did not like the black detail anyway knowing I could never trim it out. I designed some more basic derricks in Autocad and have started assembly. I like the way they are turning out so far. The diagonal strips are just pinched off card using my single edge straight blade as thin as I could make them. The derricks masts are also short 2 units so i drew them up as well.

I built 1 boat and it is ruff but acceptable, knowing i usually get better with each boat. The thin paper sides prooved to be very easy to work with I just snipped the edges and overlayed. I did not prebend anything. Next boat I will over lap the edges a little less so the boats hull is a bit longer to better fit the upper part. The upper part and internal deck I laminated to .5mm. I'll scan them in before continuing and hope to not have to use the scans, the print detail on the original boats is too delicate to acurated repricate with a scanned and reprinted image.

I can see the light at the tunnels end and must admitt this model is only 1/2 the work Rodney was.

:wave:
 

Attachments

  • P2090001.jpg
    P2090001.jpg
    171.9 KB · Views: 192
  • P2090004.jpg
    P2090004.jpg
    155.7 KB · Views: 180
  • P2090002.jpg
    P2090002.jpg
    96.7 KB · Views: 169
  • P2090005.jpg
    P2090005.jpg
    87.8 KB · Views: 162
  • P2090006.jpg
    P2090006.jpg
    96.2 KB · Views: 167

jkrenzer

Member
Oct 2, 2007
126
0
16
Syracuse, NY
derrick inprogress pics.

Also another flaw, the ships navigation lights are inverted. To install the correctly I painted the red one green and the green one red. They did assemble well, but intially scared me into thinking I installed them incorectly on every previous model I ever built. However, the printed number on the bridge wing matched the correct color, only to install them you would have the light behind the plate, making in not visible from ahead. Easy fix with paint.
 

Attachments

  • P2090007.jpg
    P2090007.jpg
    193.5 KB · Views: 141
  • P2090008.jpg
    P2090008.jpg
    166.6 KB · Views: 125
  • P2090010.jpg
    P2090010.jpg
    189.8 KB · Views: 141

papastumpy

Member
Dec 20, 2008
140
0
16
Lowell, North Carolina
I want one, the supplier I order from does not have. Any ideas as too where I might get a copy of this beauty.:thumb: Thanks, and the build is outstanding. Iliked the build thread for the Rodney as well.
 

jkrenzer

Member
Oct 2, 2007
126
0
16
Syracuse, NY
WHEW!

That was interesting, anyway finished the derricks and completed one boat launch boom. I built all of the lower assmeblies then decided to complete one, easily one of the more difficult projects yet but I like the outcome so far. I laminated the thin paper arms onto thin copy paper and was able to cut out the frame. Had I tried to fold it as designed I believe I would have had lines so I laminated it on clean paper. Cutting the frame on glass made the job easier. I typically cut on glass, glue on it as well. It wears the blades faster but I believe it gives cleaner cuts.

I have 2 sets of pictures below.

:wave:
 

Attachments

  • P2150002.jpg
    P2150002.jpg
    167.5 KB · Views: 177
  • P2150008.jpg
    P2150008.jpg
    145.2 KB · Views: 163
  • P2150009.jpg
    P2150009.jpg
    166.9 KB · Views: 144
  • P2150010.jpg
    P2150010.jpg
    189.3 KB · Views: 158

jkrenzer

Member
Oct 2, 2007
126
0
16
Syracuse, NY
Boat booms
 

Attachments

  • P2150006.jpg
    P2150006.jpg
    132.1 KB · Views: 123
  • P2150007.jpg
    P2150007.jpg
    103.2 KB · Views: 135
  • P2150011a.jpg
    P2150011a.jpg
    196.6 KB · Views: 120
  • P2150011.jpg
    P2150011.jpg
    182.3 KB · Views: 121
  • P2150012.jpg
    P2150012.jpg
    114.8 KB · Views: 120
Status
Not open for further replies.