February Layout Party? I cheated...

Gary S.

Senior Member
Oct 13, 2005
1,576
0
36
Texas
Jesper:

More info: I used carpenters glue and sheetrock screws to attach the module framework together. I drilled 3/16" holes in the 1/4" plywood for the screws to pass through, and drilled small pilot holes for the screws in the 3/4 by 1.75 framing strips cut from the 3/4 plywood. I did put in some screws without the pilot holes, but I also had a couple places where the plywood split without the holes being drilled first.
 

MasonJar

It's not rocket surgery
Oct 31, 2002
5,362
0
36
Ottawa, Canada
Visit site
Gary,

Looks fantastic. I love the final decision on how to level the brackets! ;) I laughed when I read that... :D

In order to protect the foam, I would recommend some sort of facia for the edge. The styrofoam is strong, but the edges are prone to damage (for my modules, the foam is recessed inside the frame, so it is not an issue). Use 1/4" masonite or something like that. It is easily cut to match any contours you may construct, and takes paint nicely.

It is great that you have found the 2" stuff in 4x8 sheets, without the ship lap. All I can get here is 2x8 sheets with ship lap. That means I have to cut every side to make it work :curse:

Congratulations on your progress. :thumb: :thumb:

Andrew
 

Gary S.

Senior Member
Oct 13, 2005
1,576
0
36
Texas
Andrew, thanks for the compliments and I must say that your suggestions have been very helpful throughout my time here. :)


I didn't even think about the foam not having the shiplap grooves. The 3/4 inch stuff from Home Depot did have the ship lap. So hooray I got lucky! No shiplap means an easier installation. I did an internet search for foam insulation in Houston and found Houston Foam Plastics and they have thicknesses up to 3 inches. Now, the 2" stuff cost $23 a sheet, I figured that wasn't too outrageous considering a 3/4" thick sheet at HD costs over 10 bucks.

I was going to buy more 1/4" birch plywood for the fascia. Any comments on that versus the masonite that you mentioned? I can go either way, and the masonite is cheaper.
 

MasonJar

It's not rocket surgery
Oct 31, 2002
5,362
0
36
Ottawa, Canada
Visit site
Wow! $23 for a whole 4x8 sheet? We pay nearly that CAN$20 for a measly 2x8 sheet...

I don't have any comment one way or the other on the facia, as either will work. The masonite may be easier to bend, but i don't recall that you have any rounded corners... The 1/4" ply might be slightly stronger if you are going to extend the facia below the layout benchwork for installation of plug-ins for your control system. The masonite may not be the best at resisting repetitive stress (or the one-time accidental headbutt when accessing those bookcases... ;) ).

Andrew
 

Ray Marinaccio

Active Member
Aug 4, 2003
1,940
0
36
66
Dewey Az.
Visit site
Nice work Gary.
The sectional idea is a great idea. I built my HO layout in 3 sections because I know it will need to be moved at some point.
The 2" foam on 1/4" plywood should make a strong foundation to build on. I used 2" foam directly on the gridwork and it is sturdy.
 

Gary S.

Senior Member
Oct 13, 2005
1,576
0
36
Texas
Hi Ray:

Originally I thought I was going to have to laminate a couple pieces of 3/4 foam to get to 1.5 inch thickness, so that is why I used the 1/4 inch plywood. Even though I found the 2" foam, I still don't regret my decision, I think the 1/4 plywood will make it even stronger and gives me something to mount under the layout components to.

I'm really feeling good about my progress.
 

Gary S.

Senior Member
Oct 13, 2005
1,576
0
36
Texas
Well, I started on the backdrop painting this afternoon. Here are some pics, I am happy with the way it is turning out so far, except I am going to make some adjustments....

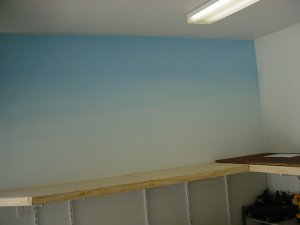
Here's what the first wall looks like:
 

Attachments

  • sky 1 first wall.JPG
    sky 1 first wall.JPG
    37 KB · Views: 86

Gary S.

Senior Member
Oct 13, 2005
1,576
0
36
Texas
I bought 3 colors of paint. Lowe's Olympic brand, colors are "Sweet Dreams" at the top, "Blue Booties" in the middle, and "First Light" at the bottom. I think I could have gone with one shade darker of each color, if you look at the color pallette at a Lowe's store, maybe move to the next color chip to the left (if that means anything...)

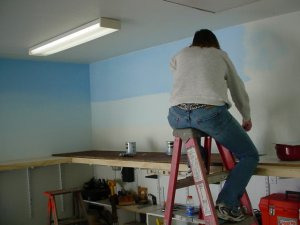
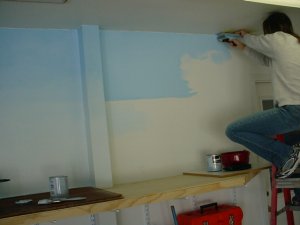
We paint on each layer, then blend them together where they converge to get a gradient from dark at top to light at bottom. By not blending them completely, we can get a kind of "wispy cloud look," very similar to what the evening sky was looking like tonight.
 

Attachments

  • sky 3 v painting.JPG
    sky 3 v painting.JPG
    37.6 KB · Views: 88

Gary S.

Senior Member
Oct 13, 2005
1,576
0
36
Texas
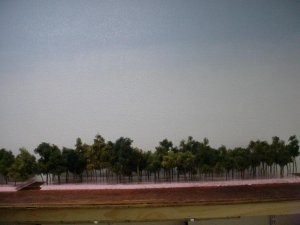
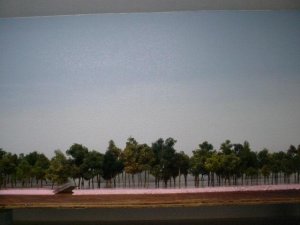
Now that I have looked at it for awhile, I am pleased with the overall result, even with the "orange peel" texturing on the wall. What I am not pleased about is that I feel I didn't bring the dark blue down far enough. The "hazy" look goes up too high compared to the sky I was looking at today as I was painting. Here is a pic of the backdrop sky with trees at about the height they would be at, and another pic where I have raised the trees up about 8 inches. You probably can't tell a whole lot from the pic, but in person it just seems that the darker blue should come down lower.

And that's okay, it is only paint, and I have only done about 1/4 of the walls so far.

Here's a shot of some trees at the height they would be at, with a lot of lighter colored sky above them.
 

Attachments

  • sky 4 trees normal.JPG
    sky 4 trees normal.JPG
    31.6 KB · Views: 84

Gary S.

Senior Member
Oct 13, 2005
1,576
0
36
Texas
And here is a pic of the same thing, only the trees have been raised up about 8 inches so less lighter sky shows.
 

Attachments

  • sky 5 trees higher.JPG
    sky 5 trees higher.JPG
    31.1 KB · Views: 93

Gary S.

Senior Member
Oct 13, 2005
1,576
0
36
Texas
So if anyone has any suggestions, I am listening, after looking at the pics, I may be getting more paint a tad darker than the paint at the top and moving everything down a touch. Any thoughts?
 

Gary S.

Senior Member
Oct 13, 2005
1,576
0
36
Texas
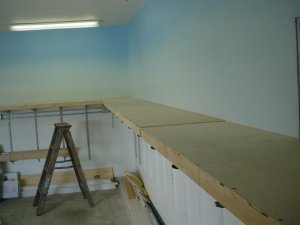
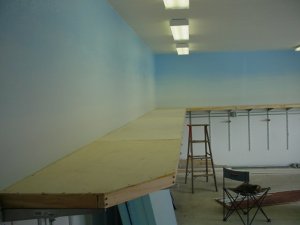
Drew, the wife and daughter agreed with you. I went to Lowe's this morning and got another quart of paint the next shade darker than what I had. I painted another section of wall, this time using four shades instead of three. I put the new darker blue at the top and moved the other three blues down some. Blended them in, then let them dry for awhile.

I had my wife and daughter take a look, then we put it to a vote. Both of them liked the original wall without the new darker blue at top. So, I bowed to the democratic process and we finished the walls as we had started.
 

Attachments

  • sky B finished.JPG
    sky B finished.JPG
    37.7 KB · Views: 91

Gary S.

Senior Member
Oct 13, 2005
1,576
0
36
Texas
I'm sure the colors on the computer aren't exactly what they are in reality, but it looks okay. The "orange peel" texture shows a little bit, but on the other hand, it did make it easy to blend the colors together and get a "cloudy-hazy" look down lower... so, I am satisfied with how it looks.
 

Attachments

  • sky C finsihed.JPG
    sky C finsihed.JPG
    38.2 KB · Views: 91

Gary S.

Senior Member
Oct 13, 2005
1,576
0
36
Texas
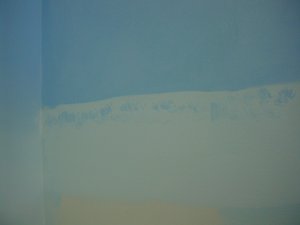
This is how I mixed the paint. We put the layers down first, about four horizontal feet at a time. Then while the paint was still wet, I dabbed on some more of the darker color into the top of the lighter color, then spread and blended it together.
 

Attachments

  • sky A mixing.JPG
    sky A mixing.JPG
    40.1 KB · Views: 97

Gary S.

Senior Member
Oct 13, 2005
1,576
0
36
Texas
Now, as soon as I get the track plan finalized, I can put in the final crossbracing under the frames, and then add the foam on top.

Question for everyone: I plan to paint the wood frames to protect them from humidity. Should I also paint the top of the 1/4 plywood where the foam will be glued? In other words, would it be okay to glue the foam to the paint? Any thoughts?
 

zedob

Member
Dec 26, 2004
757
0
16
62
Chicopee, MA
Gary S. said:
Now, as soon as I get the track plan finalized, I can put in the final crossbracing under the frames, and then add the foam on top.

Question for everyone: I plan to paint the wood frames to protect them from humidity. Should I also paint the top of the 1/4 plywood where the foam will be glued? In other words, would it be okay to glue the foam to the paint? Any thoughts?

I would. I lived in LA (next door) and the humidity there was/is about as bad or worse than Houston's. If your layout is in a climate controlled room, you don't have to worry about it too much, but if not, paint and seal! Better to be safe than sorry. I'd worry more about the underside as the top side will eventually get gooped and globbed up and sealed with all kinds of paints, glues and what ever bizarre MRRer scenic concoctions you dream up.

I once had a layout that was not air conditioned and the continual swelling created nothing but trouble. I used lath style sub-roadbed, which was fine, but the homosote roadbed was like a sponge and turned what was well layed track into Toonerville trolley ROW. It was rather depressing after putting all kinds of hours in to build the layout only to have to tear it up (that layout ended right there).

Honestly, I wouldn't build a layout in the south unless I had A/C.
 

Gary S.

Senior Member
Oct 13, 2005
1,576
0
36
Texas
Question: What kind of roadbed would you use? I am building on top of 2" extruded blue foam. Cork?

My two choices were to build the layout in a small room indoors, or in the big attached garage. I chose the garage, after inquiring about it on the gauge. The reviews were kind of 50/50 "yes garage" and "no garage".

Advice was to paint and seal everything. Also, I'll only solder the flex track in the curves, leaving the rest with just the rail joiners. Of course, I'll feed every section of track from the bus wires.

The benchwork sections will be bolted together but left free floating on the shelf brackets. I also left 1/8" or so gaps at the walls. I hope I don't have any problems from the heat or humidity. It'll be a good experiment anyway.
 

Ray Marinaccio

Active Member
Aug 4, 2003
1,940
0
36
66
Dewey Az.
Visit site
I used 1/16" cork over the 2" foam. Then after the track was laid and soldered (all joints except the connector tracks between sections) I used a home made hot-wire tool to cut the roadbed contour.
With the foam you shouldn't have an expansion problem from the heat or humidity.
My layout experiences some temperature and humidity (during monsoon) changes and I haven't noticed any problems.