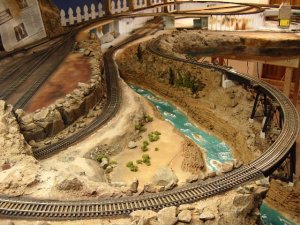
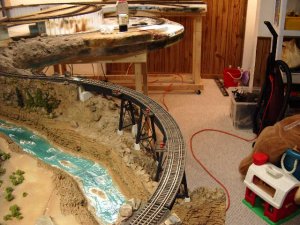
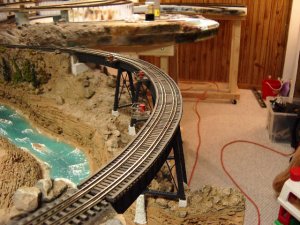
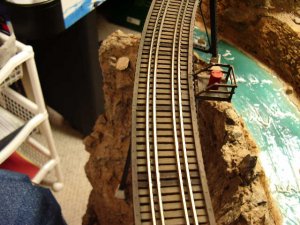
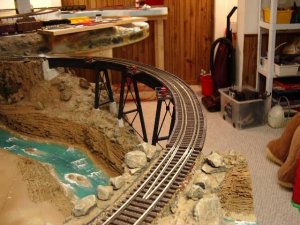
Don't laugh too hard...It's my first attempt!

91rioja

Member
Mar 18, 2006
317
0
16
55
High Point, NC
wickman said:
Its actually a 2 minute job per cable to make them. You just need the ends and 6 wire telephone wire and a crimper. I made all of mine.:wave:

Yeah, I'm an IT guy. I have crimpers that can make just about any kind of cable I need. It is like the days when I used to have to use dial up when traveling on business; some places I stayed had the phone cables hard wired into the telephones. You had to pull out the bed just to find a place to hook the modem line into. I know, that dates me. . . . .
 

Nazgul

Active Member
Jan 22, 2006
992
0
36
63
Ohio
Miles...I have decided to take your suggestion:thumb:. I had not intended to paint the ties of my track (just the rails) but since I have to paint the bridge track anyway...I will be painting it all with an air brush, so......I spent the night masking off the bridge girders and supports and the river to protect them from over-spray.
Gus, Chris...Glad ya liked my "caboose alternative" :D
I think you should contact Walthers and see if they will sell them!!!
I thought about that.....but this product is going to be BIG!!!...I am trying to get the financing in place to start my own online business.....I'm going to call it: "CABOOSE-LESS HOBBIES"tooth1
Russ...The first place I put the barrel platforms was on the outside. I thought they just looked better there. Before gluing, I ran all my engines and rolling stock. My 60' passenger cars ripped them right off because of the severe overhang on the tight radius. It wasn't even close.......
Steven...thank you....there is certainly plenty of potential in that area...I like all the suggestions and I have a few ideas of my own but I have really only started thinking about it....I'll mull it over as I do other things:thumb:
Lynn...Thank you so much!!!:thumb:
cyclingshane73...thank you for your VERY kind words! I appreciate it greatly:thumb:
Chris...The cable that comes with the UT4 and goes from the throttle to the jack is one of the curly ones.
Here's a pic of where my jack is located and the green lines represent how far the cord "comfortably" stretches without putting too much stress on the connections:
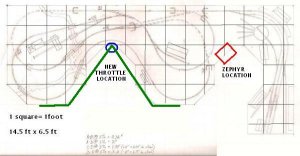
Copy of nazgul2aa.JPG
With my free arm, I can easily reach the outside of the peninsulas. A quick review: I like the throttle...the dials to enter the numbers for your engine's address are really small but for as often as I use them it's not a problem. And they are also equipped for Infra-red so if you ever want to lose the cord, you can buy a receiver (cha-ching!)
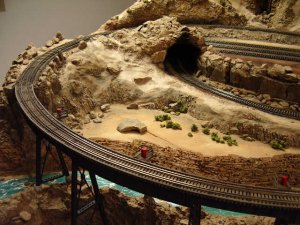
The bridge track is Micro Engineering bridge flex track. It does not come with the kit....I found out the hard way!. The guard rails are packaged with the track but they are not attached (you have to do that with super-glue) It is very easy because the "rail spikes" are molded into the ties and you just place the guard rails between them. The flex track is stiff and holds it's shape (unlike Atlas flex) so it is easy to kink if you're not careful...overall the viaduct and track are excellent products!:thumb: :thumb: :thumb:

And last but not least....Cannonball:
Brilliant!
I think I will end on that keen insight!
sign1
 

wdsrwg

Member
Jan 29, 2006
137
0
16
66
Hill Country of Western Wisconsin
I have had the pleasure of following this project from day one
and I am just amazed at what you have done Steve.
I know I do not post as often as I should but my schedule
does not allow for the better things in life right now!

A tear comes to my eye when I see your progress. :cry: :cry:

Yes, one reason is because you have done so well but,
the other is I am wondering why the heck my layout
DOSEN"T LOOK LIKE YOURS!!!! :curse: :eek:ops: :rolleyes: :D

I once a while back called you an inspiration and you continue
to be so. I will post pix in 20 years or so when I have arose
to half your levels!

Thanks for this great post and, of course, no one really has to tell you
to keep up the good work. Do they? goldtoth1

Good weekend to all,

Russell
 

lunatic

New Member
Jan 12, 2007
5
0
1
43
Katherine, NT - Australia
Nice effort so far Steve. I've just spent close to half a day reading your whole thread and I'm quite impressed by your effort so far.

I'm in the planning stages for my first layout and if it turns out half as good as yours i'll be more than happy :)

I look forward to more progress pics.

Mick
 

Nazgul

Active Member
Jan 22, 2006
992
0
36
63
Ohio
Russell
You are too kind! I really don't know what to say except: do what you can do, do it as well as you can, and compare your work to other's only to look at things from a different perspective and see things you may have missed...
If it aint fun, then we're doing it wrong!
Mick
thank you....you must be very patient to read this whole thing!
I'm in the planning stages for my first layout
Good luck and keep it fun!...The Gauge is a great place to learn and full of great people and great ideas!

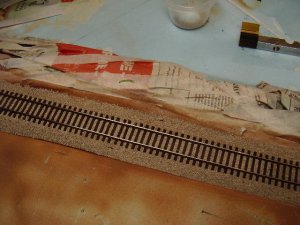
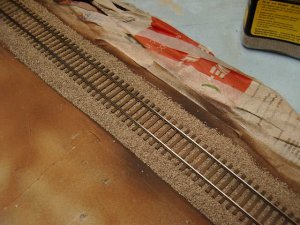
Ok...I painted my track and it came out BAD!!! I used dark brown paint but when it dried it looked red!......I then painted the whole track black followed by a light brown...The result is somewhat better:

The hideous red!
Twin River RR 091 small.jpg

The hideous red with ballast:
Twin River RR 097 small.jpg

The rest are pics re-done with black/Lt brown:
Twin River RR 100 small.jpg

Twin River RR 110 small.jpg

Twin River RR 106 small.jpg

You see...screwing up is the mother of invention!:D

Take care:wave:
 

lunatic

New Member
Jan 12, 2007
5
0
1
43
Katherine, NT - Australia
That track looks pretty good. I'd be happy with that :)

Nazgul said:
Mick
thank you....you must be very patient to read this whole thing!

I don't know if you'd call it patience. It's more boredom sign1 I started off reading everything. In the end i'd just scan for pictures and read from there :) Either way it's been a great read!
 

UP SD40-2

Senior Member
Apr 29, 2006
2,709
0
36
58
Steve:wave:, i think the end result looks GREAT!!:thumb: in the center of the tracks, after the ballast is dry, you could take and add a little black water based paint to your glue, or matte medium mixture(whatever you use to glue the ballast down)and dribble a little down the center of the track. by doing that, it would look like cinders, or oil had dripped from the engines, and it would darken the center of the ties a little. DON'T get me wrong, i REALLY think it looks GREAT!!!:thumb: might want to try it on a siding first, just a thought;). GREAT JOB STEVE!:thumb: :D -Deano
 

cnw1961

Member
Jan 7, 2006
846
0
16
65
Germany
Steve, you’re right., the hideous red was horrible. peasoup . But the black/lt. brown looks great. Well done :thumb: .
 

Nazgul

Active Member
Jan 22, 2006
992
0
36
63
Ohio
thanks guys!
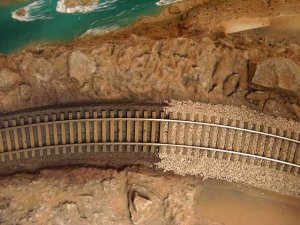
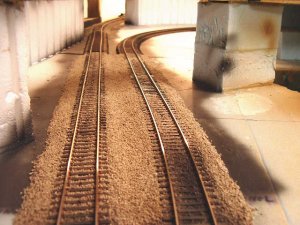
Deano...I have some ballasting done, in soon to be tunnel entrances, and I sprayed a little black between the rails. Although I didn't post them....I took some pics of the results
Here's 2 tracks...the right hand track (at the bottom) was sprayed with the black...It was done a little heavier than I would do the rest of the layout (with the exception of the yard)
Twin River RR 116 small.jpg
I think this will help make the look of the track more realistic.
I am also toying with the idea of doing the ol' india ink wash over the bridge timbers to darken it and simulate wood a little better. It looks better in person but in pics it shows up too light......
 

UP SD40-2

Senior Member
Apr 29, 2006
2,709
0
36
58
Steve:wave:, NICE JOB BALLASTING!:thumb: :thumb: :thumb: I agree, i think the black is a little to heavy, but lightened up(or toned down), i think it might look GREAT!:thumb: it gives the appearance of dropped cinders, or oil that has been dripped from the bottom of the engines. perhaps make the darker area not as wide between the tracks. but hey, thats just my thoughts:rolleyes:. lets see what others think;), after all, i could very well be "all wet"tooth1:eek:ops:. :D -Deano
 

Nazgul

Active Member
Jan 22, 2006
992
0
36
63
Ohio
Deano
You are absolutely right....If I can control the pattern of the spray and make it narrower...I'll use paint, if I can't....I'll try the ink in the glue:thumb:

I decided to do the ink-wash on the bridge ties and timbers...
The first pic (I apologize for the pic quality) is before the wash. I don't think it looked "BAD"...but it could look better:
Twin River RR 104 small.jpg

All other pics are after the wash:

Twin River RR 125 small.jpg

Twin River RR 118 small.jpg

Twin River RR 119 small.jpg

Twin River RR 122 small.jpg

There ya go...I think it was worth the extra effort. The hardest part was knowing when to stop! But it certainly looks more like real wood than it did before:D :wave:
 

steamhead

Active Member
Apr 16, 2005
2,360
0
36
75
Brownsville, TX
Steve,

Great work (as always...)!!! Could you elaborate a little on the "ink wash" treatment of the bridge timbers? I'm getting ready to install the bridge on my layout and would like to do the finish before it's in place. (I'll also be installing the guard rails which I had completely forgotten about 'till I saw yours....:eek:ops: ). Another question: should the bridge itself be "fixed" to the piers or just sit on them and have the rails keep it in place??? Thanks and keep that great work comin'. :thumb:
 

Nazgul

Active Member
Jan 22, 2006
992
0
36
63
Ohio
Gec....next time you're in OHIO....bring your engine!
COMBAT...thank you very much!
Gus...I will try and answer your questions but I am no expert and do it MY way...not necessarily the BEST way;) :
Could you elaborate a little on the "ink wash" treatment of the bridge timbers?
The plastic timbers were first painted a light brown (Harold uses white)
http://www.pacificcoastairlinerr.com/weathered_wood/
Then I brushed on a mixture of india ink and alcohol. add the ink very sparingly to the alcohol (just enough to stain it ever so slightly) A lot of light coats are better than 1 dark coat. be careful brushing....repeated strokes may take paint off....This mixture can also stain real wood.
Another question: should the bridge itself be "fixed" to the piers or just sit on them and have the rails keep it in place???
I glued my bridge shoes to the abutments and also glued the tower supports to the piers...I need all the "stability" I can get!;)
I hope that helps!
Jim...here ya go:
Twin River RR 069 small.jpg

I bent them till they almost touched
 

ocalicreek

Member
May 4, 2005
824
0
16
48
Puyallup, WA
groups.yahoo.com
Very nice work on the track...another step towards 'the look' (greatness, realism, however you define it...it just looks right!)

I've been busy doing nothing (but sneezing) the past two days, getting over a cold....ugh. And somehow once again the Gauge didn't send me updates to the posts I've subscribed to...or they did and Juno didn't like it. Anyway, it's a great spirit-lifter to see the fantastic progress you've made.

Don't worry about all the black at that turnout. You'd typically find more at junction points like that anyway where one train has to wait on another to pass by and the engine drips as it sits. Your color selection on the bridge ties also provides a great contrast to the metal of the bridge girders and supports.

Oh, and congrats on a 50 page thread! Maybe a dumb question, but did you ever imagine it would go this far?

Galen
 

UP SD40-2

Senior Member
Apr 29, 2006
2,709
0
36
58
Steve, i cant believe how GREAT the bridge looks after the ink wash!:thumb: it REALLY adds REALISM to it!!:thumb: VERY WELL DONE!:thumb: OH YEA, and like Galen mentioned, CONGRATULATIONS ON HITTING 50 PAGES!!!balloon6 cant wait to see the next 50!:thumb: :D -Deano
 

Nazgul

Active Member
Jan 22, 2006
992
0
36
63
Ohio
Thanks Guys!
I must be doing something right for you two to say it's ok!;)
50 pages...no I never imagined anything like this...in the back of my mind I was wondering if I would lose interest and just find another hobby. It seemed really daunting at first (sometimes it still does) but with everyone's help and encouragement...somehow it works out:thumb: Thanks EVERYBODY for being there!:)

I don't know about you...but I'm tired of looking at low quality, shrunk-down photos
here's a link to some better pics (5)... (click on "back" in the upper right corner to see more)
http://s147.photobucket.com/albums/r310/nazgul-np/?action=view&current=TwinRiverRR128.jpg