Discovering UHU02's 2001 Discovery One
- Thread starter Jacopo1969
- Start date
You are using an out of date browser. It may not display this or other websites correctly.
You should upgrade or use an alternative browser.
You should upgrade or use an alternative browser.
- Apr 5, 2013
- 13,499
- 9,551
- 228
Time to give this thread back to the Original Poster. I am interested on his progress. ")
@DanBKing, Spine finally completed thanks! Finally onto the storage modules. HALlelujah!
These seem straightforward enough. Only ambiguous bit is which way to cut the tiny tabs at the end of the thin profile sides. I've gone with cutting a clean end section and keeping the tab folds at the ends of the sides.
These seem straightforward enough. Only ambiguous bit is which way to cut the tiny tabs at the end of the thin profile sides. I've gone with cutting a clean end section and keeping the tab folds at the ends of the sides.
Attachments

Last edited:
- Apr 5, 2013
- 13,499
- 9,551
- 228
Very precise cuts. Great Job!Bottom row done... The modules on the dish section come later.
Sky Seeker
:tank:
Sweet!
Nice and straight and linear!
Nice work! Claphands
Just another 60 to go ........

54!!!

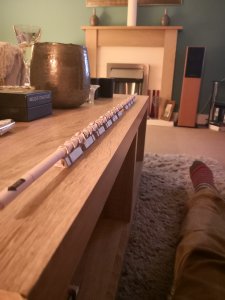
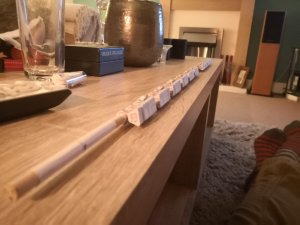
Here's a keep in touch post. Second row nearly done... 
Here's a keep in touch post. Second row nearly done... View attachment 163573 View attachment 163573
Like the use of the stick! Nice work only 54 to go!
Sky Seeker
:tank:
I'm now within sight of the antennae section (next sheet after the one I'm working on) . I wondered if @DanBKing might have any tips for waterforming the dishes? Would you suggest ditching the tabs for some edge glueing and burnishing? Or not...?
Or not...?I'm now within sight of the antennae section (next sheet after the one I'm working on) . I wondered if @DanBKing might have any tips for waterforming the dishes? Would you suggest ditching the tabs for some edge glueing and burnishing?
It took me many attempts at getting the dishes the way I wanted them, as @Revell-Fan will remember.
I ditched the tabs, they caused too much distortion. What gave me the most grief was getting all the radial lines to line up on the front of the dishes.
Make up the front and back of each dish separately, then using a wooden ball as a former, glue the fronts and backs together. If you use a 'wet glue', you automatically have softened paper, without adding water....
My advice; print a couple of copies of the pages for the antenna assembly....
And trim the parts to perfection........
OK - something nasty has happened to my last few posts on this thread, but the new site is looking superb, so probably a minuscule price to pay. I'll try and recreate where I got to in the interests of continuing a novice's guide to tackling a model way out of their league!
This post also needs to explain the lengthy gap in the construction process. Explanation below...
This post also needs to explain the lengthy gap in the construction process. Explanation below...
Attachments

Last edited:
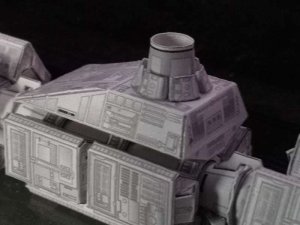
Here's the final completed module from the spine. Straightforward except to say the tabs on the long slope got in the way at the top, making for a curve which should n't be there. Not noticeable enough at actual size to warrant doing again, but hopefully a helpful note for anyone getting this far - better to just lose the tabs and glue the edges.
Attachments
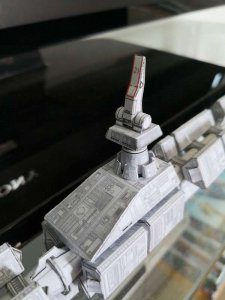
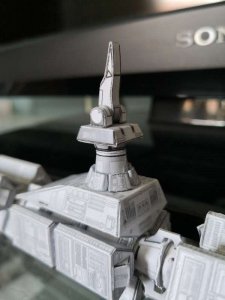
And here we have the mast, in various stages. The column assembly is lively and straightforward, the mast itself is pretty straightforward - it's all in the cutting really: