De Havilland Mosquito Mk.II NF / Mały Modelarz / 1:33

Wojtee

Member
Jun 8, 2008
151
0
16
Prague, CZ
5.jpg


A.K.A. The Wooden Wonder or Mossie :)

This is a model of Mk.II night fighter, armed with four .303 Browning machine guns and four 20 mm Hispano Mk.II cannons in the bomb bay. Published by Polish Mały Modelarz, it is, lets say, of intermediate difficulty (e.g. Halinski would need about as many parts for interiors as MM for the whole model :)).

It is, in fact, my first model with laser-cut inner construction - makes life much easier and fingers much less sore from the cutting of thick cardboard :)


Cockpit section fits together nicely :)


With wings it will come out rather large (about 50 cm wide). It won´t get lost under the mess on a table, that is for sure :)

The cockpit - it has wrong color, so I repainted it with green. And did some upgrading here and there - cutting out the dials, attaching some "knobs" on the boxes inside (radio, radar and such...)


The nose - this part decides how the model looks. If it will fly out of the window right away or if I keep it a little longer :mrgreen:


All right, I´ll take that :) We move on to next fuselage segments...


(the parts are actually dry-fitted, so the gap between will not be this wide...)

To be continued...
 
Z

Zathros

Beautiful workmanship. I agree about dry fitting the parts too. Form follows function! :)
 

Wojtee

Member
Jun 8, 2008
151
0
16
Prague, CZ
Pressing on, slowly.

Underside - bomb bay with two bombs and 4 20mm cannons.


Ammo belts. Slightly more work than author intended, but slightly better look :)


Then I got a little stuck on the cannons, which did not fit in as they were supposed to, so I jumped to the rest of the fuselage.

The front part:


There was a discussion about the swastikas and the polish red-white roundel (hey, it is a square, is it not a squarel? :D), as they appear to be mirrorred. But, surprisingly, these are most probably right for the case. The 307th Night Fighter Division used the polish marking reversed... see the pictures here: http://www.polishairforce.pl/dyw307zdj.html

Two segments of the middle part, not much to say here...


And the tail part:


There are some slight errors here - the cutout for the tail fin must look different than drawn, there is also a green paint where there should be gray (around the rear wheel opening).
But all fits together rather nicely:
 

Wojtee

Member
Jun 8, 2008
151
0
16
Prague, CZ
Moving on with the Mossie :)

Belly of the beast pretty much as it is in the kit. The cannons are parallel with the axis of the plane. At first, it did not look that way...
How the bombs were really fastened, is another mystery (i think I will examine Zeno´s videos, if there is some movie with Mosquito...)


On to the rear parts. The steering is supposed to be moving. The edges, though, do not look very presentable.
Original:


There, I fixed it :) Some colored paper was left over :)


Keeping it simple...
And completed, painted edges included :)


And on to the wings:

Ailerons and flaps are supposed to be moving, again.


The "skin" of the wings (or most of it). And some parts cut out on the second photo. In simple version the flaps and ailerons can be left out.


Landing lights (slightly better than painted ones)


And what we have so far:

 
Z

Zathros

You did a fine job. I belonged to this forum once where a guy said it would take him 6 months to design ailerons into his wings!! Ridiculous. You showed perfectly how a modeler (Master Modeler in your case) can do what is necessary to complete the job! Excellent! :)
 

Wojtee

Member
Jun 8, 2008
151
0
16
Prague, CZ
I have been having something like a modeller's block, recently... So, let's try to kick this thread up, again...

The inner part of the wings
Is a bit on the naïve side. The drawn radiators are not very pretty, so I reworked them a little.
Original:


Cut apart:


Cut out parts of the wing ribs, put the radiator inside:


Glued the inside skin from the black paper (not much measuring here, will be cut to fit later):


Glued the outer skin from the kit, and fitted to the inside:


And, finally, cut the inner skin to fit the outer, bit of retouching and done:


Then Ctrl+C & Ctrl+V on the other wing :mrgreen:


And to the engines (in fact, last large parts here). The instructions are rather vague - there are two sentences, and one drawing, which is a 2D-cut. So, figuring out what to cut out and what to leave there was a kind of puzzle...
The pictures are mostly in order - before cutting - after cutting - complete segment.

Part 24 (23 in the background)


25:


Not much left of the ribs here...

26:


27:


28:


And one "motivator-style" dry-fitted picture, again. I love how this is growing...

[/quote]

:wave:
 

micahrogers

Moderator "Where am I, and how did I get here?"
Staff member
Moderator
Jul 12, 2012
3,773
4,643
113
Shannon GA
I have always loved the "Wooden Wonder" nice clean build so far and looking nice.
:thumb:
 

Wojtee

Member
Jun 8, 2008
151
0
16
Prague, CZ
I'll kick it up a little (pun intended :D)

Finished the main landing gear, with help of plastic wheels (sold as accessories), some wires and a lot of cyanoacrylate glue (not really).

Looks as it should.


Work on the engines is also finished, only few more parts left to do...

 
Z

Zathros

It's beautiful!! I am surprised by how big of a model it is. You have closed it up so well, it is hard to tell the scale. Fantastic, probably the best Mosquito I have ever seen!! :)
 

Wojtee

Member
Jun 8, 2008
151
0
16
Prague, CZ
shoki2000: Yes. Needed a bit of cutting and filing here and there (pity I did not take a photo when I started on them), but still look many times better than anything I could scratch from cardboard or wood. It surprised me how heavy the wheels are :)
 

Wojtee

Member
Jun 8, 2008
151
0
16
Prague, CZ
Just a few more parts to go :twisted:

The rear wheel assembly. Nothing much here.


The canopy. Well, not really good. I got me some copies and started to experiment. At first try, not so good fit in the lower part. At second try, better fit, but what about the hole in the upper part?! :curse:

First one:


Second one:


Not much better. It happens to every author, sometime.

Some covers were missing from the main wheels and of the "cargo" space :)


Yes, the proppellers, too:


And then off to experimenting. At first, I tried to form the canopy using hot air gun and a transparent plastic sheet, and blowing it on the paper canopy. Well, surprise, it did not work.

(drat)

So, a second, a little (but just a little) more sophisticated attempt :)
A modelling clay (hardens on air in 24 hours), paper canopy used as a form (then discarded), a little modelling, and there goes a nice former.


And then again - hot air gun, transparency sheet glued to a piece of cardboard, heated, and then formed by the clay former. Then I glued the original canopy cover with the two sided tape. Much better :rolleyes:


Some reinforcing of the wing/fuselage contact. Originally the wings are glued only by a very small piece of cardboard and then with edges only. So this is to support the edges.


And finally, it all starts to get together. The canopy is not yet where it should be, of course. That will take some work yet...

 
Z

Zathros

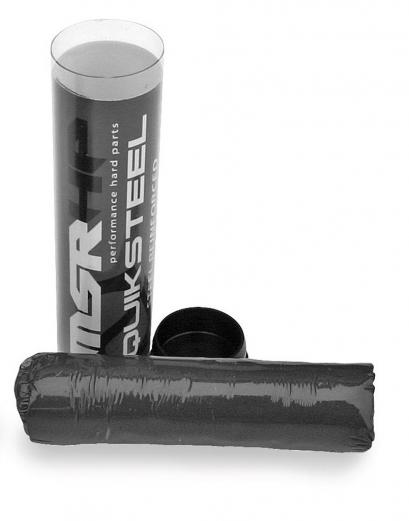
Absolutely beautiful!! Try using two part steel hardener if you want to make a rock hard machinable canopy plug. It hardens in 5 minutes.

I still think she's one of the best Mosquito builds I've seen, and it's huge! :)


I have machined parts on a milling machine made of this stuff, you can carve out details you way want to transfer over to the "glass".
feature-quick-steel-epoxy.jpg