Come along on our adventure

cabdriver

Member
Jan 23, 2005
207
0
16
68
Hi all. :wave: I'm new to the-gauge and relatively new "again" to model railroading. I'm similar to many of you in that I had a great interest in model railroading as a kid, did some stuff with my father, and am now rekindling the interest with my own sons after many years. My sons and I have decided to build the "World's Greatest Hobby" layout, with personal modification, of course. We thought we would invite you all to join us by recording our adventure here -- let us know if you are interested. :rolleyes:

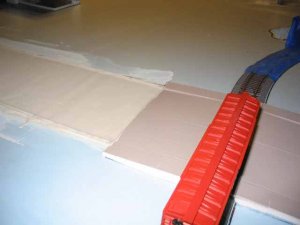
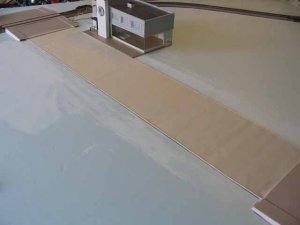
We began several months ago, and I unfortunately don't have pictures of our early progress. We started with two sheets of plywood and have now built our 4x8 benchwork (I used to think it was called a table) and covered it with 1" foam (can't find anything thicker here). I have to tell all you seasoned folk -- I have never built anything close to this benchwork in my life. My sense of satisfaction with just the benchwork is unbelievable ...My dad was very skilled in woodworking, machining, and electrical work. I am ABSOLUTLEY AMAZED that after all these years, when it came time to build this benchwork, I was able to follow the suggestions on the video and could even recall my Dad giving me tips on how to measure, how to cut, how to strip wire and make a solid electrical connection, etc. My advice -- never underestimate the impact you have on your kids! May take many years, but it will be there when they need it. My kids and I am SO proud of our benchwork! It is level, it is sturdy, and it has a train track on it! Whohoo!!

We've decided to use Atlas True-Trak for our rail -- I know this might be beginner style, but we debated it long and hard and decided that given our skill level and what we wanted to accomplish, it would suffice. We liked the true track better than the Bachman EZ-track that was suggested on the video. By the way, we're going DCC!

Let us know if this is something you all are interested in, and we'll continue the post.
 

cabdriver

Member
Jan 23, 2005
207
0
16
68
Here's what we have accomplished so far -- Benchwork, complete! Atlas track laid out according to layout! Initial DCC wired! (We're using Altas DCC -- can give you all the reasons why -- we research everything). Now, here goes -- the WGH (World's Greatest Hobby) provided info on building a hill near the layout of the Gravel Company (northeast corner). We're modifying the WGH to model a railroad in the late 60s and 70s in South Texas (San Antonio area) which has many gravel companies at work. We like the gravel company, but the hill just didn't do it for us, so, with the power of owning our own environment and railroad, we built a mountain complete with rock entries and exits. We built up the mountain with one inch foam molds -- it took about 5 courses of foam before we got above the height of the Cornerstone Tunnel entrance molds, then several other courses of 1" foam on top, sculpted to resemble the mountain top. We used a rasp of sorts (one of my Dad's old tools -- not sure what he used it for) to blend the foam layers, then we sanded and sculpted the mountain smooth and fixed the tunnel entrances and exits in place. We used Woodlands Scenic's plaster to fix the tunnel entrances/exits and to add rock outcrops to the bottom and tops of the mountain. I'm not sure that we used the right amount of water in the "plaster" as it really seems to be drying slowly, but the result is awesome -- really looks like rock outcropping and is well blended into the mountain. Woodlands Scenics turf with undercoated paint on the moutain yielded some awesome results, at least in our opinion. Here are some pics -- In the low resolution they just don't do the layout justic, but they do give you an idea of what we are working on. This is our first attempt at incorporating pictures, so please help us if this doesn't work right.
 

Attachments

  • Gravel and Mountain.jpg
    Gravel and Mountain.jpg
    58.8 KB · Views: 514

cabdriver

Member
Jan 23, 2005
207
0
16
68
Looks like we had success in the first picture, :thumb: but for some reason, we're struggling with subsequent pictures. We'll keep trying. We're trying to get another picture of the mountain and the entrances/exits. And yes.... we glued the layers of foam down to form the mountain without painting the inside of what became the tunnels :eek: -- so yes, the blue you see inside the tunnel is unpainted foam. Feeling pretty stupid! Oh well, live and learn! :thumb: We'll mask off the track and spray paint the inside of the tunnel black, unless someone on this forum gives us another idea.
 

J&A_RR

New Member
Feb 11, 2005
86
0
6
51
austin, tx (round rock)
cabdriver said:
Hi all. :wave: I'm new to the-gauge and relatively new "again" to model railroading. I'm similar to many of you in that I had a great interest in model railroading as a kid, did some stuff with my father, and am now rekindling the interest with my own sons after many years..
:wave:
sounds familiar, my four year old is big into thomas trains and of course the 'I Love Toy Trains' videos which brings all that back to us 'big kids'. Now we are starting a small 4X8 in the garage with ho scale. We'll see where that takes us. If we continue in this hobby together we probably will change to n scale since we don't have to much HO stuff.
look forward to seeing your progress.
john
 

spitfire

Active Member
Jul 28, 2002
3,448
0
36
75
Toronto, Canada
www.parkdaleyard.com
Hi Cabdriver and son!! Welcome to the Gauge. :wave:

I'm looking forward to following your progress. Looks great so far and it sounds like you've made some wise decisions based on your comfort level regarding track, operating level with DCC (coolness!) and scenic interest. Have fun and keep the pix coming!!

Val
 

cabdriver

Member
Jan 23, 2005
207
0
16
68
Thanks to all or you for your interest and your kind words. I'll try to keep the pictures coming! This has been an awesome weekend of "working on the railroad." We got several of our models completed enough to see how they are going to look, and laid out on the table. For those of you who are familiar with the "Worlds Greatest Hobby" layout, it calls for a Gravel Works at the industrial end of the layout. This works fine for our Alamo Southern line -- if any of you have seen the gravel pits around route 281 in San Antonio, Texas you know this would be perfectly at home there. The plans call for building up the base under the Gravel Works using cork and then tapering out with plaster. This was the first time we had used plaster, so it was a real learning experience seeing how it sets up and then can be molded and smoothed. Here's a pic.
 

Attachments

  • Gravel Company.jpg
    Gravel Company.jpg
    62.7 KB · Views: 415

cabdriver

Member
Jan 23, 2005
207
0
16
68
We liked the technique so much that we decided to do the same around the train station. :) We built up the foundation with cork, then tapered the cork to the base layout with plaster just like we did with the Gravel Company. We had to take into consideration that the road that runs through the center of the town crosses the grade right next to the train station. We used the Walthers Cornerstone grade kit where the road crosses the rail -- since we are using Altas True Trak (with road bed included) we had to modify the angle of the grade kit. Not exactly what the kit called for, but it worked for us. :thumb: This allowed us to have the train station and the grade of the crossover at the same level. We think it looks better.
 

Attachments

  • Train station.jpg
    Train station.jpg
    29.8 KB · Views: 417

cabdriver

Member
Jan 23, 2005
207
0
16
68
A couple other activities today -- We laid the main road through town -- using Woodlands Scenics road kit -- Wow! We thought that this would be the easiest thing to do given the fact that you lay out the sides with tape then screen the flow in betwen the tape like you are laying cement. We found it to be very difficult to keep the right level of paving -- everyting flowed right over the tape, and then what was left inside of the tape as we scraped over the top of the tape was of varying degrees of thickness. Needless to say, we spent a significant amount of time trying to get this right. Our only hope is that the directions say that after it has dried, you should sand it down -- we're going to need to do that, for sure.
 

Attachments

  • Main Road.jpg
    Main Road.jpg
    30.7 KB · Views: 425

cabdriver

Member
Jan 23, 2005
207
0
16
68
Let us know what you think! :eek: :rolleyes: We're very happy to get your advice and learn from all your experience. We are not expert modelers but are having great fun! This is our first layout and we're very open to your comments. :) We look at some of the layouts featured on this site and stand in awe of your modeling skills and knowledge of model railroading. It is a real pleasure to be able to show our humble effort and get advice for our current and future modeling endeavors. Thanks all.
 

cabdriver

Member
Jan 23, 2005
207
0
16
68
Well, we took the edge tape off of the street and here's how it turned out.
 

Attachments

  • Main Street.jpg
    Main Street.jpg
    27.1 KB · Views: 403

cabdriver

Member
Jan 23, 2005
207
0
16
68
Also, had to run some trains this morning. :) Here's a picture of the UP heading into the newly painted tunnel. Seems to be able to make it through the tunnel without a problem! Whew! :D
 

Attachments

  • UP Tunnel.jpg
    UP Tunnel.jpg
    58.3 KB · Views: 193

trainwhiz20

Member
Aug 9, 2004
198
0
16
34
Tampa, FL
Wow. What progress.

From an inexperienced modeler, I really appreciate you sharing. You have given me inspiration. Maybe I won't use that WS road kit after all. I think I might go for posterboard or something.

Please keep those photos coming. I love the mountain. The foam layers are a little apparent, but the fact that the mountain is so beautiful overshowers the fact. Love the rock outcroppings too. That WS plaster is nice. Just lay it down and spray it with water, and cover it with plaster for a solid shell.

UP loco is awesome!

BTW- how did you weather the gravel structure? Was it easy putting together? I ask because I have some Cornerstone kits on the way, and wanted to prepare myself.

Keep those photos coming. Thanks cabdriver!

:D
 

interurban

Active Member
Aug 21, 2002
4,407
0
36
76
Pickering. Ontario. Canada.
Visit site
Very good progress. :thumb:
If you want to hide the "foam joins" mix a medium solution of hydrocal and go over all the sides after an hour or two scratch some rock type indentations in the hydrocal.
Mix a very watery paint colour to your likeing, When the plaster is dry apply the paint and watch the colour soak in.
Keep applying untill tone is right .
If you creat some ledges drop a bit of glue on them then grass it over.

Only if you want to, I does look good.
:wave: