Building the Walthers N scale Blast Furnace

TruckLover

Mack CH613 & 53' Trailer
Apr 14, 2006
4,073
0
36
34
Rancho Santa Margarita, Cali.
Step 25

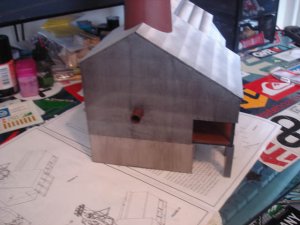
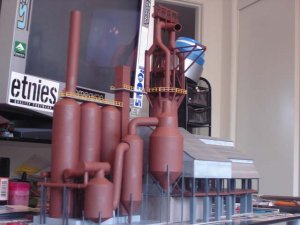
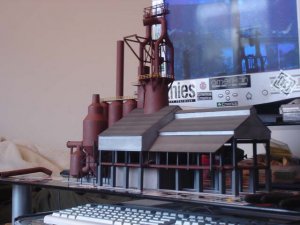
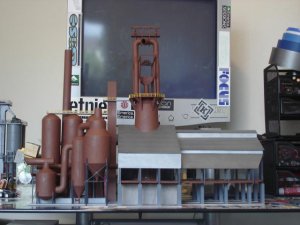
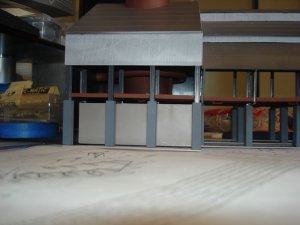
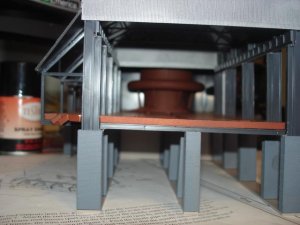
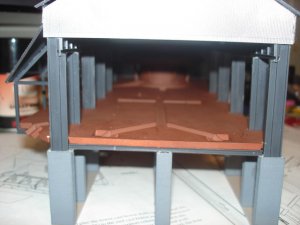
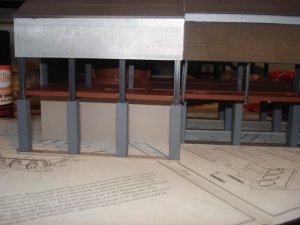
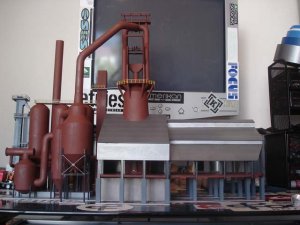
Glued the other Furnace Room Roof sheet on.

The Furnace and Cast House part of the Blast Furnace Building are now complete (exept for attaching the pipe at the top of the furnace and the conveyor that goes to the top of the furnace. That is later.)
 

Attachments

  • DSC03361.JPG
    DSC03361.JPG
    65.5 KB · Views: 287

TruckLover

Mack CH613 & 53' Trailer
Apr 14, 2006
4,073
0
36
34
Rancho Santa Margarita, Cali.
Here are some pics of the Furnace and Cast Room. Keep in mind that this whole building will get a coat of black wash and rust stains all over the roofs, tanks and pipes. This is WAY TO SHINNY for a blast furnace and is just the "undercoat"!! LOL
 

Attachments

  • DSC03362.JPG
    DSC03362.JPG
    67 KB · Views: 285
  • DSC03363.JPG
    DSC03363.JPG
    63.8 KB · Views: 284
  • DSC03364.JPG
    DSC03364.JPG
    68 KB · Views: 289
  • DSC03365.JPG
    DSC03365.JPG
    60 KB · Views: 286

TruckLover

Mack CH613 & 53' Trailer
Apr 14, 2006
4,073
0
36
34
Rancho Santa Margarita, Cali.
Step 26

Started building the next part of the Blast Furnace.

The Gas Main Supports were put in place, Elevator assembled and glued in place, the Stack Risers, Stack Breach, and the Lower Stack were assembled and glued in place. The Upper Stack was also assembled and glued in place. The foundation was also painted grey for concrete and the rest painted rust brown to match the furnace.
 

Attachments

  • DSC03371.JPG
    DSC03371.JPG
    64.6 KB · Views: 257

TruckLover

Mack CH613 & 53' Trailer
Apr 14, 2006
4,073
0
36
34
Rancho Santa Margarita, Cali.
Step 28

Glued the 3 Stoves into place on the foundation and Lower and Upper Stove Valves were also glued to the Stoves along with the Burners and Burners Feed Pipes.

Next, the walkway will go ontop of the stoves and the Hot Blast Main will go on the top of the Supports and connected to the Stoves.
 

Attachments

  • DSC03373.JPG
    DSC03373.JPG
    63.8 KB · Views: 251

TruckLover

Mack CH613 & 53' Trailer
Apr 14, 2006
4,073
0
36
34
Rancho Santa Margarita, Cali.
Step 29

Glued the Precipitator tank together and connected the Precipitator Pipe to the Precipitator and the Gas Pipe. Also added the supports and glued to the foundation. Also glued the Platform Walkway to the top of the Stoves and connected it to the Elevator.
 

Attachments

  • DSC03374.JPG
    DSC03374.JPG
    59.9 KB · Views: 234

TruckLover

Mack CH613 & 53' Trailer
Apr 14, 2006
4,073
0
36
34
Rancho Santa Margarita, Cali.
Step 30

Glued the Gas Washer Tank together and the Gas Washer Pipe to the Gas Washer and the Precipitator Tank. Glued the Washer Valve and the Washer Valve Wheel to the bottom of the Gas Washer and also glued the supports for the Gas Washer to the foundation.
 

Attachments

  • DSC03375.JPG
    DSC03375.JPG
    59.3 KB · Views: 236

TruckLover

Mack CH613 & 53' Trailer
Apr 14, 2006
4,073
0
36
34
Rancho Santa Margarita, Cali.
Step 31

Glued the Gas Collector Tank together and the Gas Collector Pipe. Glued the Gas Collector Pipe to the Gas Washer and the Gas Collector. Glued the Gas Connector Supports to the Gas Collector and to the foundation.
 

Attachments

  • DSC03377.JPG
    DSC03377.JPG
    59 KB · Views: 230

TruckLover

Mack CH613 & 53' Trailer
Apr 14, 2006
4,073
0
36
34
Rancho Santa Margarita, Cali.
Step 32

I decided that I should do the first step in weathering the building while I could still reach it easyly. This is the black wash step, I will use chalks and create rust marks on the sheeting. The whole building will get a coat of the black wash.
 

Attachments

  • DSC03422.JPG
    DSC03422.JPG
    66.1 KB · Views: 218
  • DSC03423.JPG
    DSC03423.JPG
    60.8 KB · Views: 221
  • DSC03424.JPG
    DSC03424.JPG
    62.4 KB · Views: 217
  • DSC03425.JPG
    DSC03425.JPG
    62.2 KB · Views: 218

TruckLover

Mack CH613 & 53' Trailer
Apr 14, 2006
4,073
0
36
34
Rancho Santa Margarita, Cali.
Step 33

The pics show the overall view of the building. The Furnace Building and the Stove Area aree now glued together and the platfor for the second elevator opening is now connected to the Furnace.
 

Attachments

  • DSC03426.JPG
    DSC03426.JPG
    59.8 KB · Views: 220
  • DSC03427.JPG
    DSC03427.JPG
    61.4 KB · Views: 215
  • DSC03428.JPG
    DSC03428.JPG
    67.4 KB · Views: 235

TruckLover

Mack CH613 & 53' Trailer
Apr 14, 2006
4,073
0
36
34
Rancho Santa Margarita, Cali.
Step 35

Glued the yellow Railings in place on the upper Elevator Platform. I have to touch up the side of the Elavator. This part of the Blast Furnace is now complete. Next will be the conveyor to the top of the Furnace and the Bridge for the hopper cars to drive over.
 

Attachments

  • DSC03431.JPG
    DSC03431.JPG
    59.2 KB · Views: 216

ejen34

Member
Aug 6, 2006
123
0
16
68
Brewer, ME
Excellent thread, Josh I want to know if you have any pieces left over when you finish :hahaha: that always seems to happen to me :)