

Love the interior and it seems the rear body frame is coming along quite well too. You really seem to be moving fast with this build.
Building my own Y wing(s)
- Thread starter dnalor
- Start date
You are using an out of date browser. It may not display this or other websites correctly.
You should upgrade or use an alternative browser.
You should upgrade or use an alternative browser.
Hum...i thought that i was slow..
But at this moment my android phone died...and i need to make pictures with my normal finepix.
and it takes to long to connect it to the pc blah blah..
But again a little update.
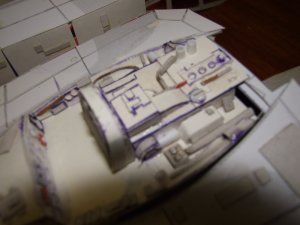
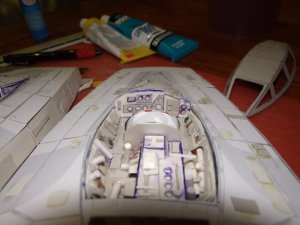
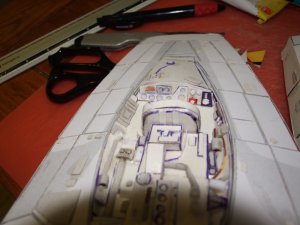
Cockpit part 2.
917
But at this moment my android phone died...and i need to make pictures with my normal finepix.
and it takes to long to connect it to the pc blah blah..
But again a little update.
Cockpit part 2.
917
Attachments

Unbelievable work! It's so great to see a model like this taking shape. All that detail, these are going to be extraordinary when completed.
Mike
Mike
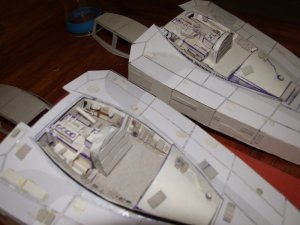
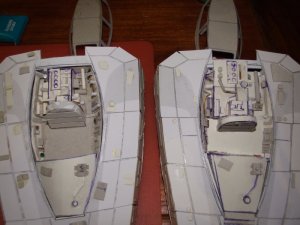
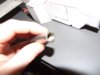
Thanks guys somehow i build the cockpits from the same picture..
But they don't came out the same")
Maybe i do some little more greeble stuff in the back of the first cockpit..
but i have to see when.
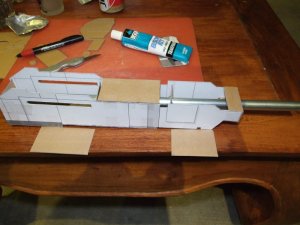
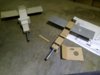
Today i made a metal rod inside of the first body chassis..
This should carry the nose piece so that it stays on the right angle.
I also need to find piece of metal for the wings and engines.
The orginal y wing could be mounted on 5 points.
upside, downside, wing left, wing right, and from the back.
I'm now figuring out how to build that.
But first the body.
i have cut it down to his basic shape..(i think)
972
But they don't came out the same
Maybe i do some little more greeble stuff in the back of the first cockpit..
but i have to see when.
Today i made a metal rod inside of the first body chassis..
This should carry the nose piece so that it stays on the right angle.
I also need to find piece of metal for the wings and engines.
The orginal y wing could be mounted on 5 points.
upside, downside, wing left, wing right, and from the back.
I'm now figuring out how to build that.
But first the body.
i have cut it down to his basic shape..(i think)
972
Attachments

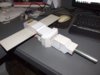
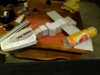
Yes the wings are a fact..
I insert the stainless steel blade for the wings.
Attached it to the Rod in the middel of the body
And add some cardboard to it.
Also i've started with the body, and i have reached the back with the most difficult part
When this is done i can start with the second y wing
Also i have a solution for the mounting points (second picture)
I insert a treaded piece inside of the Rod. (center body)
and i also want to place that on the wing-tips.
for the mounting points at the lower and upper body i don't have a solution so they will not be there..maybe at the second wing but i'm still thinking about it.
1124
Attachments
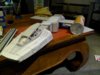
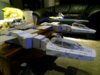
Yes the first body is almost ready.
im searching for my engines..
I found the pringles chips but they are just a little to small..
Maybe i find something closer to what i need or else the y wings will be powered bij Pringles
1217
im searching for my engines..
I found the pringles chips but they are just a little to small..
Maybe i find something closer to what i need or else the y wings will be powered bij Pringles
1217
Attachments
That is awesome! Do you make the parts on-the-fly or do you make a plan of the parts in case of a repair or a possible release?
Z
Zathros
The pringles cans are a clever idea and make for a fun story. If your concerned about the size you might also look into packaging tubes for blueprints and artwork. They come in numerous sizes and you may find one the exact size you need.
I thought about those packaging tubes..
but the ones i have are to small..i should go to a hobbystore..but shopping isn't my biggest hobby
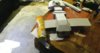
today i'm about ready with the 2 body's
i need to make the wings thicker but i want to wait with it when the engines are attached that way i only have to cut a thin slice in the tube instead of a big one.
I think that i can start worrying about the small stuff..
1520
but the ones i have are to small..i should go to a hobbystore..but shopping isn't my biggest hobby
today i'm about ready with the 2 body's
i need to make the wings thicker but i want to wait with it when the engines are attached that way i only have to cut a thin slice in the tube instead of a big one.
I think that i can start worrying about the small stuff..
1520
Attachments

Z
Zathros
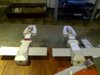
i started with the detailing..
damn that's hard...
this is my master example of how it has to become..( i hope)

damn that's hard...
this is my master example of how it has to become..( i hope)